
Zenithal Highlighting for Beginners: Airbrush, Aerosol, or Dry Brush
Zenithal Highlighting: The Cheapest Way to Add Depth Before You Add Colour
Weekly column · Lessons from the paint counter at WWH · August 2026
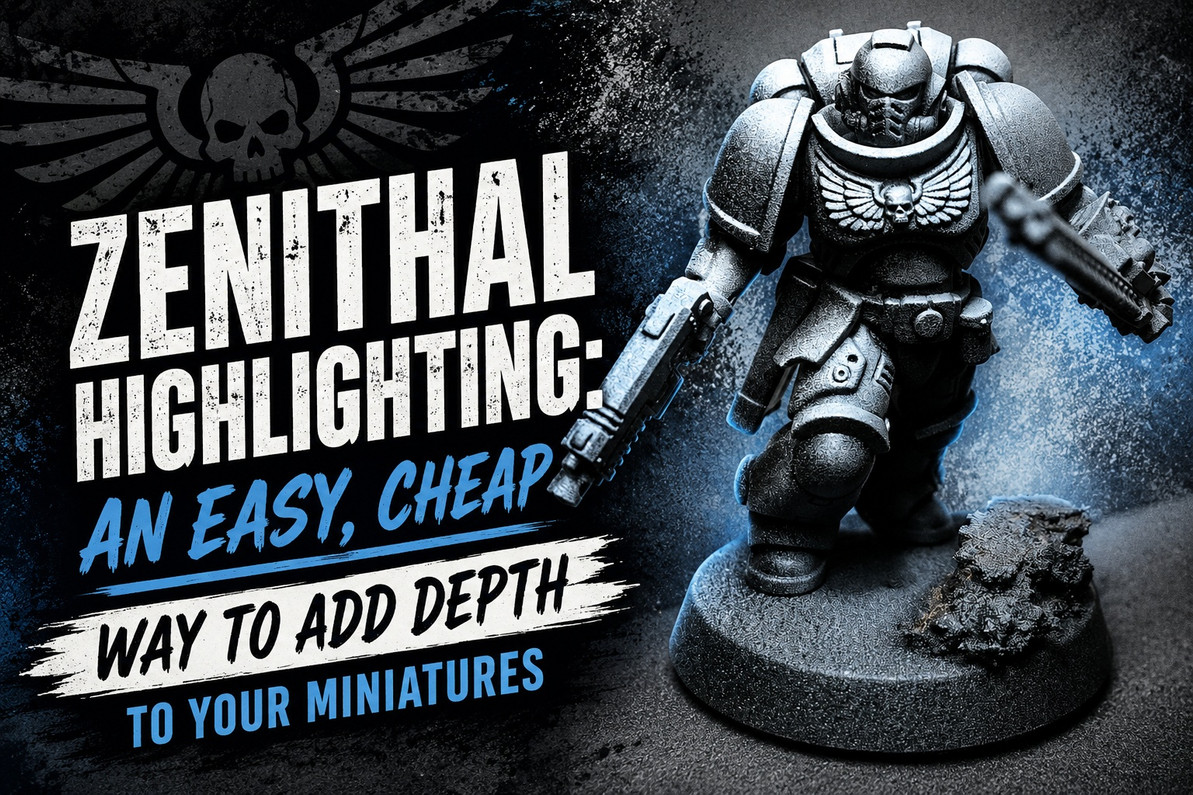
Zenithal highlighting is one of the easiest, cheapest steps up you can take toward better-looking figures, and it is one we point people to constantly at the counter. The name sounds technical, but the idea is plain: you apply your highlight from directly above the model, the way the sun falls on everything around you at noon. "Zenith" just means the point straight overhead. Light it from up there and the raised surfaces catch the brightness while the folds, undersides, and recesses stay dark. You have created a natural highlight before you have picked up a single colour.
In its classic form the technique is a two-step prime. You lay down a black base primer, then spray white from above the model, straight down. That bakes a soft highlight into the surface. When you go on to layer your main colour scheme over the top, the highlight underneath shows through, giving you a "natural" gradient for free. How much of it shows through is entirely up to you: the heavier and more opaque your top coat, the more you bury the effect; the thinner or more translucent the coat, the more that pre-shade reads through.
Here is the part most beginners miss. Zenithal is not really about black and white. It is about contrast and light direction. Once you understand that, the technique opens up: you can spray your highlight in any colour you like, and you can even use the same idea to fake a glowing light source on the model. It is, overall, a very inexpensive way to step your mini-painting game up. Here is how we walk people through it at the counter.
Zenithal highlighting is a highlight baked in before you add colour: prime dark, apply light from directly above, then let that gradient show through your paint. It costs almost nothing and works three ways, so pick the one your kit allows. Airbrush (a black primer like Vallejo Mecha Black and a strong white like Pro Acryl Bold Titanium White), aerosol (Citadel Chaos Black and White Scar), or no spray at all, just a dry brush pulled across the raised surfaces. Two rules matter more than the products: it only has to contrast (any colour works), and the thickness of your top coat controls how much of the highlight survives. Thin, translucent colours (contrast paints, speedpaints, glazes) let it shine through, which is the "slapchop" shortcut.
What zenithal actually is, and why it works
A highlight applied before colour. Light from straight overhead, dark underneath, and a control lever you set with your top coat.
Picture your model standing outside at noon with the sun directly above it. The top of the head, the shoulders, the tops of the boots and the raised edges of the armour all catch the light. The chin, the underside of the arms, the deep folds of a cloak all stay in shadow. Zenithal highlighting is just you doing that on purpose, with primer, before you start painting. Prime dark so every recess reads as shadow, then apply light from above so every raised surface reads as a highlight. You have mapped out where the light and shade live on the whole model in about two minutes.
Why the highlight survives under paint
The reason this is more than a nice-looking primer is that the gradient shows through the colour you put over it, as long as that colour is not fully opaque. Thinned paint, inks, glazes, and modern translucent ranges like contrast paints and speedpaints are effectively coloured film: they tint the surface without hiding what is underneath, so the dark stays dark and the light stays light while picking up your chosen hue. That is the whole trick. You are not highlighting the paint, you are letting the paint reveal a highlight that is already there.
You control how strong the effect is
This is the lever beginners tend to overlook. The heavier and more opaque the coat on top, the more of the zenithal you bury; the thinner or more translucent the application, the more it comes through. So the same primed model can give you a subtle, realistic gradient or a bold, high-contrast comic look purely based on how you layer your colour. If your first attempt looks too flat, you almost certainly went on too thick. Thin it down and try again.
Three ways to lay it down: airbrush, aerosol, or dry brush
Same idea every time. The only question is what tool puts the light on the raised surfaces, and what you already own.
The technique does not care how the paint gets there. An airbrush gives the smoothest gradient, an aerosol can gives you most of the same result with zero setup, and a dry brush lets you do the entire thing with no spray gear at all. Match the route to your kit and your conditions, not to some idea of the "right" way.
Airbrush: the smoothest gradient
For airbrush users we recommend a dedicated black primer and a high-coverage white. Our store favourite for the base is Vallejo Mecha Black, and for the white highlight Pro Acryl Bold Titanium White has been a solid pick after many years of searching for a genuinely good coverage white straight out of the bottle. That said, most people who airbrush already have a black and a white on the bench, and any of your favourites will do the job. Prime black all over, then bring the white down from directly above, easing off as you move lower so the transition stays soft.
Aerosol: no airbrush required
You do not need an airbrush to get a clean zenithal. A pair of rattlecans does the same two-step prime. For the black base we like Citadel Chaos Black, and for the white highlight Citadel White Scar. Spray the black to cover, let it flash off, then hold the can above the model and mist the white straight down in short bursts. As with any aerosol, work in a ventilated space, keep the can moving, and build the white in a couple of light passes rather than one heavy one so you do not drown the recesses.
Dry brush: the no-spray route (and the smoothest on a budget)
If you do not own an airbrush or an aerosol, or the weather and ventilation just are not cooperating, you can achieve the exact same effect with a dry brush. Prime the model black however you like, then load a little white or light grey onto a dry brush, wipe most of it off onto a paper towel, and drag the brush lightly across the raised surfaces from above. The pigment catches the high points and edges and leaves the recesses dark, building the same overhead highlight by hand. Many painters add a grey step between the black and the white (black, then grey on the upper surfaces, then white on just the highest points) for a smoother three-tone gradient. Expect to build it up over several light passes; that is normal and correct, not a sign you are doing it wrong.
Dry brushes come in a range of sizes, and the main difference between them is simply the size of the bristle head. Bigger brushes cover big surfaces and large models fast; smaller ones let you place the highlight more precisely on fine detail. Some options we carry:
- Citadel Large Dry Brush
- Vallejo Small, Medium, Large, and Extra Large dry brushes, or the Vallejo Dry Brush Set to cover several sizes at once
- Army Painter Wargamer Small and Wargamer Large drybrushes (these sit more like an oblique brush, but the angle can genuinely help positioning)
- The Army Painter Hobby Drybrush as a solid all-rounder
Dry brushing chews through bristles over time, so this is a job for a dedicated dry brush rather than your good detail brushes.
Extending it: any colour, and faking a light source
Contrast is the only real rule. Once you accept that, you can shift the whole mood or invent a glow that is not there.
Spray your highlight any colour you want
Nothing about the technique requires white. The only requirement is that your highlight colour gives a useful contrast against the paint going over it. Want a warmer finish? Highlight with a bone or off-white. Painting a cold winter scheme? Try a pale blue-grey highlight. You can even push the underpainting toward the colour you are aiming for, so a warm highlight under a red gives you a richer, more luminous result than plain white would. Pick the highlight colour with the top colour in mind, and the gradient does more than just show light and shade; it steers the temperature and mood of the finished paint.
Set up object source lighting (OSL)
The same trick sets up an object source lighting area, that effect where a torch, a plasma coil, or a glowing sword appears to cast light onto the model around it. Instead of applying your highlight from straight overhead, apply it from the direction of your imagined light source: spray or dry brush the glow colour outward from where the light would sit, brightest closest to the source and fading as it spreads. Do that on the primer stage and you have blocked in a believable OSL foundation before you have even started the colour scheme, which is far easier than trying to paint a convincing glow freehand at the end.
The "slapchop" shortcut
This is where zenithal has quietly taken over hobby tables. Lay down a black-to-white zenithal (often black, grey, then white by dry brush), then slap translucent contrast paints or speedpaints straight over the top and let the greyscale underneath do the shading for you. Painters call it "slapchop," and it can carry a model to a tidy tabletop standard in well under half an hour. It is exactly the move behind our own 20-minute Beastmen guide, where Vlad uses a zenithal prime to kick his contrast paints up a notch in colour gradient. If you want to see the technique paying off on a finished unit, that build is a good place to look.
The thread that runs through all of it
Zenithal highlighting is a highlight you build before you paint, using light direction and contrast rather than any particular pair of colours. Prime dark, bring light in from above, and let it show through translucent colour on top. The tool (airbrush, aerosol, or dry brush) only changes how smooth the gradient is and what you need to own. The colour of the highlight changes the mood. The thickness of your top coat changes how much of it survives. Understand those three levers and you can dial the effect anywhere from a whisper of natural shading to a full slapchop speed job.
The same principle as always at this counter: knowing what a technique is for beats memorising which bottle to grab. Zenithal is just sunlight at noon, faked with primer, and it is one of the best value returns on effort in the whole hobby.
If you want to try zenithal this week
You do not need much, and you very likely own half of it already. Pick the route that suits your kit:
- Airbrush: a black primer such as Vallejo Mecha Black and a strong white such as Pro Acryl Bold Titanium White, or any black and white you already spray
- Aerosol: Citadel Chaos Black for the base and Citadel White Scar for the highlight
- No spray: a black prime plus one dry brush (or the Vallejo Dry Brush Set) and a pot of white or light grey
Where to start: use a spare model, or one you have already finished and do not mind experimenting on. Prime it dark, get your light onto the raised surfaces from above, and then try one thinned or contrast colour over a section so you can watch the highlight read through.
Method: keep the highlight coming from one direction (straight down for classic zenithal), build it in light passes rather than one heavy coat, and go easy with the white so you do not fill in the shadows you just created. When you add colour, thin it or use a translucent paint so the gradient survives. If it looks flat, your top coat is too thick.
The goal of the first session is not a finished masterpiece. It is seeing how much depth a two-minute dark-to-light prime adds under a single thin colour. Once you have seen it, you will reach for it on almost everything.
Quick reference: zenithal products we stock, by route
| Product | Route | What it actually does |
|---|---|---|
| Vallejo Mecha Black Primer (200ml) | Airbrush base | Store pick for the black base: fine, airbrush-ready black primer that lays down the shadow layer for the whole model. |
| Pro Acryl Bold Titanium White (22ml) | Airbrush highlight | Store pick for the white: high-coverage white straight from the bottle, so the overhead highlight builds fast without many passes. |
| Citadel Chaos Black Spray | Aerosol base | Rattlecan black primer for the shadow layer when you do not want to set up an airbrush. |
| Citadel White Scar Spray | Aerosol highlight | Bright white rattlecan misted from above for the highlight. Build in light passes so recesses stay dark. |
| Citadel Large Dry Brush | Dry brush | Stiff, broad head for pulling white or grey across raised surfaces on larger models. The no-spray route. |
| Vallejo Dry Brush Set (and Small / Medium / Large / XL) | Dry brush | A range of bristle sizes so you can match the brush to the model: big heads for bulk, small for fine detail. |
| Army Painter Hobby Drybrush (and Wargamer Small / Large) | Dry brush | Solid all-round drybrushes. The Wargamer pair sits more like an oblique brush, which can help you angle the highlight onto awkward spots. |
Frequently Asked Questions
No. An airbrush gives the smoothest gradient, but you can get the same effect with a pair of aerosol cans (a black primer and a white), or with no spray gear at all by dry brushing white or light grey onto the raised surfaces over a black prime. The dry brush route is also the answer when the weather or your ventilation makes spraying impractical. The technique is about light direction and contrast, not about owning a specific tool.
Slapchop is zenithal highlighting followed by translucent paint. You build a black-to-white gradient (usually black, then grey, then white by dry brush), then "slap" contrast paints or speedpaints over the top and let the greyscale underneath handle the shading. It is a fast way to a tidy tabletop finish, often under half an hour a model. Our 20-minute Beastmen guide uses exactly this approach.
Not at all. Black and white is just the highest-contrast, most obvious version. What the technique actually needs is a dark base and a lighter highlight that contrasts usefully with the colour going over it. Dark grey and off-white work, and so do coloured primers. Choosing a highlight colour with your top colour in mind (a warm highlight under a warm scheme, for instance) lets the underpainting steer the mood of the finished paint, not just its light and shade.
Only if you paint it on thick and opaque. The zenithal shows through when your top coat is thin or translucent, so the trick is to thin your paint, or to use inks, glazes, contrast paints, or speedpaints that tint rather than hide. The thickness of the top coat is your control lever: heavier buries the effect, thinner reveals it. If your model looks flat after painting, the top coat almost certainly went on too heavy.
Object source lighting (OSL) is the effect of a light source on the model, like a torch or a glowing weapon, casting light onto the surfaces around it. Zenithal sets it up by changing the direction you apply the highlight. Instead of lighting from straight overhead, you apply the glow colour outward from where the imagined light sits, brightest nearest the source and fading with distance. Doing this at the primer stage gives you a believable foundation to paint the glow over, which is far easier than freehanding it at the end.
Probably nothing. White over black is naturally slow to build, and it is meant to take several light passes rather than one heavy one, whether you are spraying or dry brushing. A high-coverage white helps a lot, and adding a grey step between the black and the white gives you a smoother gradient with less effort. Keep each pass light and directional, let it build, and resist the urge to flood the model, since that fills in the very shadows you are trying to keep.
Technique described from common miniature-painting practice and cross-checked against The Army Painter's zenithal explainer, Tangible Day's zenithal drybrushing and slapchop guide, and our own in-house Beastmen build. Product details reflect current Wheels & Wings Hobbies stock listings. Counter Notes publishes weekly, drawing on what we see and hear at the paint counter in Toronto.
All recommended primers, sprays, and brushes are stocked at Wheels & Wings Hobbies in Toronto and available online with Canada-wide shipping.
Recent Posts
-

What Glue Should I Use? A Scale Modelling Adhesive Guide
Wheels & Wings Hobbies · Counter Notes What Glue Should I Use? Lessons from the paint counter at W …Oct 16, 2026 -

John's Starcraft Zerg Queen Paint Guide - Build Feature
Wheels and Wings Hobbies - Miniature Paint Guide John's Starcraft Zerg Queen Archon Studio - Starcra …Sep 24, 2026 -

Vlad's Tomb King on Necrolith Bone Dragon Paint Guide - Build Feature
Wheels and Wings Hobbies - Miniature Paint Guide Vlad's Tomb King on Necrolith Bone Dragon Warhammer …Sep 10, 2026