

Kyle Builds the Hasegawa 1/32 Kawasaki Ki-61 Tony — Build Feature
Kyle Builds the Hasegawa 1/32 Kawasaki Ki-61 Tony
Hasegawa 1/32 - Aircraft - Full Build Feature
Hey Tony. Hasegawa's 1/32 Kawasaki Ki-61 finished in the markings of the 56th Sentai based near Osaka, mid-1945. Kyle considers this his best model. The engineering reminded him of a 1/48 Tamiya kit - enjoyable to build without the high parts count that usually comes with bigger scales. Built in one month. Ready for paint in about a day. His first build of 2026.
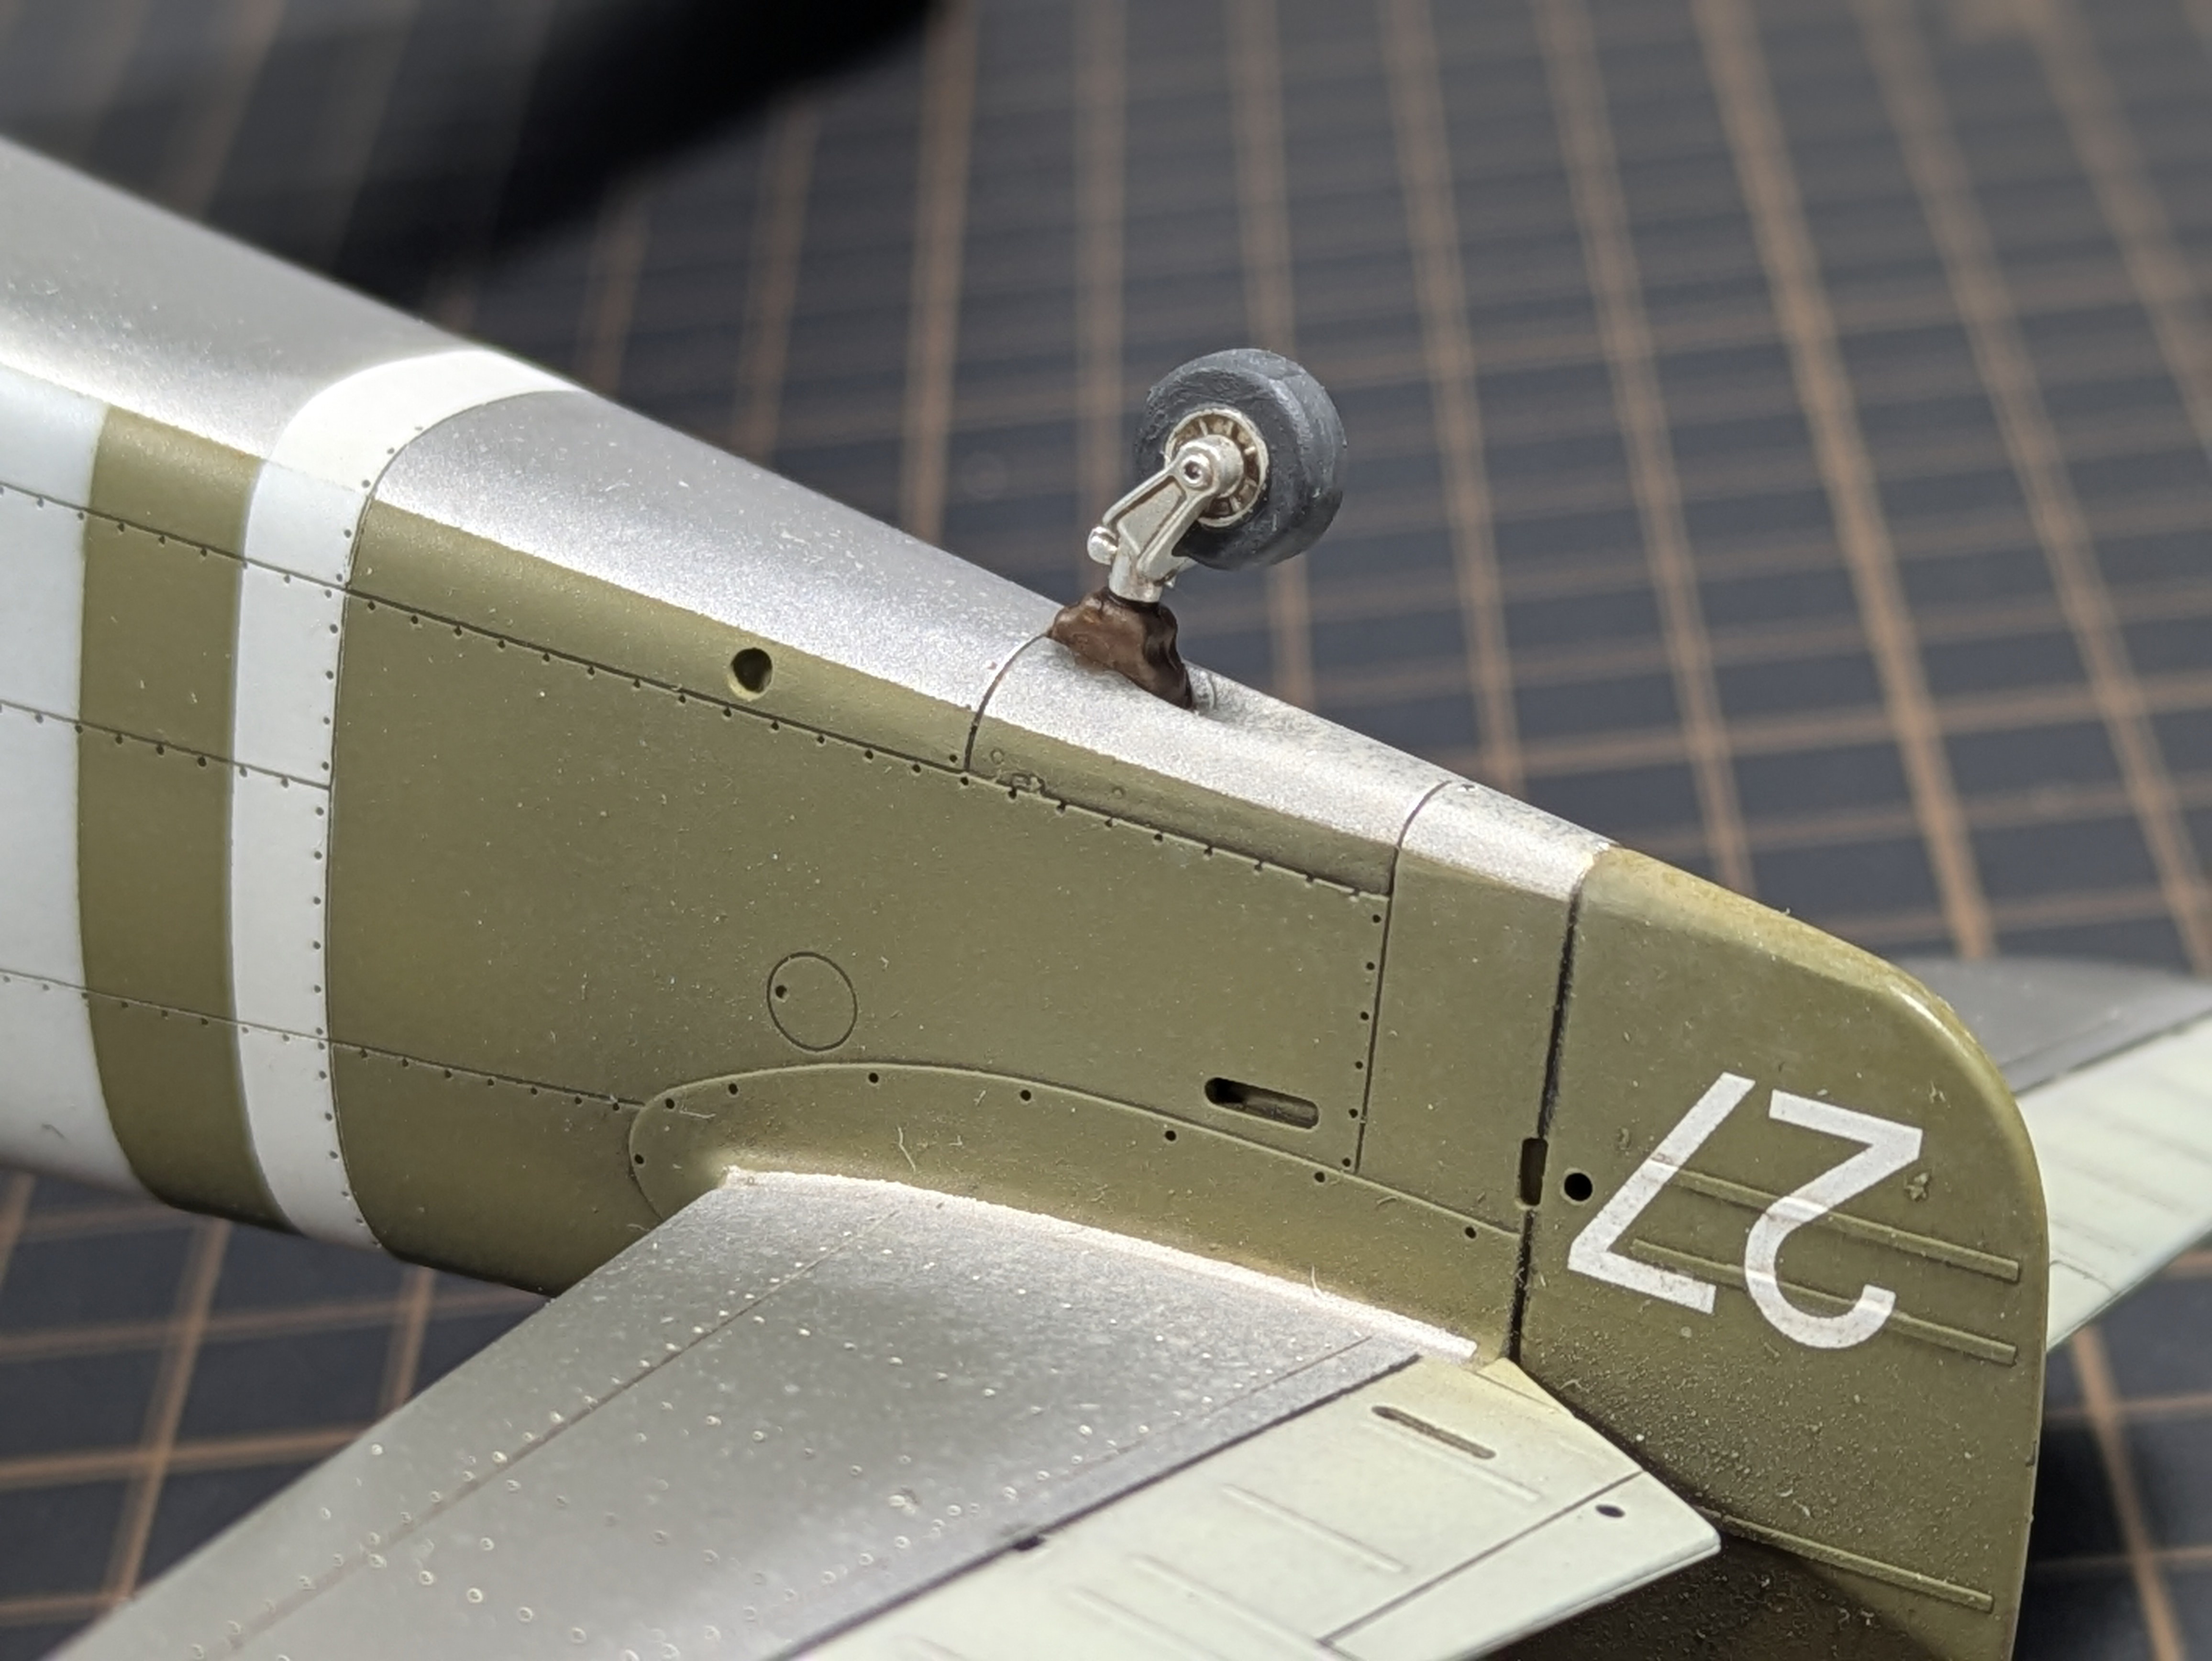
The kit is not currently available, but it remains the best 1/32 Tony on the market. Every marking on this model except the number "27" on the rudder was masked and painted - no decals. See our masking guide for the techniques used on the tail insignia.
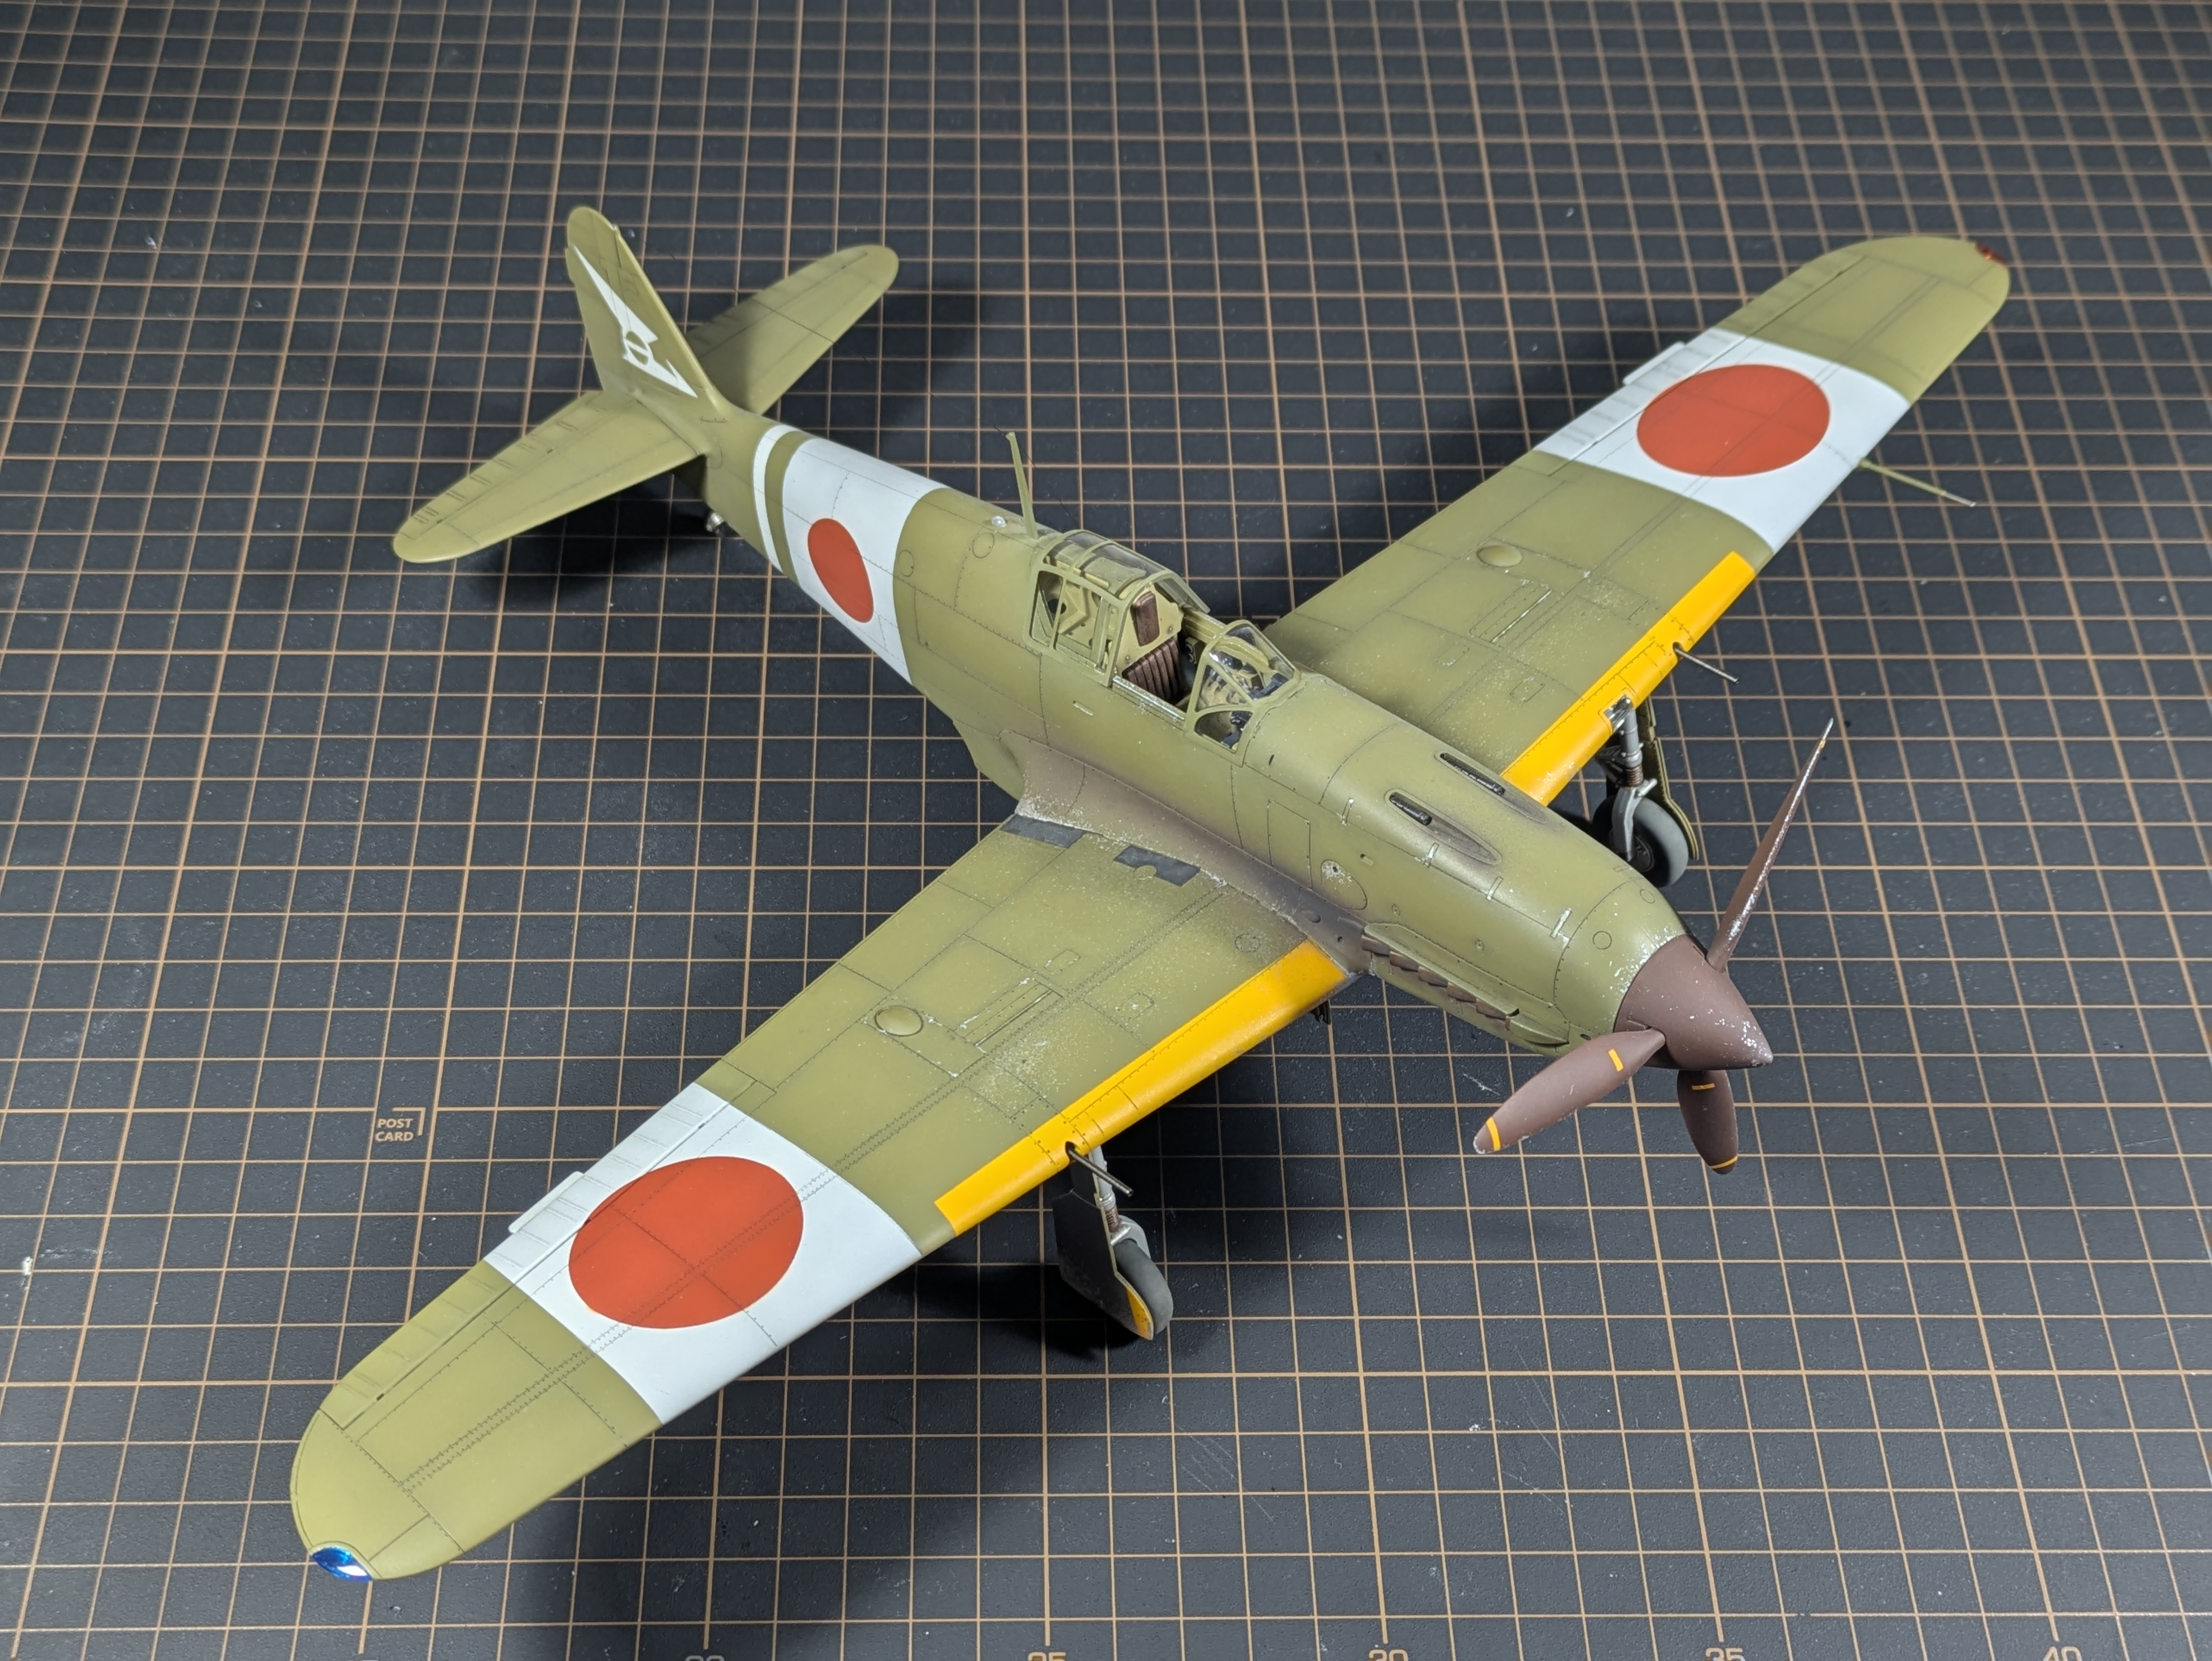
Hasegawa 1/32 Kawasaki Ki-61 Tony - 56th Sentai, Osaka, mid-1945.
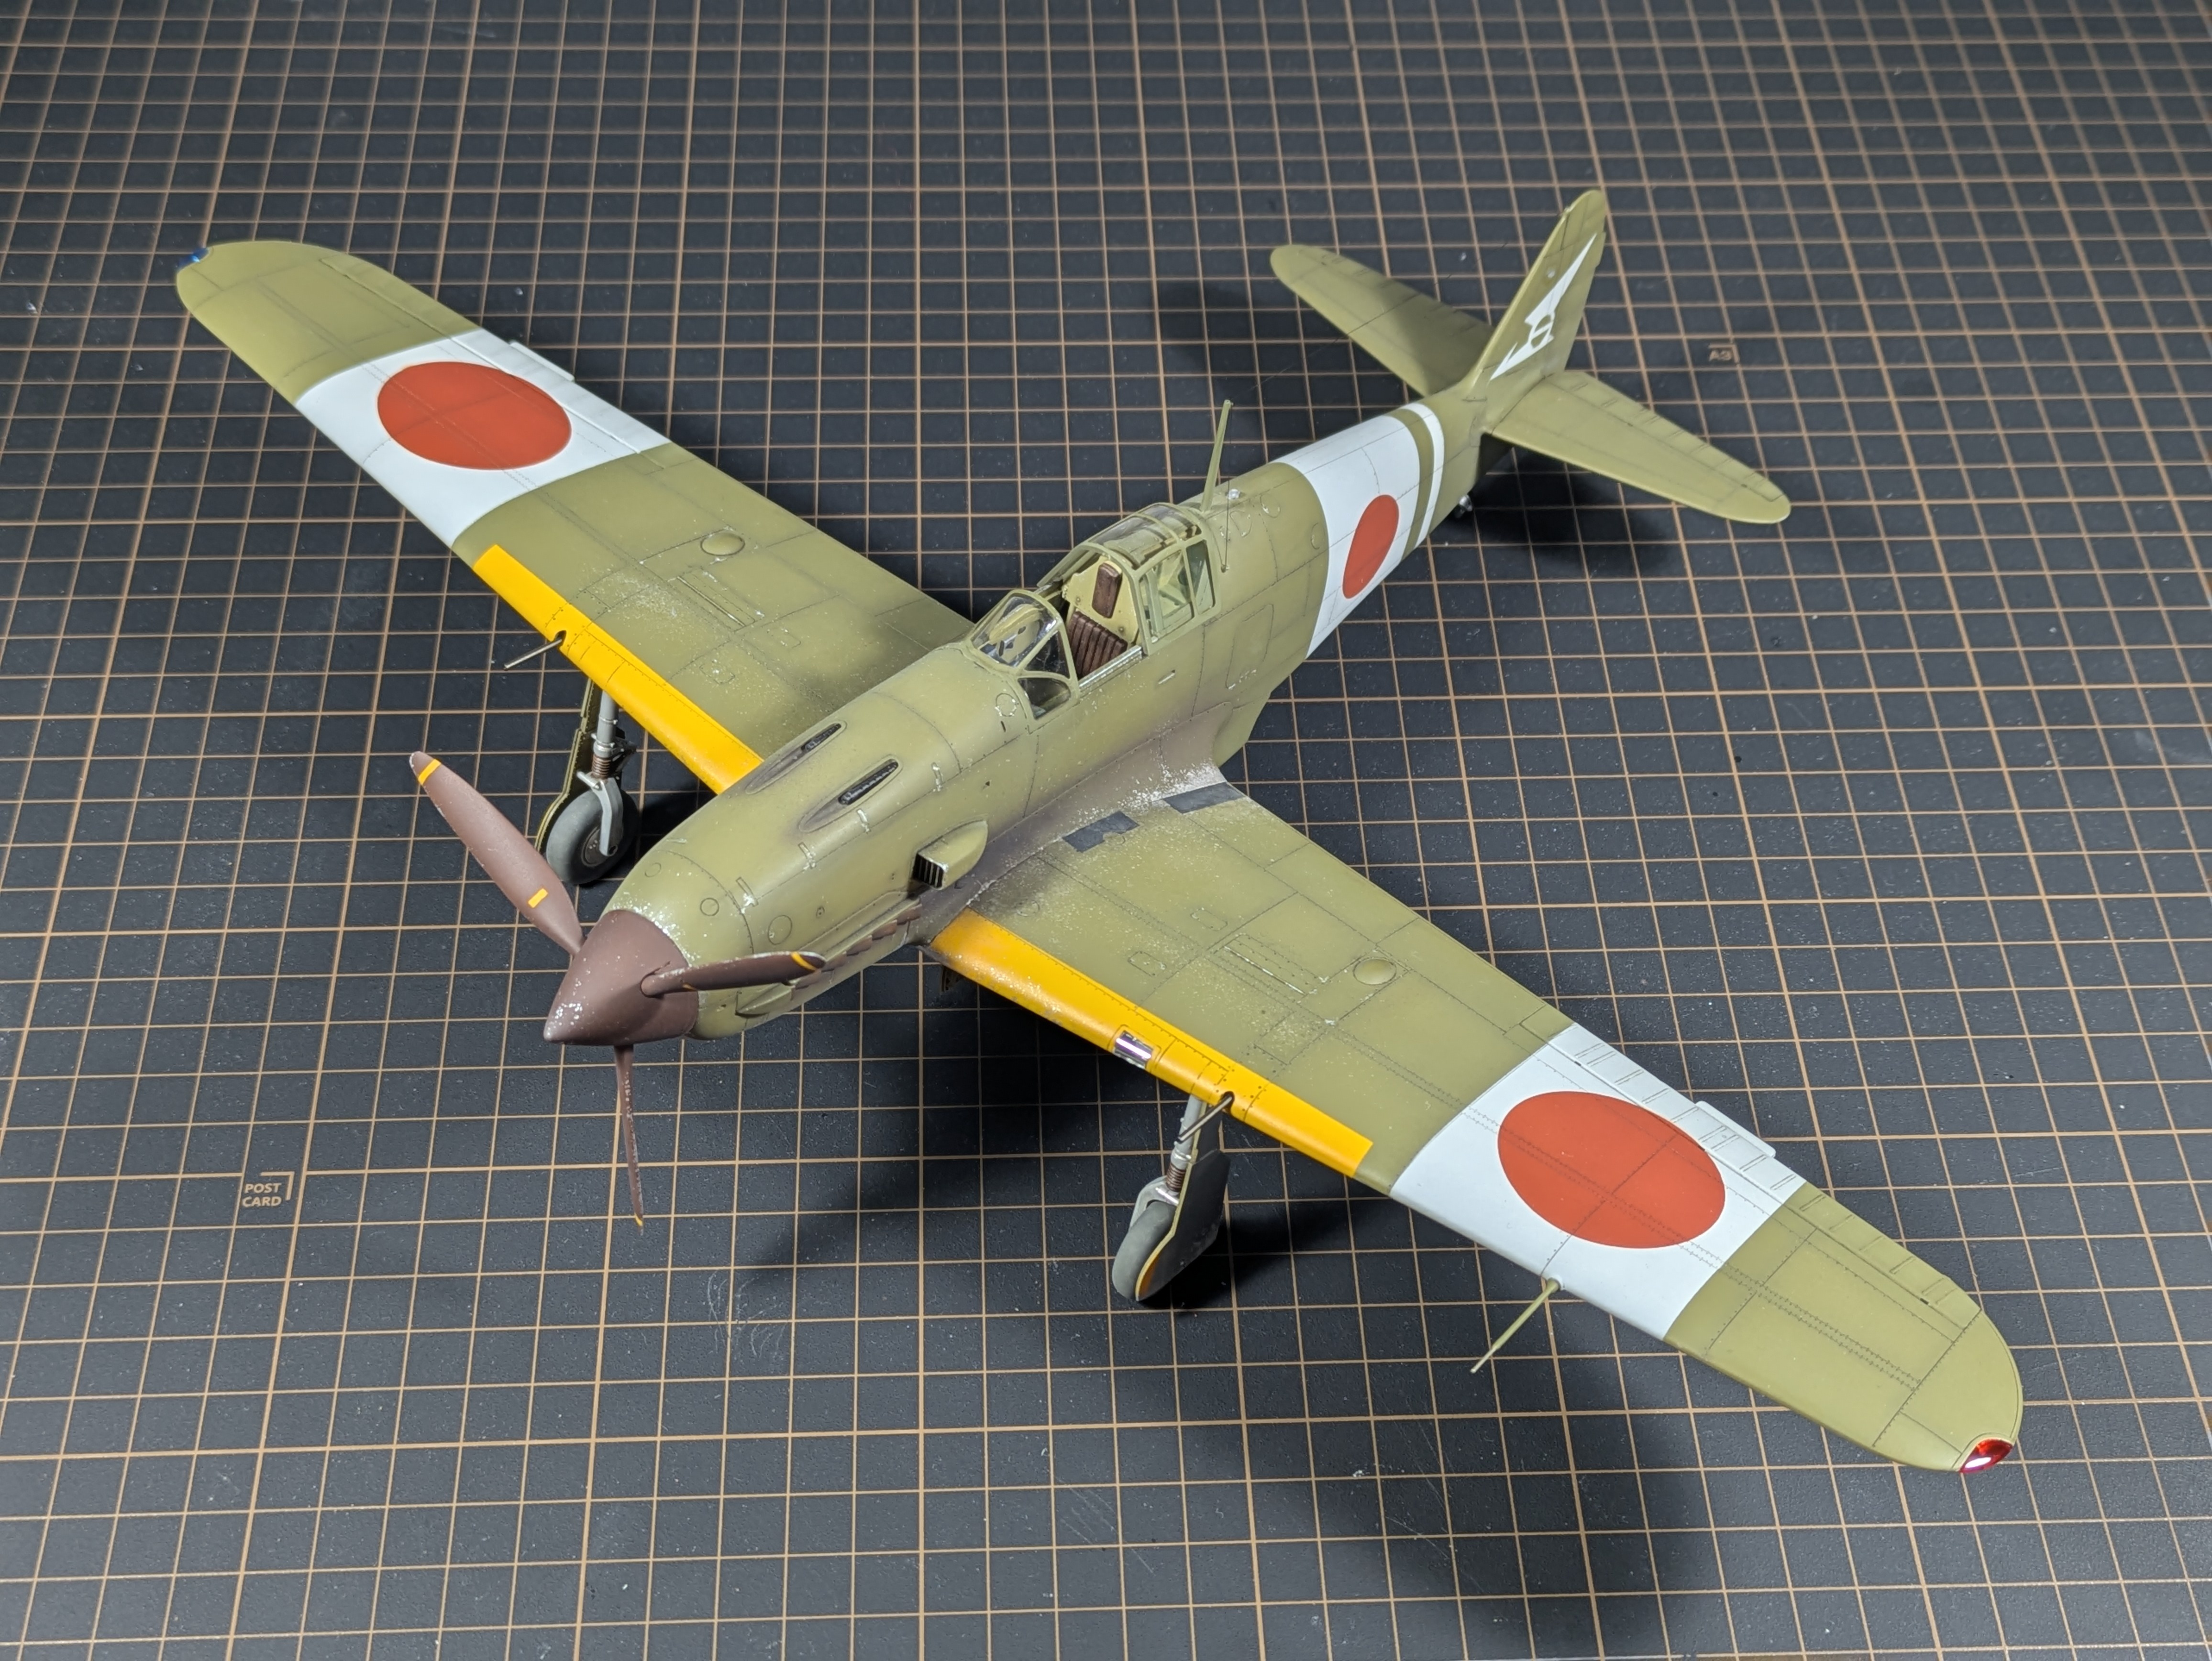
Three-quarter left
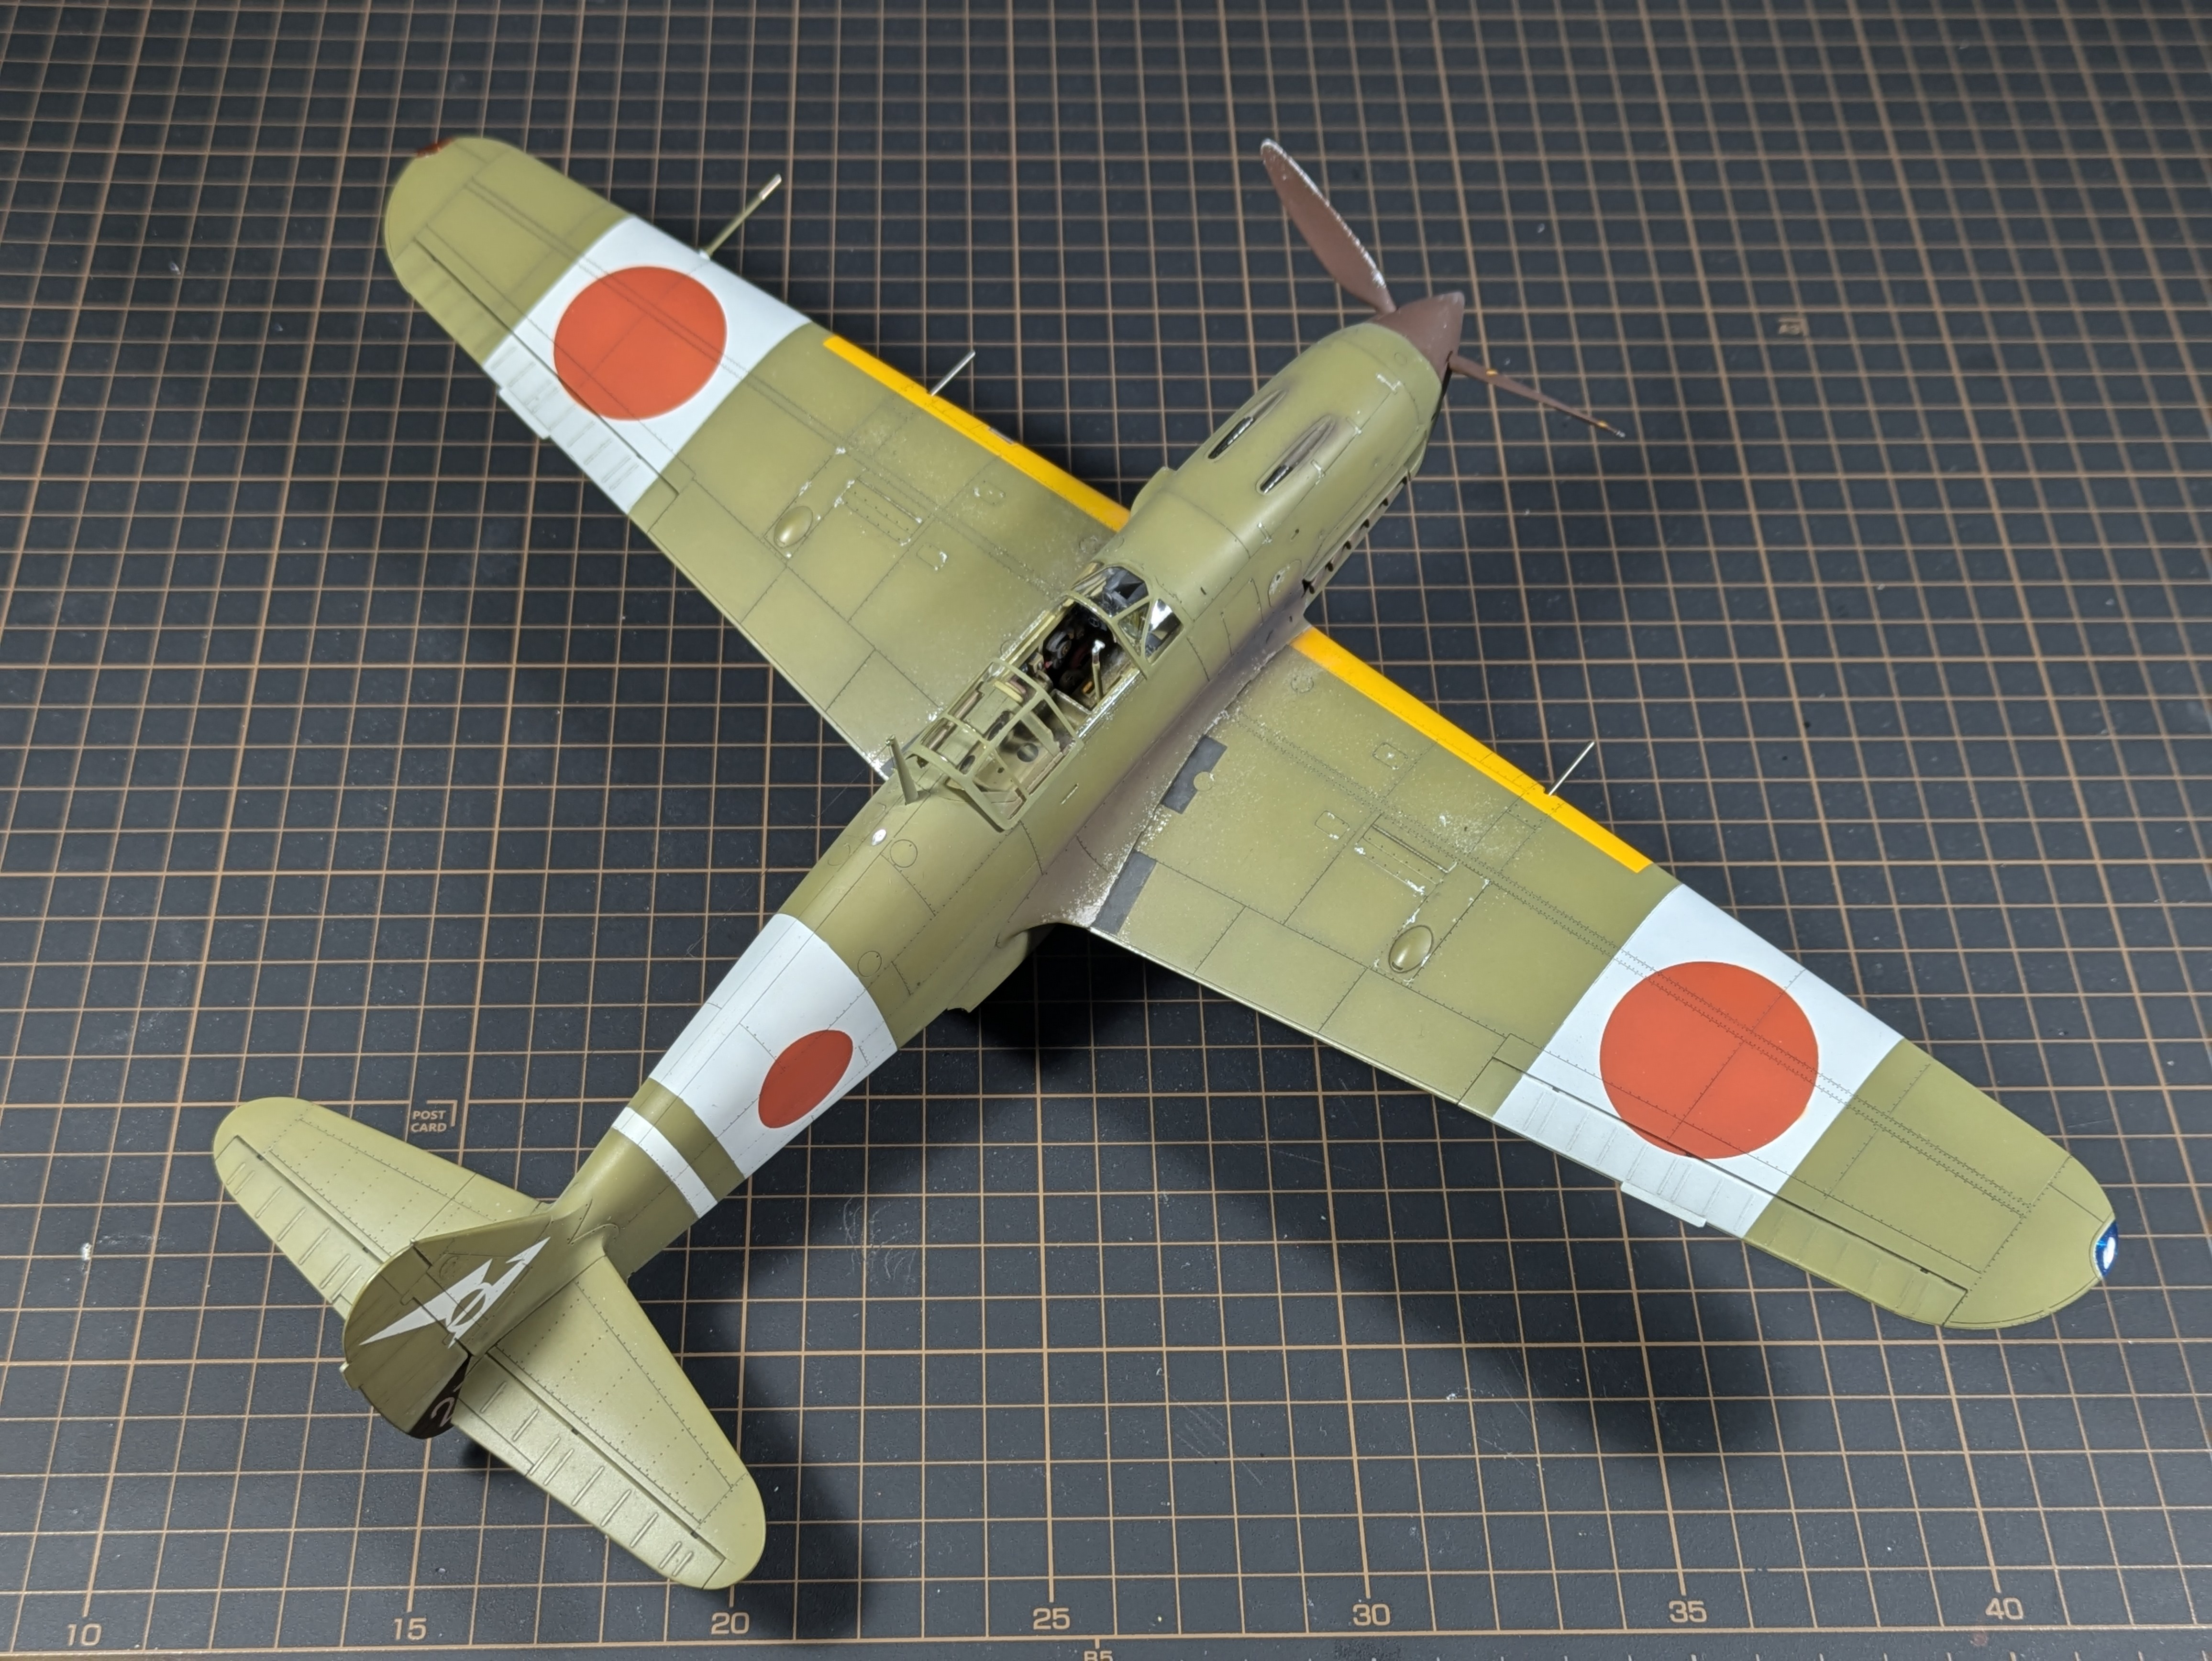
Three-quarter rear right
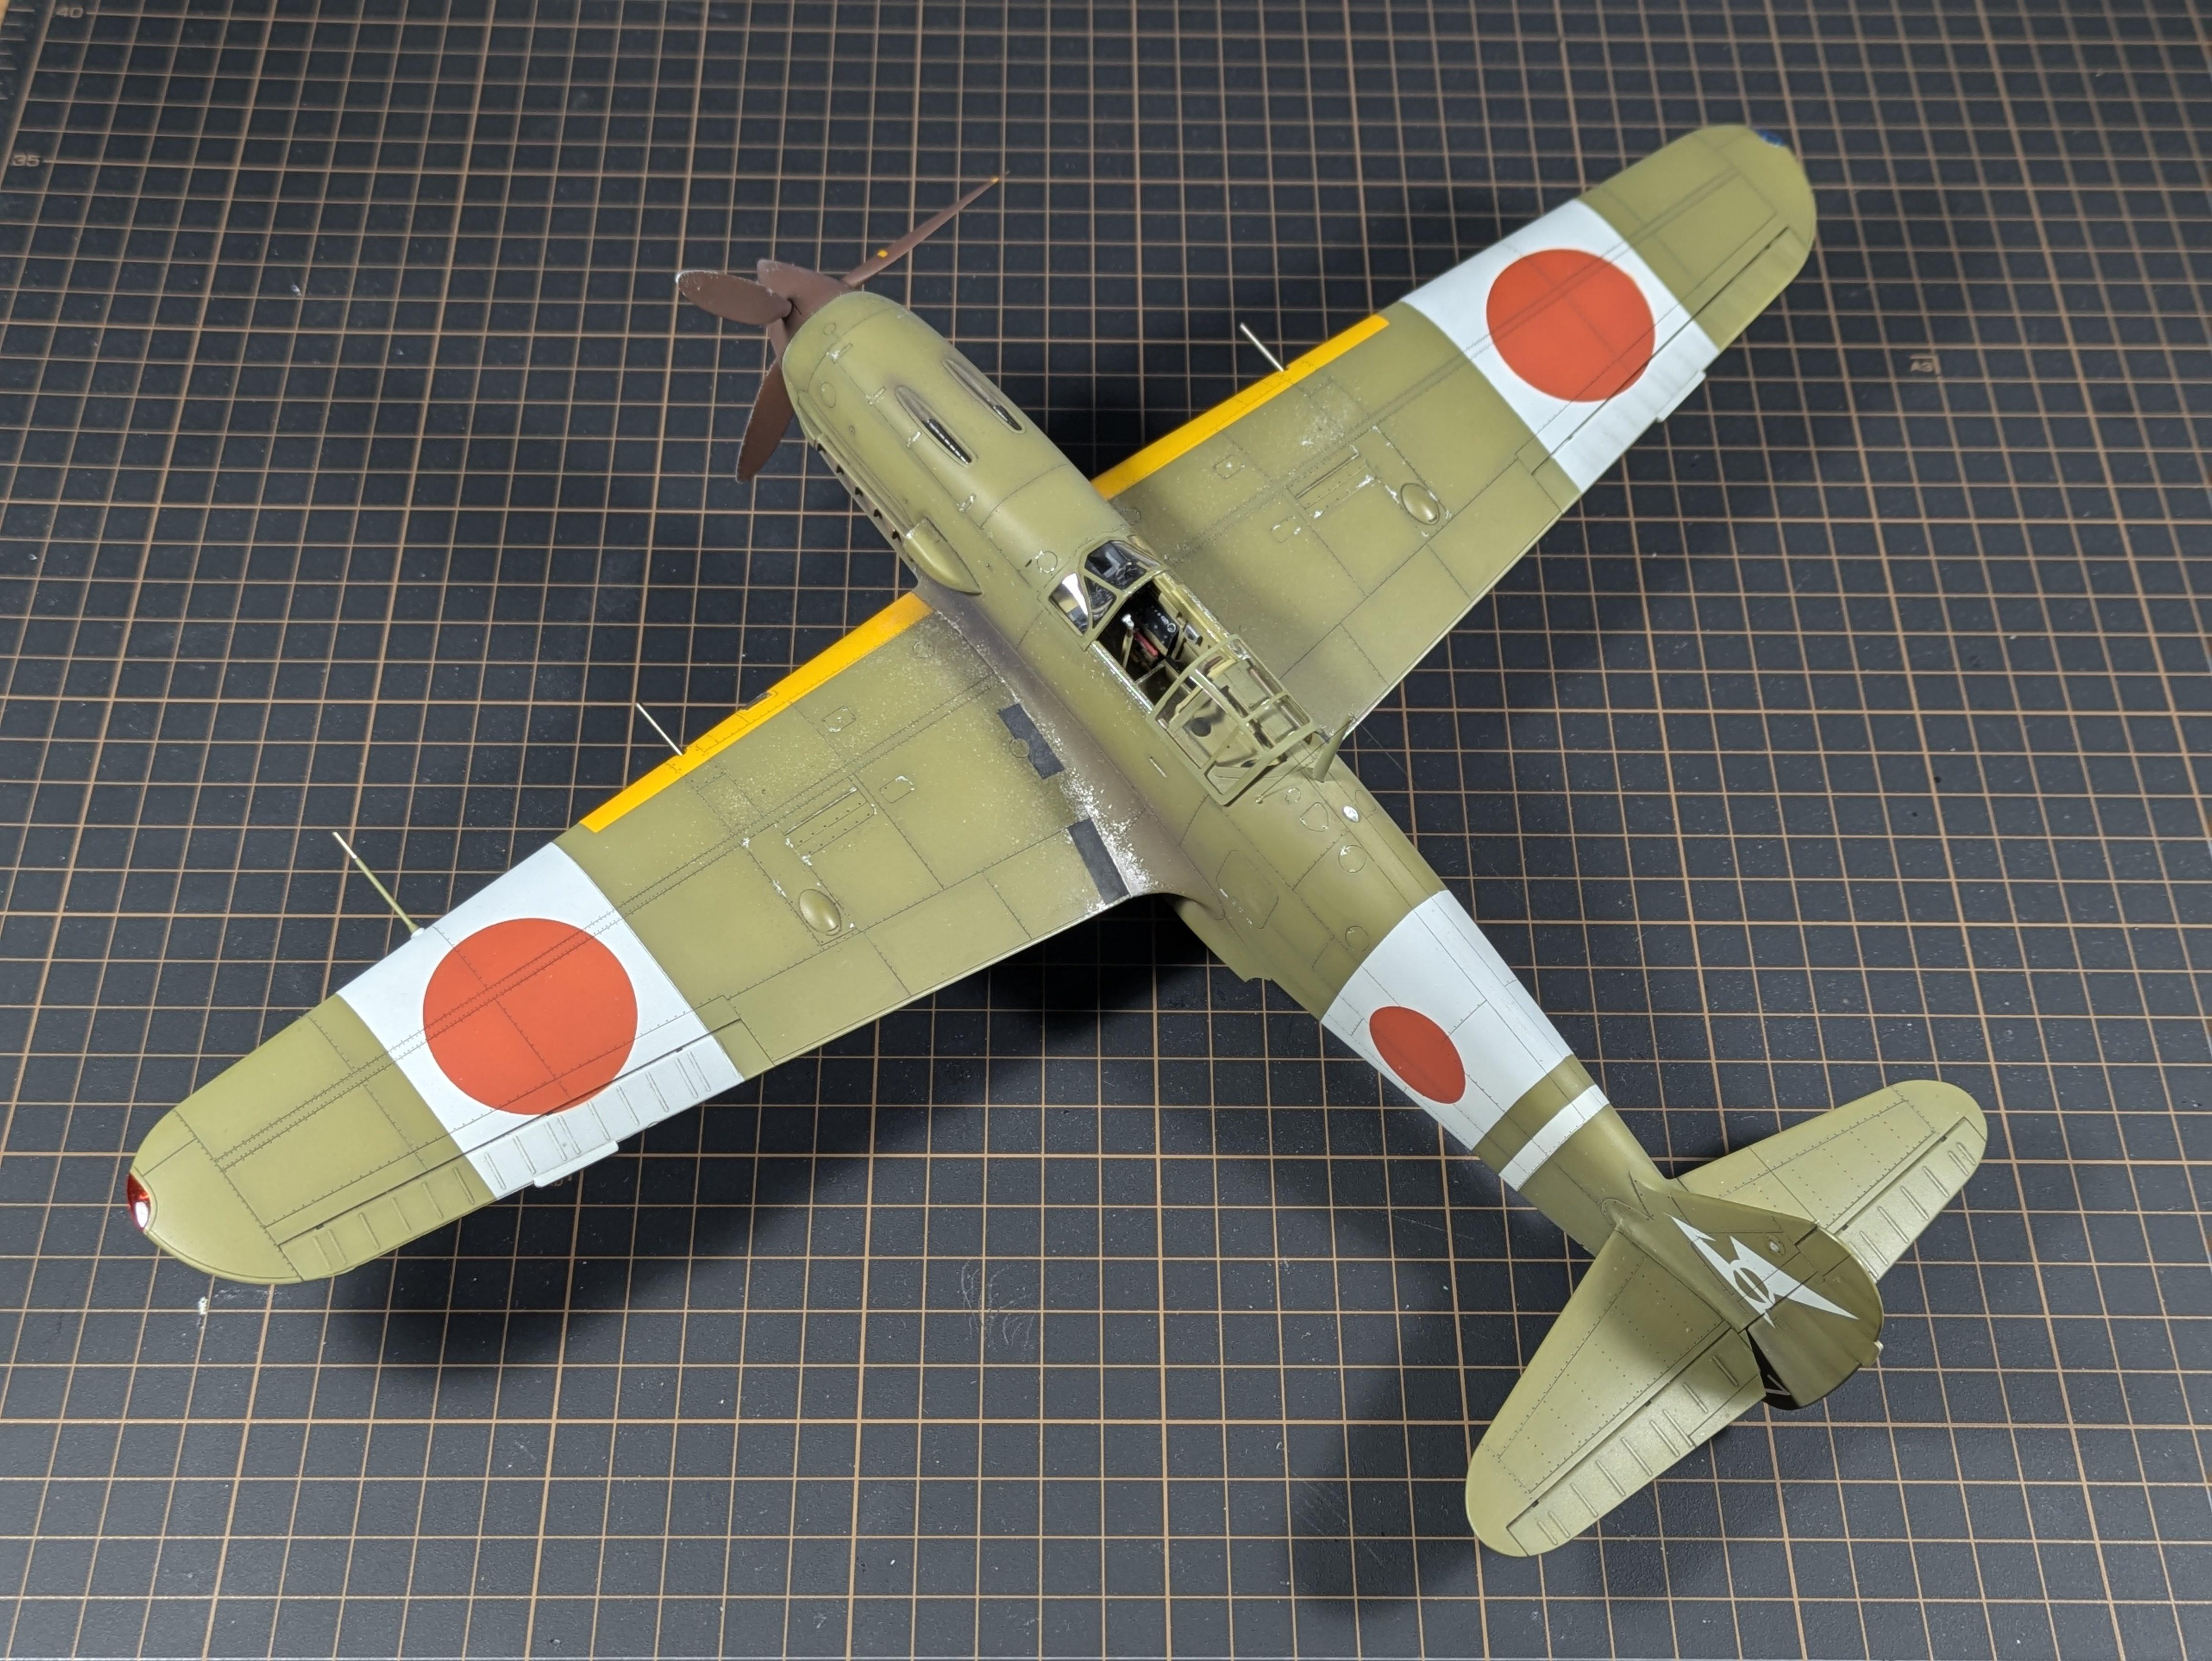
Three-quarter rear left
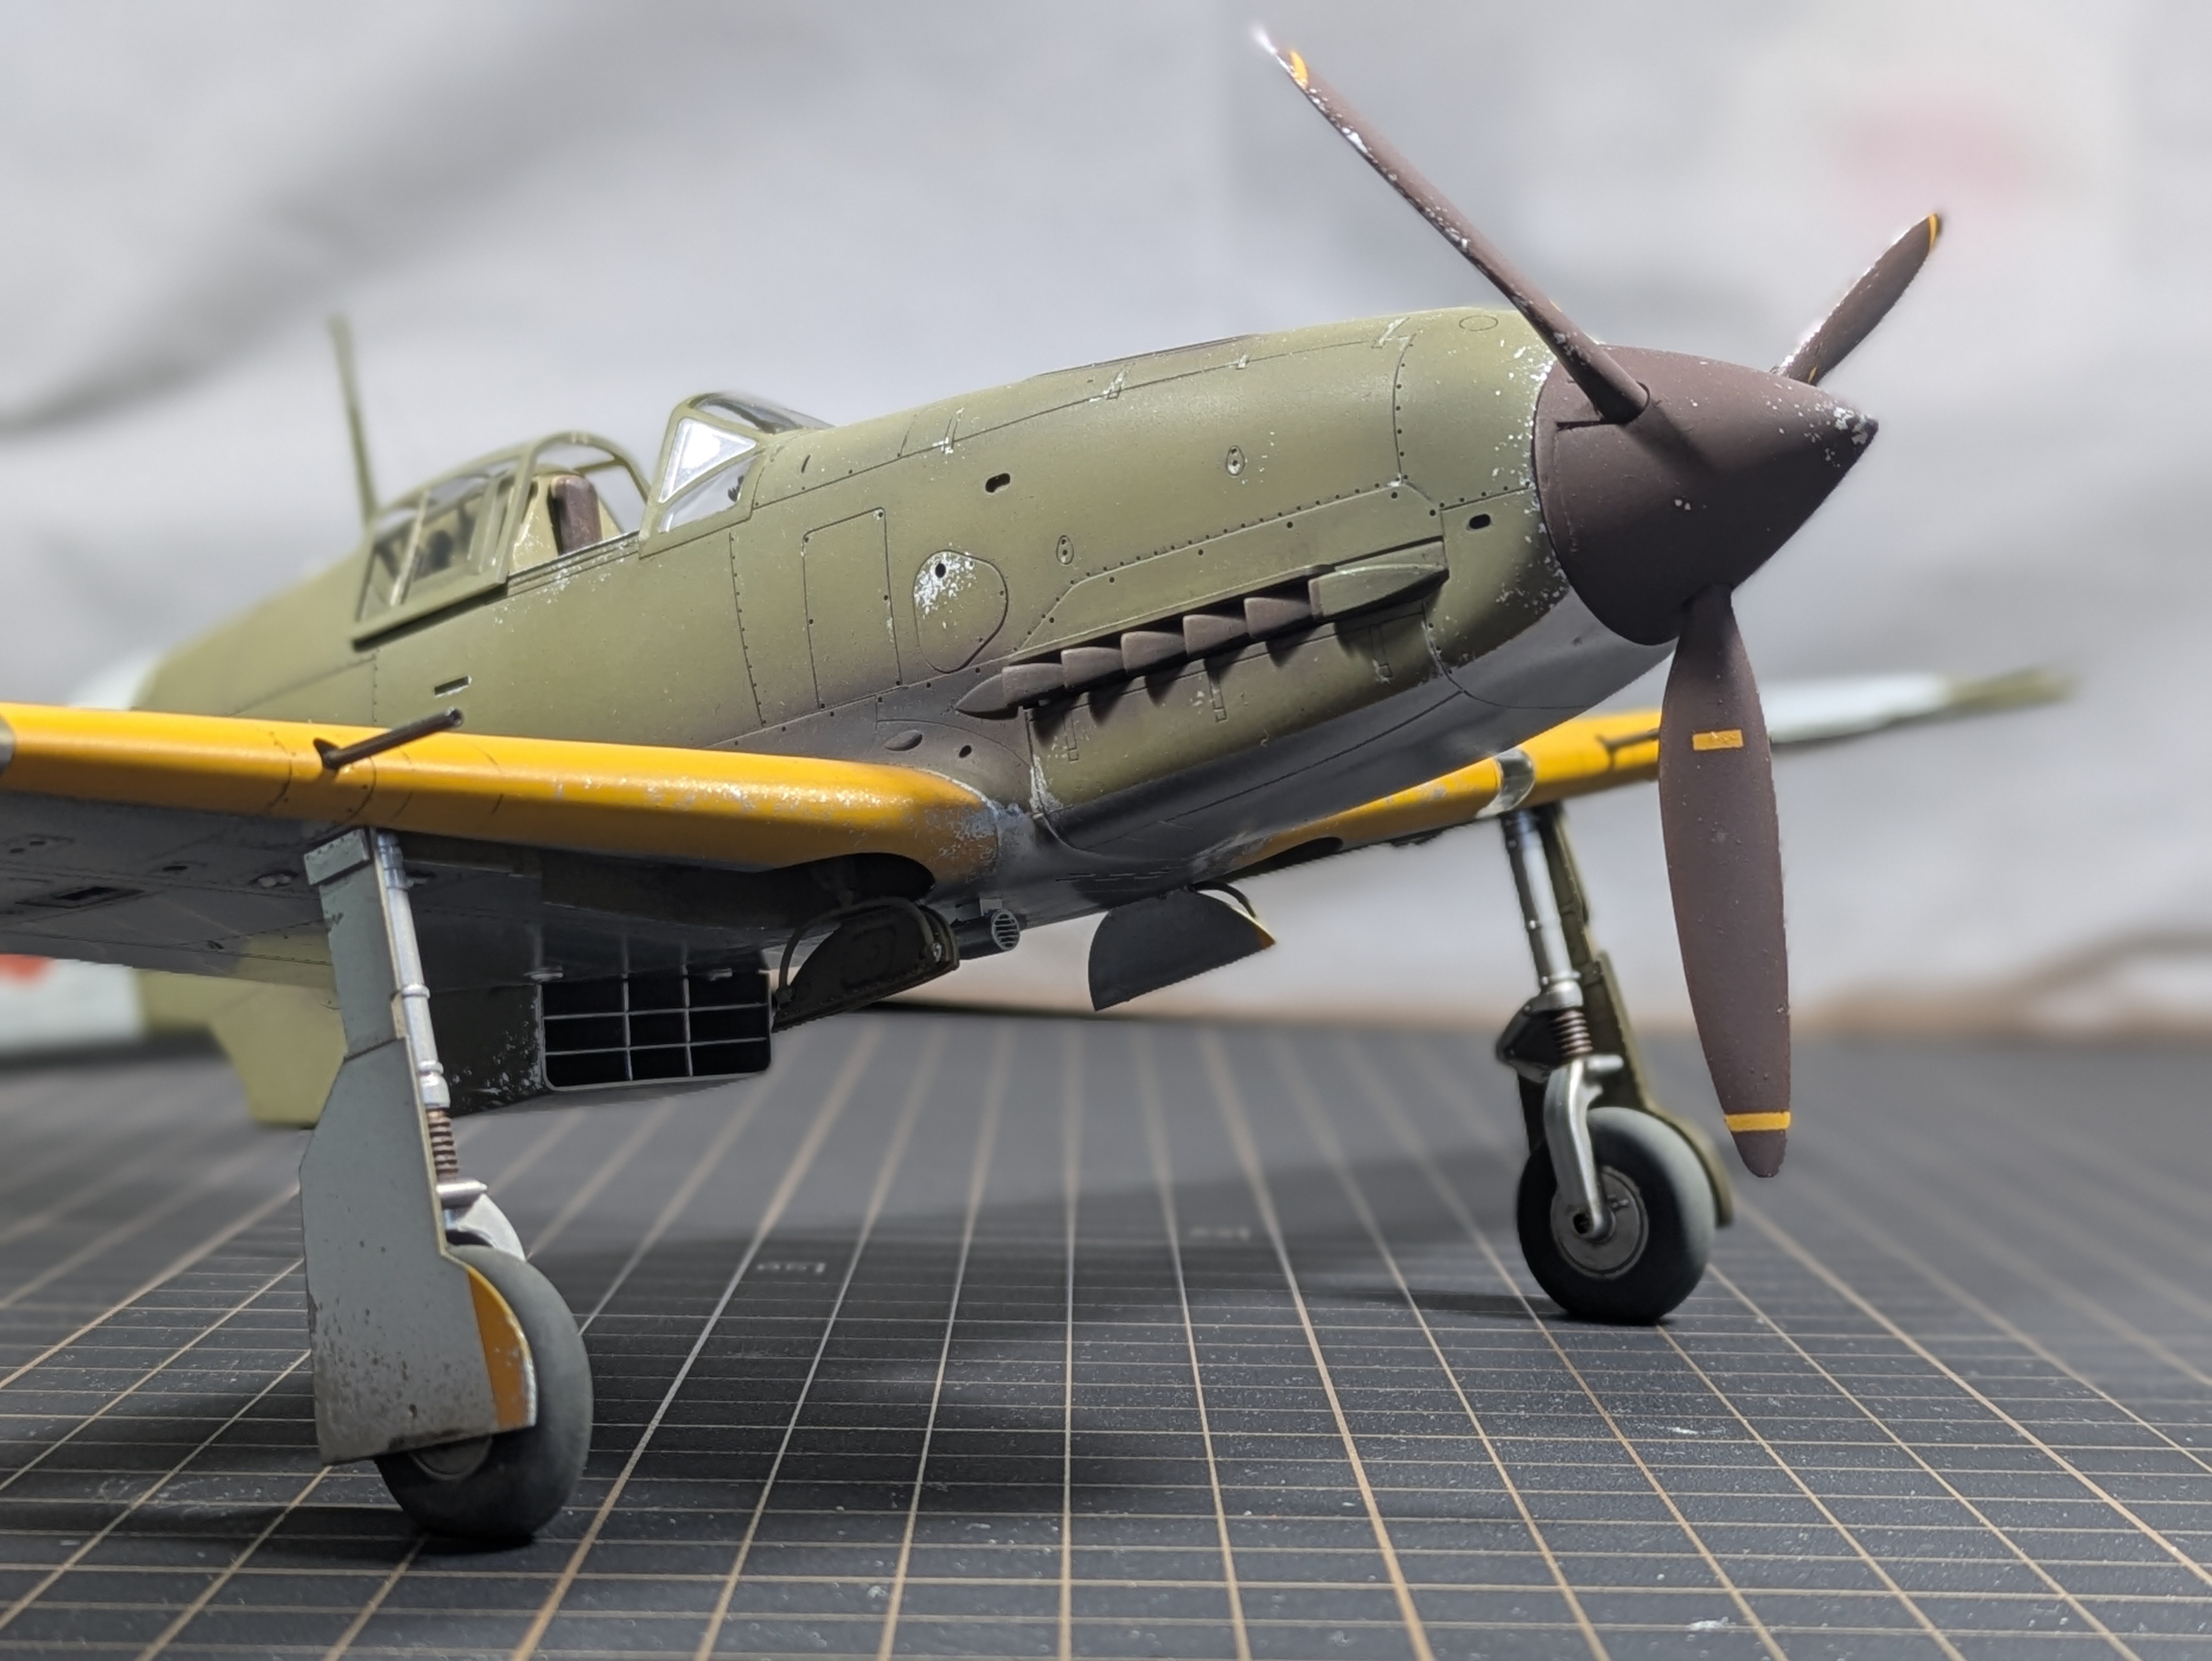
Three-quarter right - prop, leading edge, intake and gear
How Kyle Built It
Full step-by-step breakdown. All products in stock at Wheels and Wings unless noted.
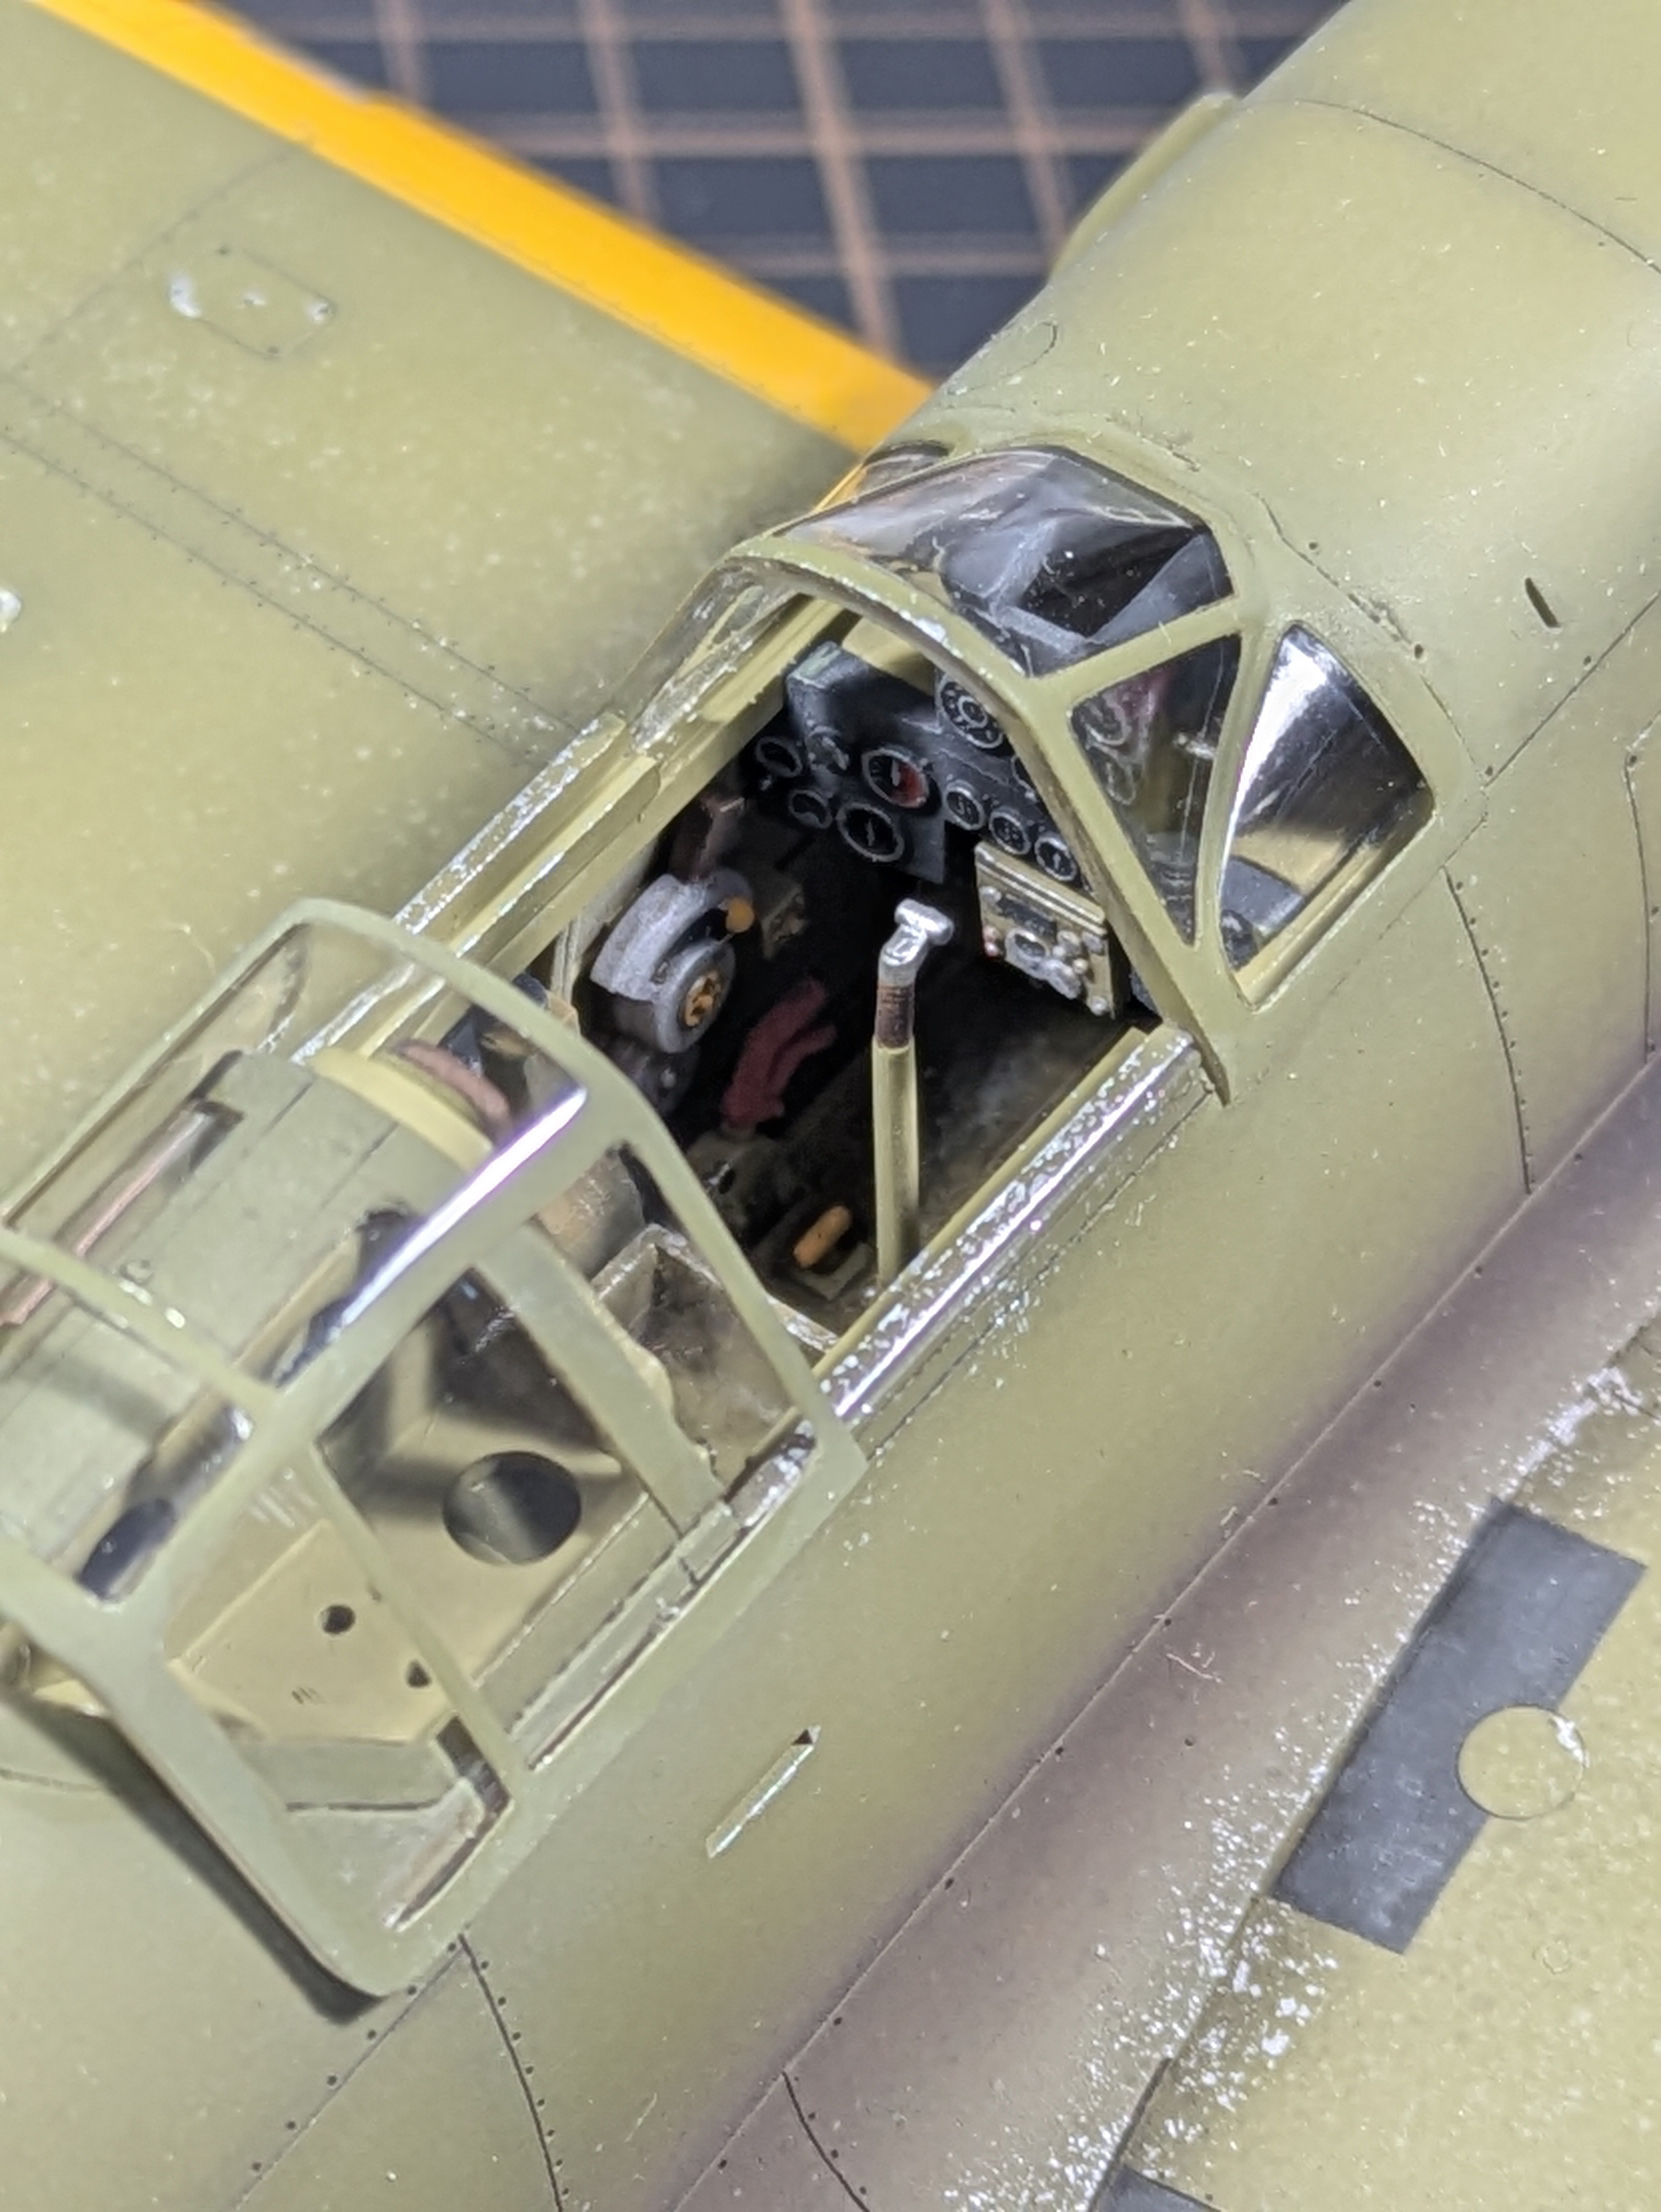
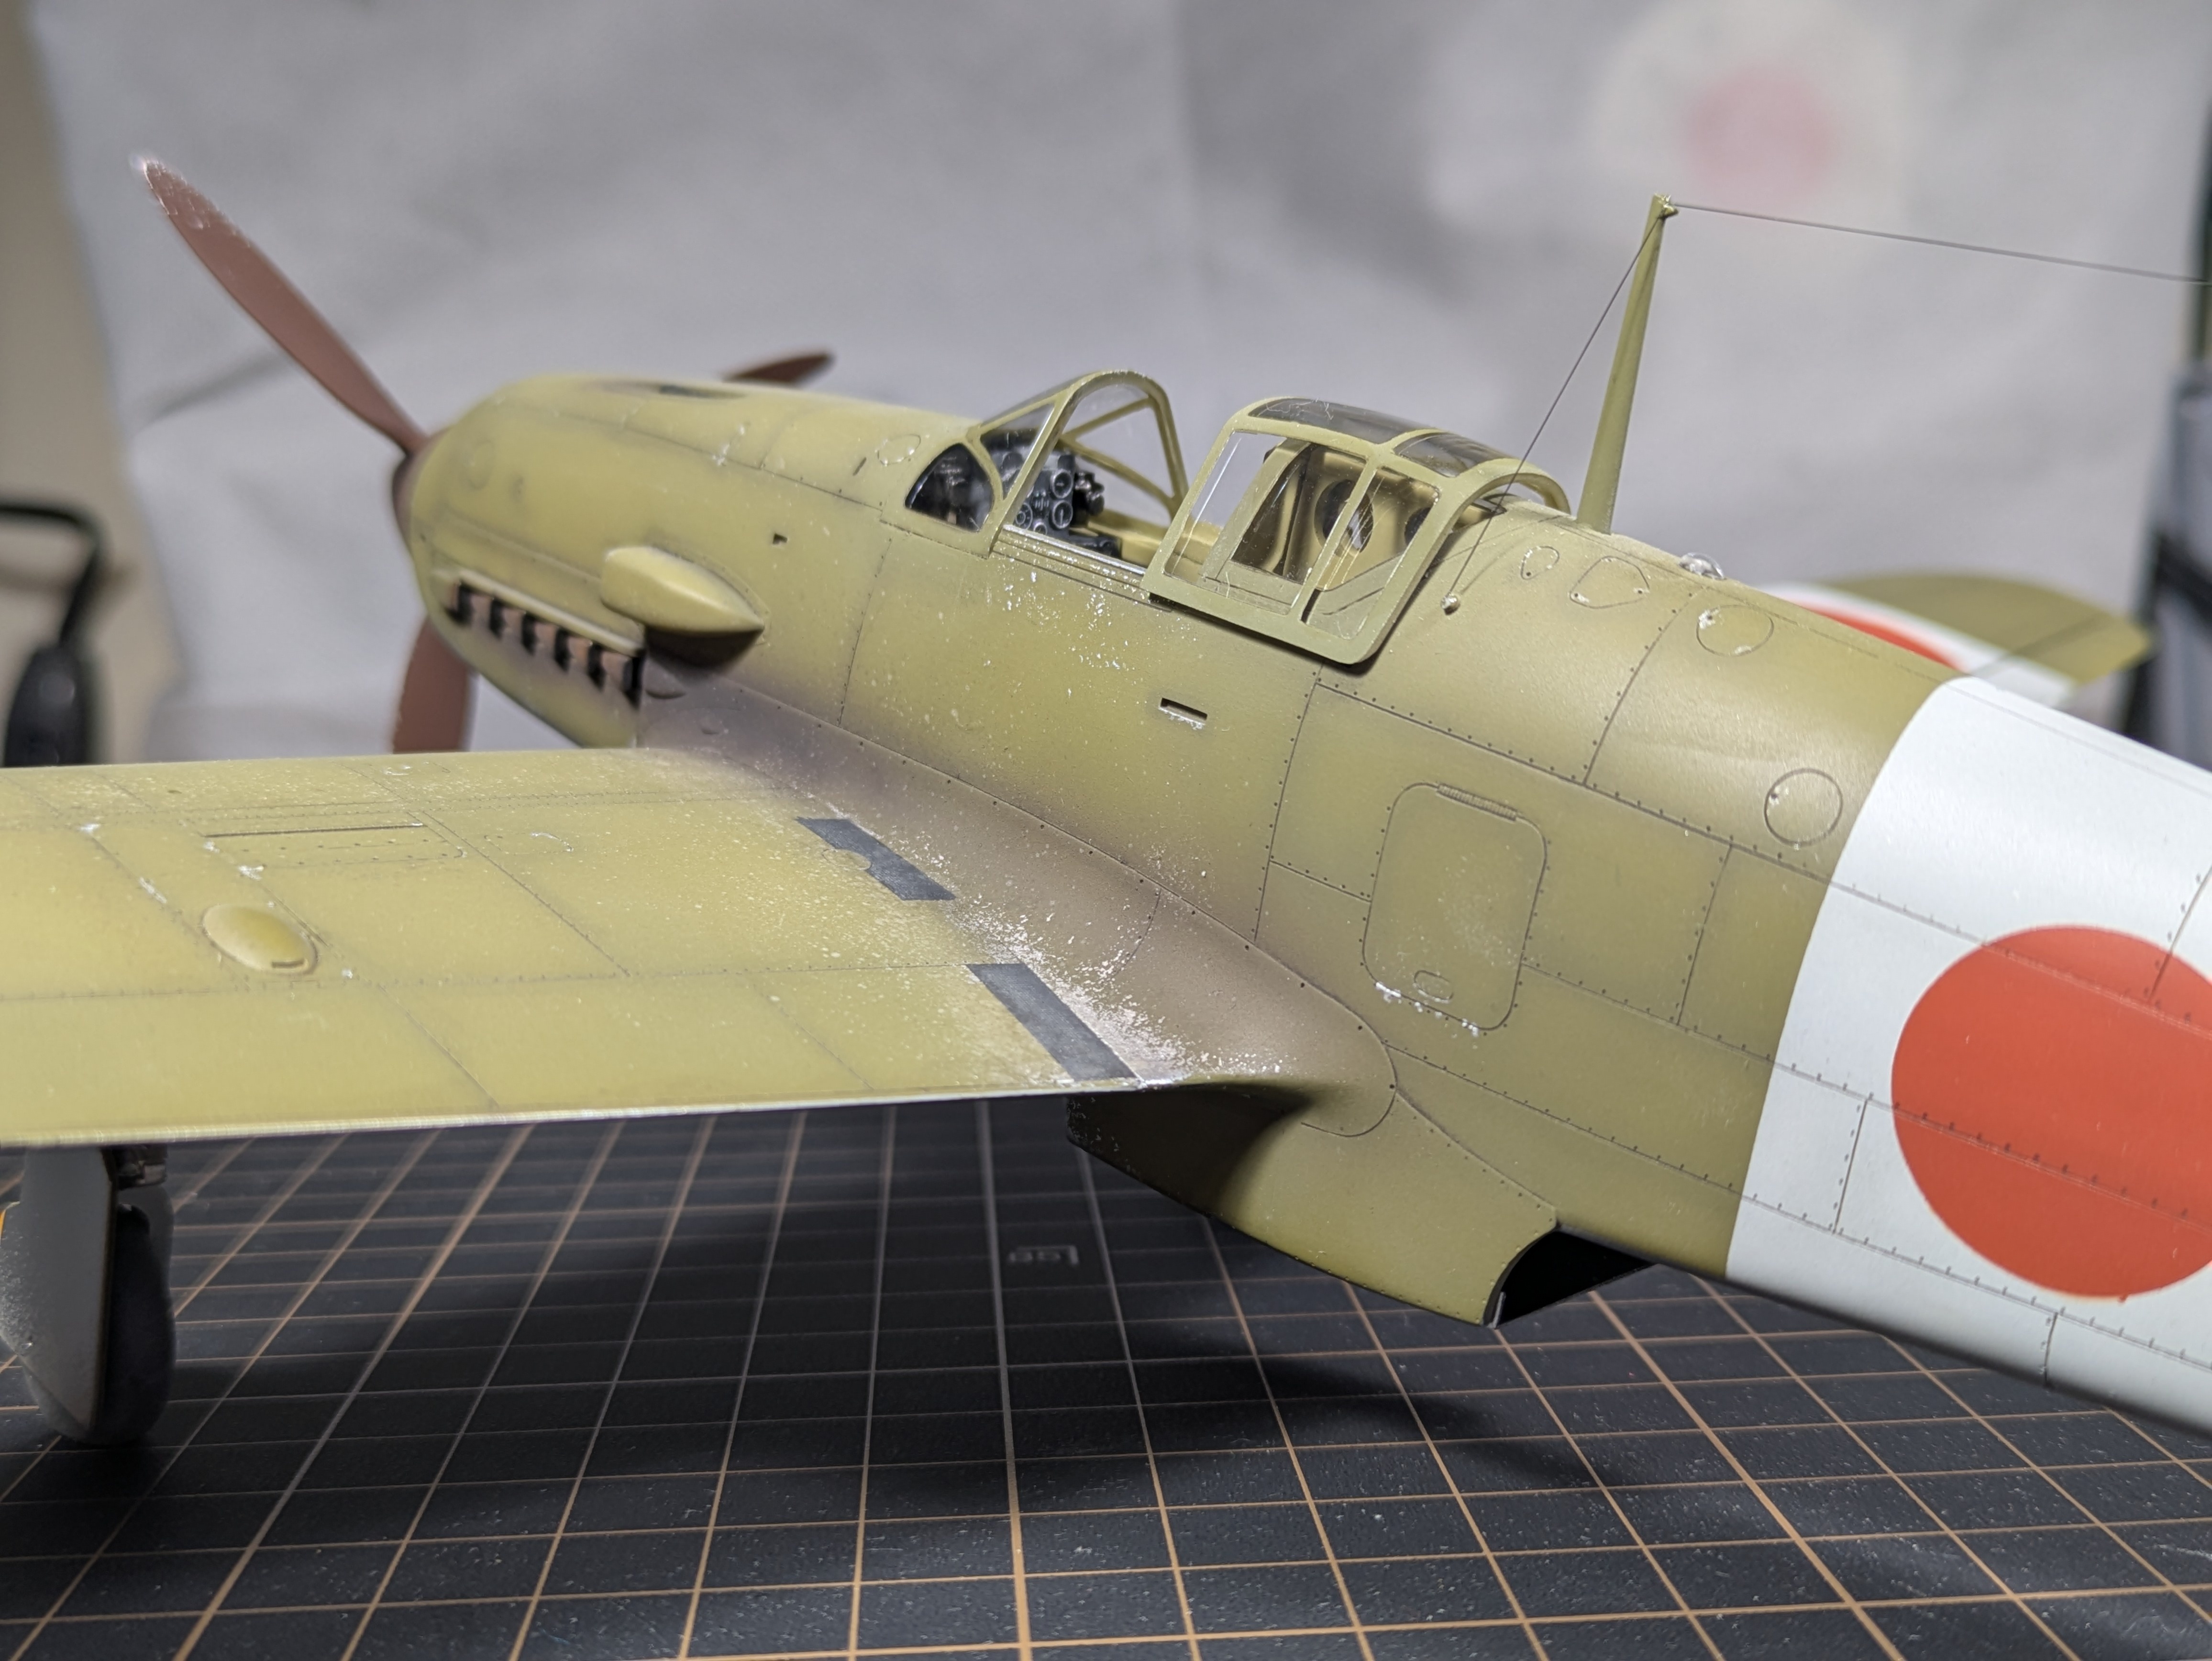
Cockpit - Done First, Fitted to Fuselage
At 1/32 scale the cockpit deserves as much attention as you can give it. Kyle completed and weathered the cockpit fully before installing it in the fuselage. Main colour in Two Thin Coats Green Beret. Instrument panel in Vallejo Heavy Charcoal with Sterling Silver bezels. Handles and switches in Army Painter Pure Red. Leather seat in AK Dark Brown over-sprayed with Army Painter Dark Wood Speedpaint. Metallic chipping with Vallejo Silver applied with a sponge. Abteilung Starship Filth and Sepia thinned with White Spirit as the weathering washes. Finished with Kaleido Matt Varnish before installation.
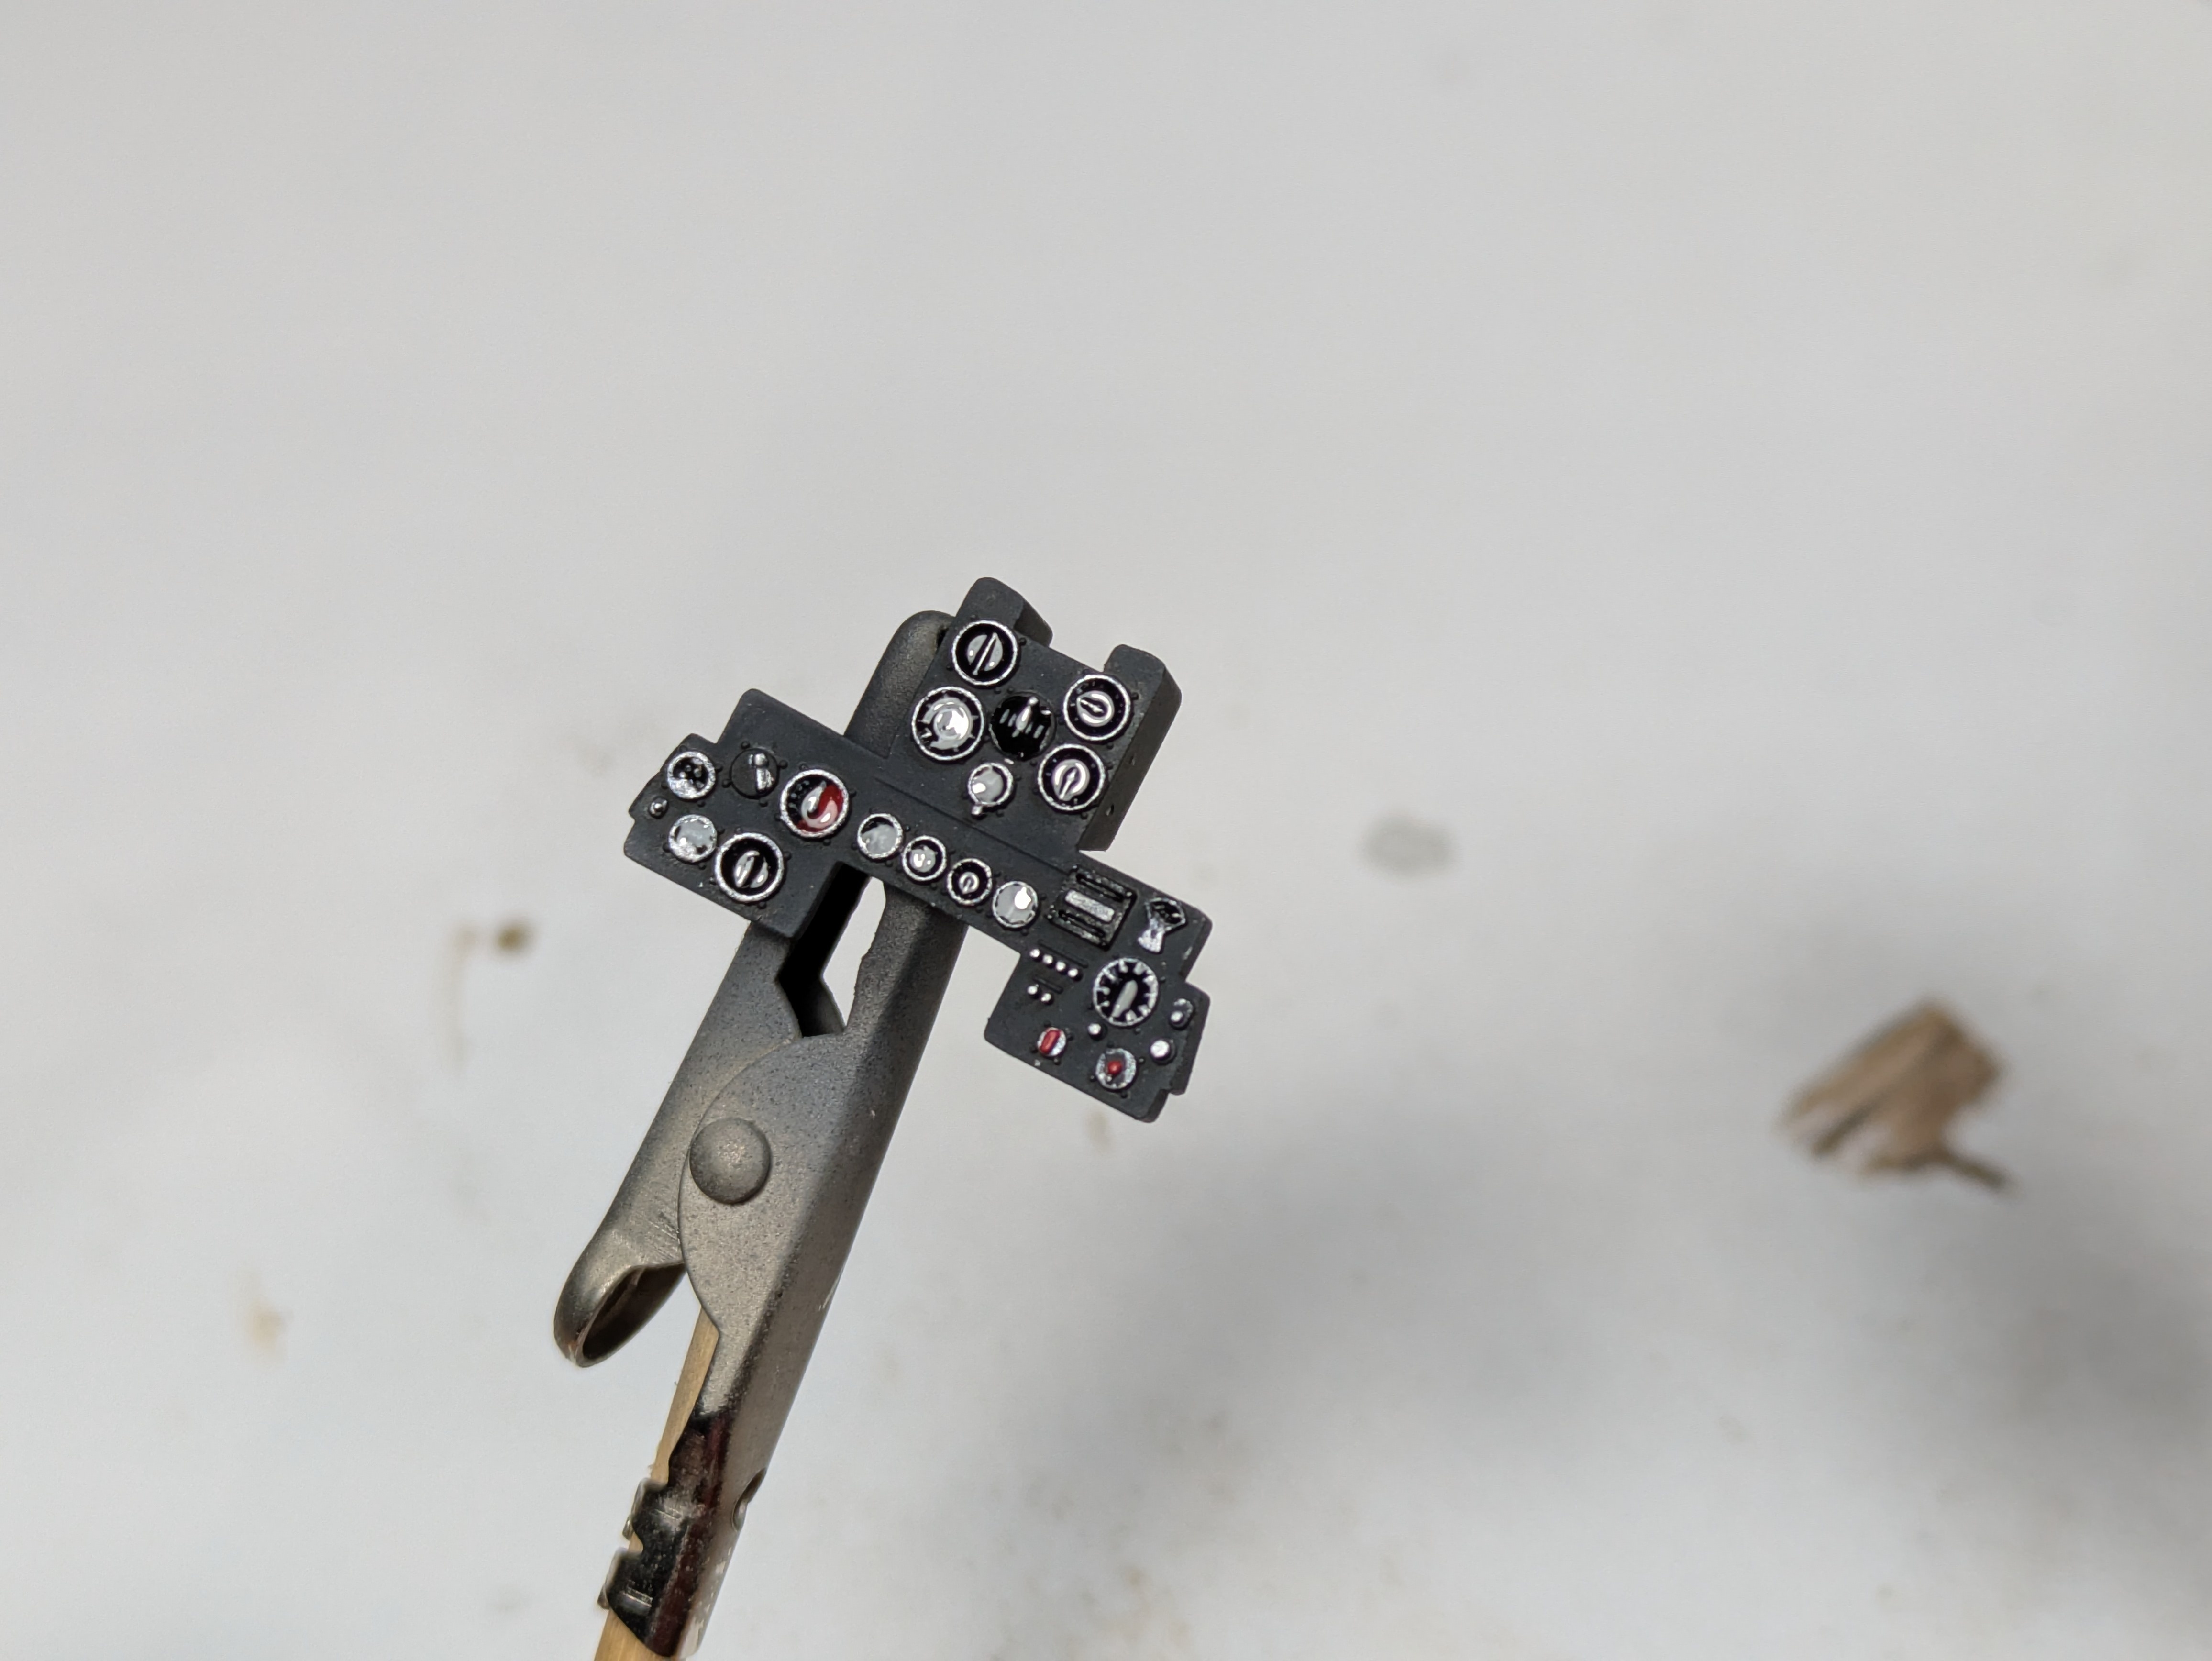
Instrument panel - before installation
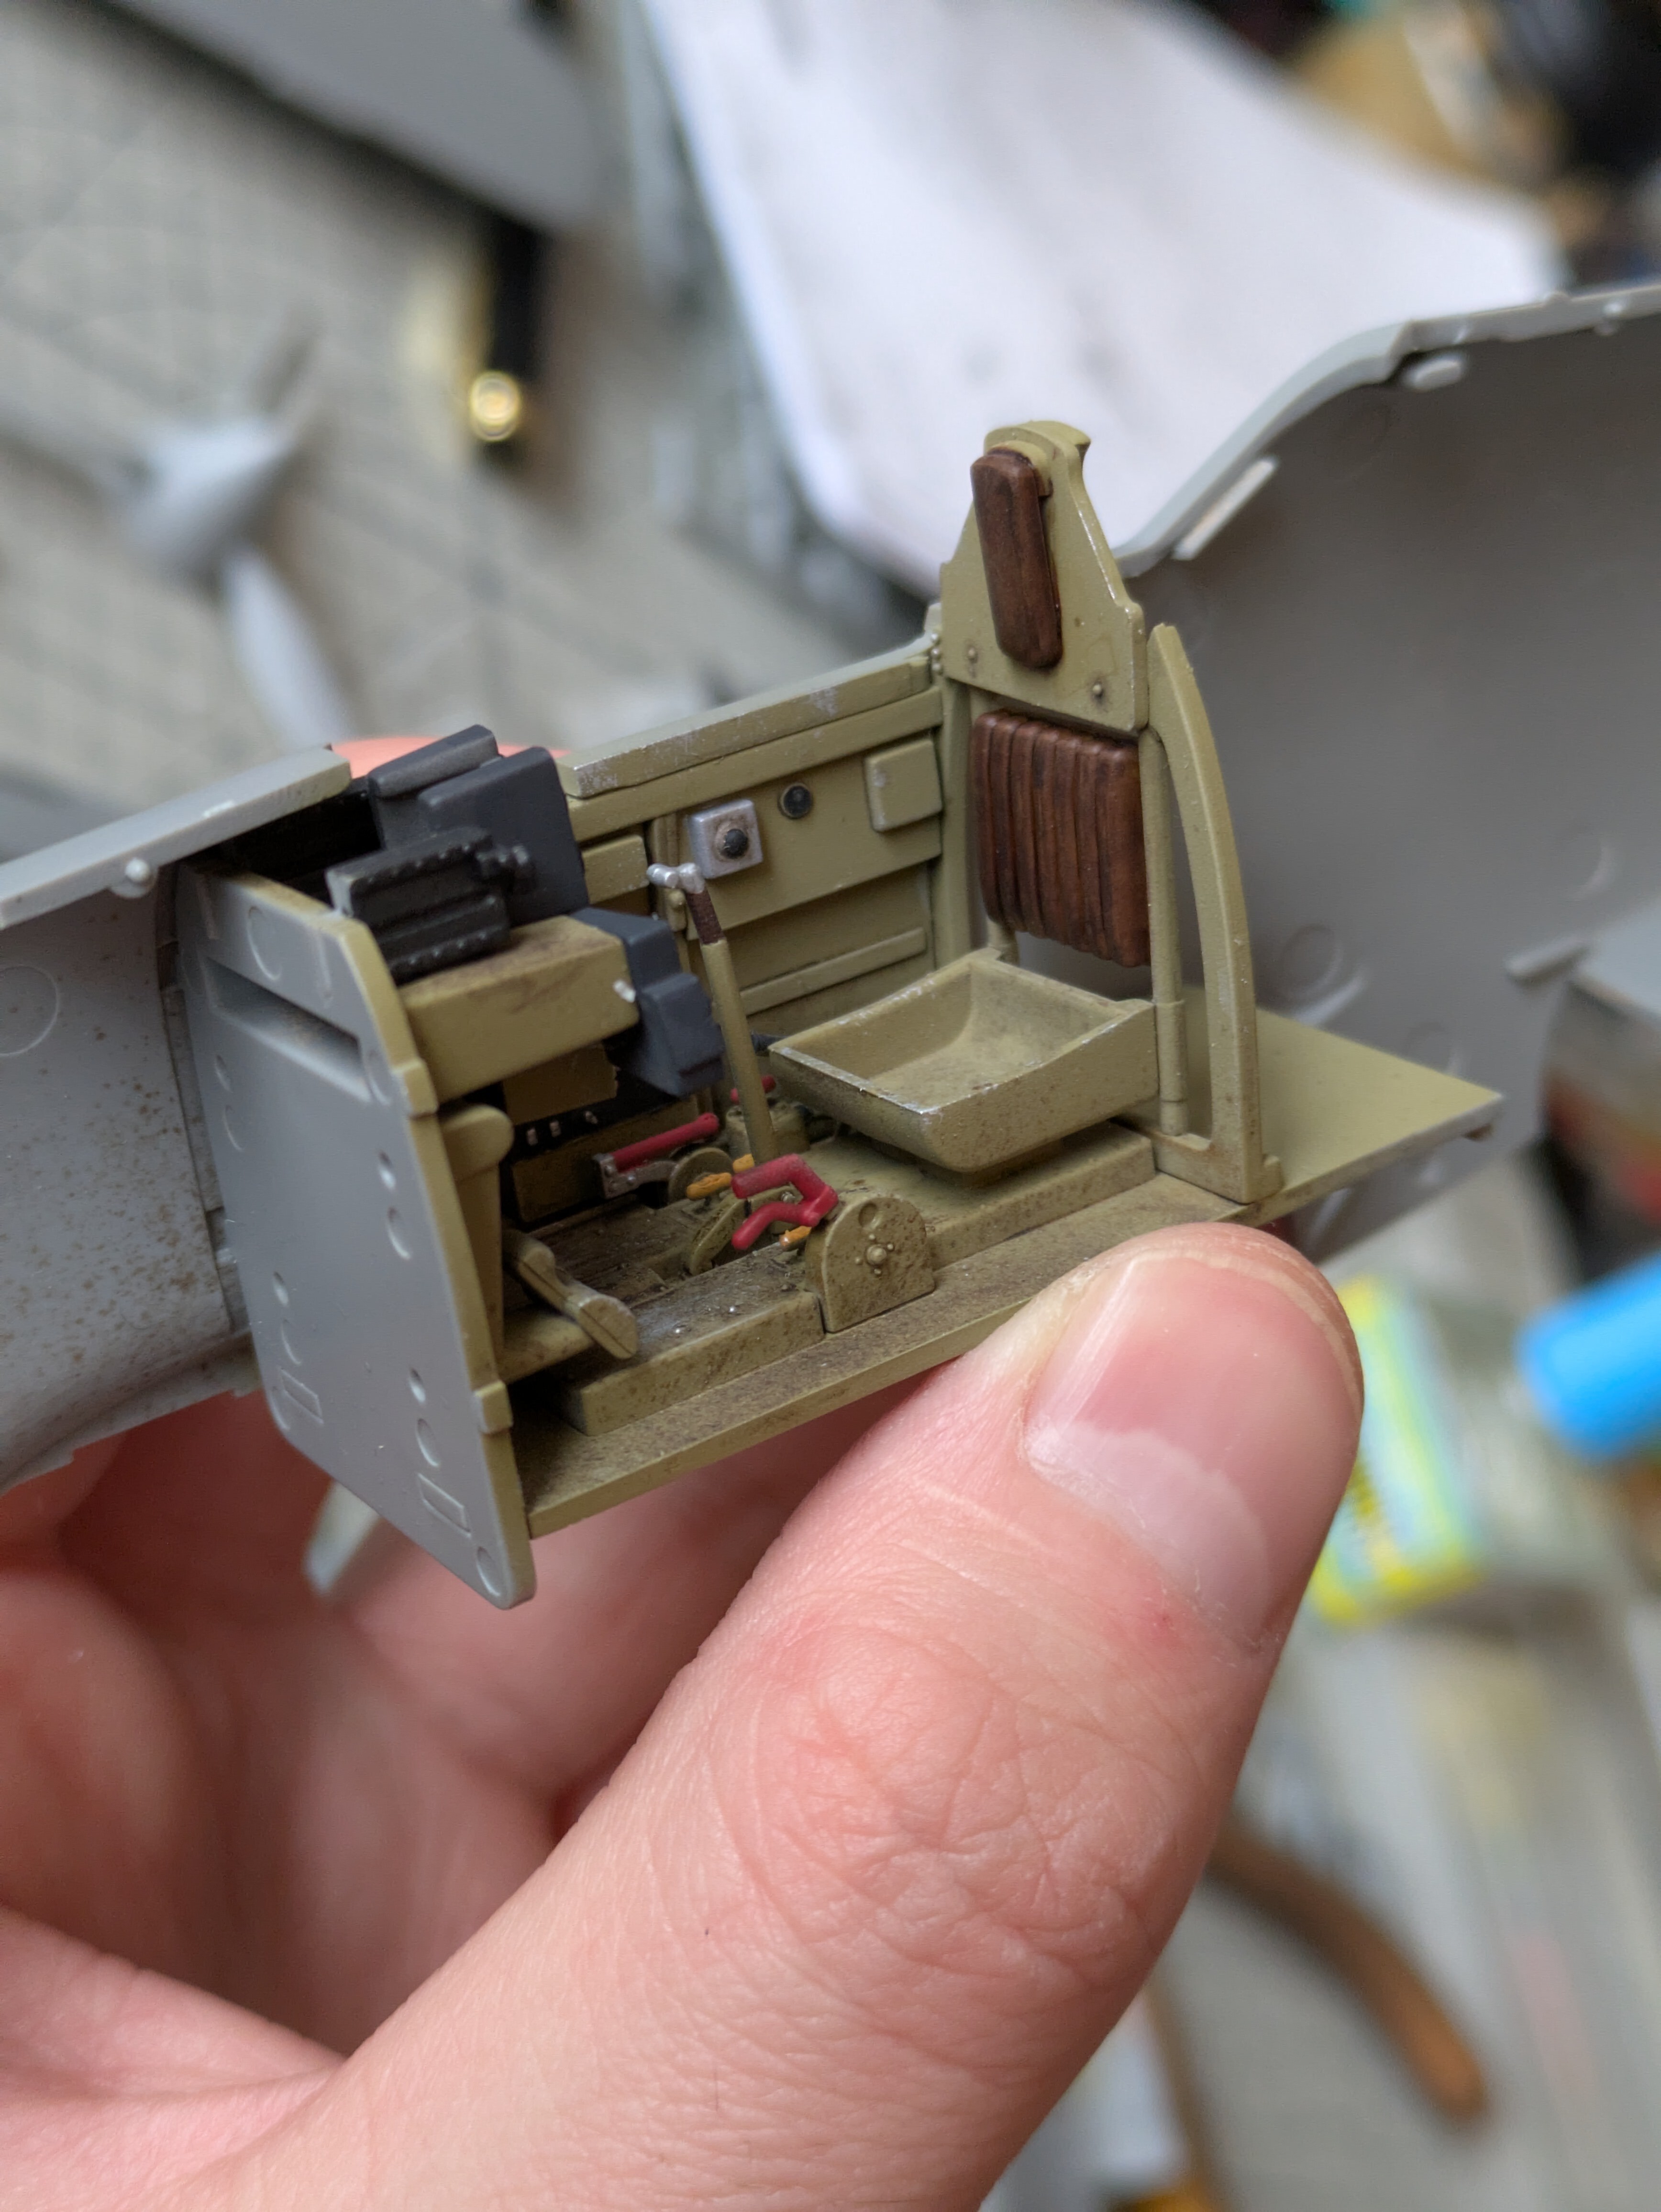
Cockpit rear - leather seat
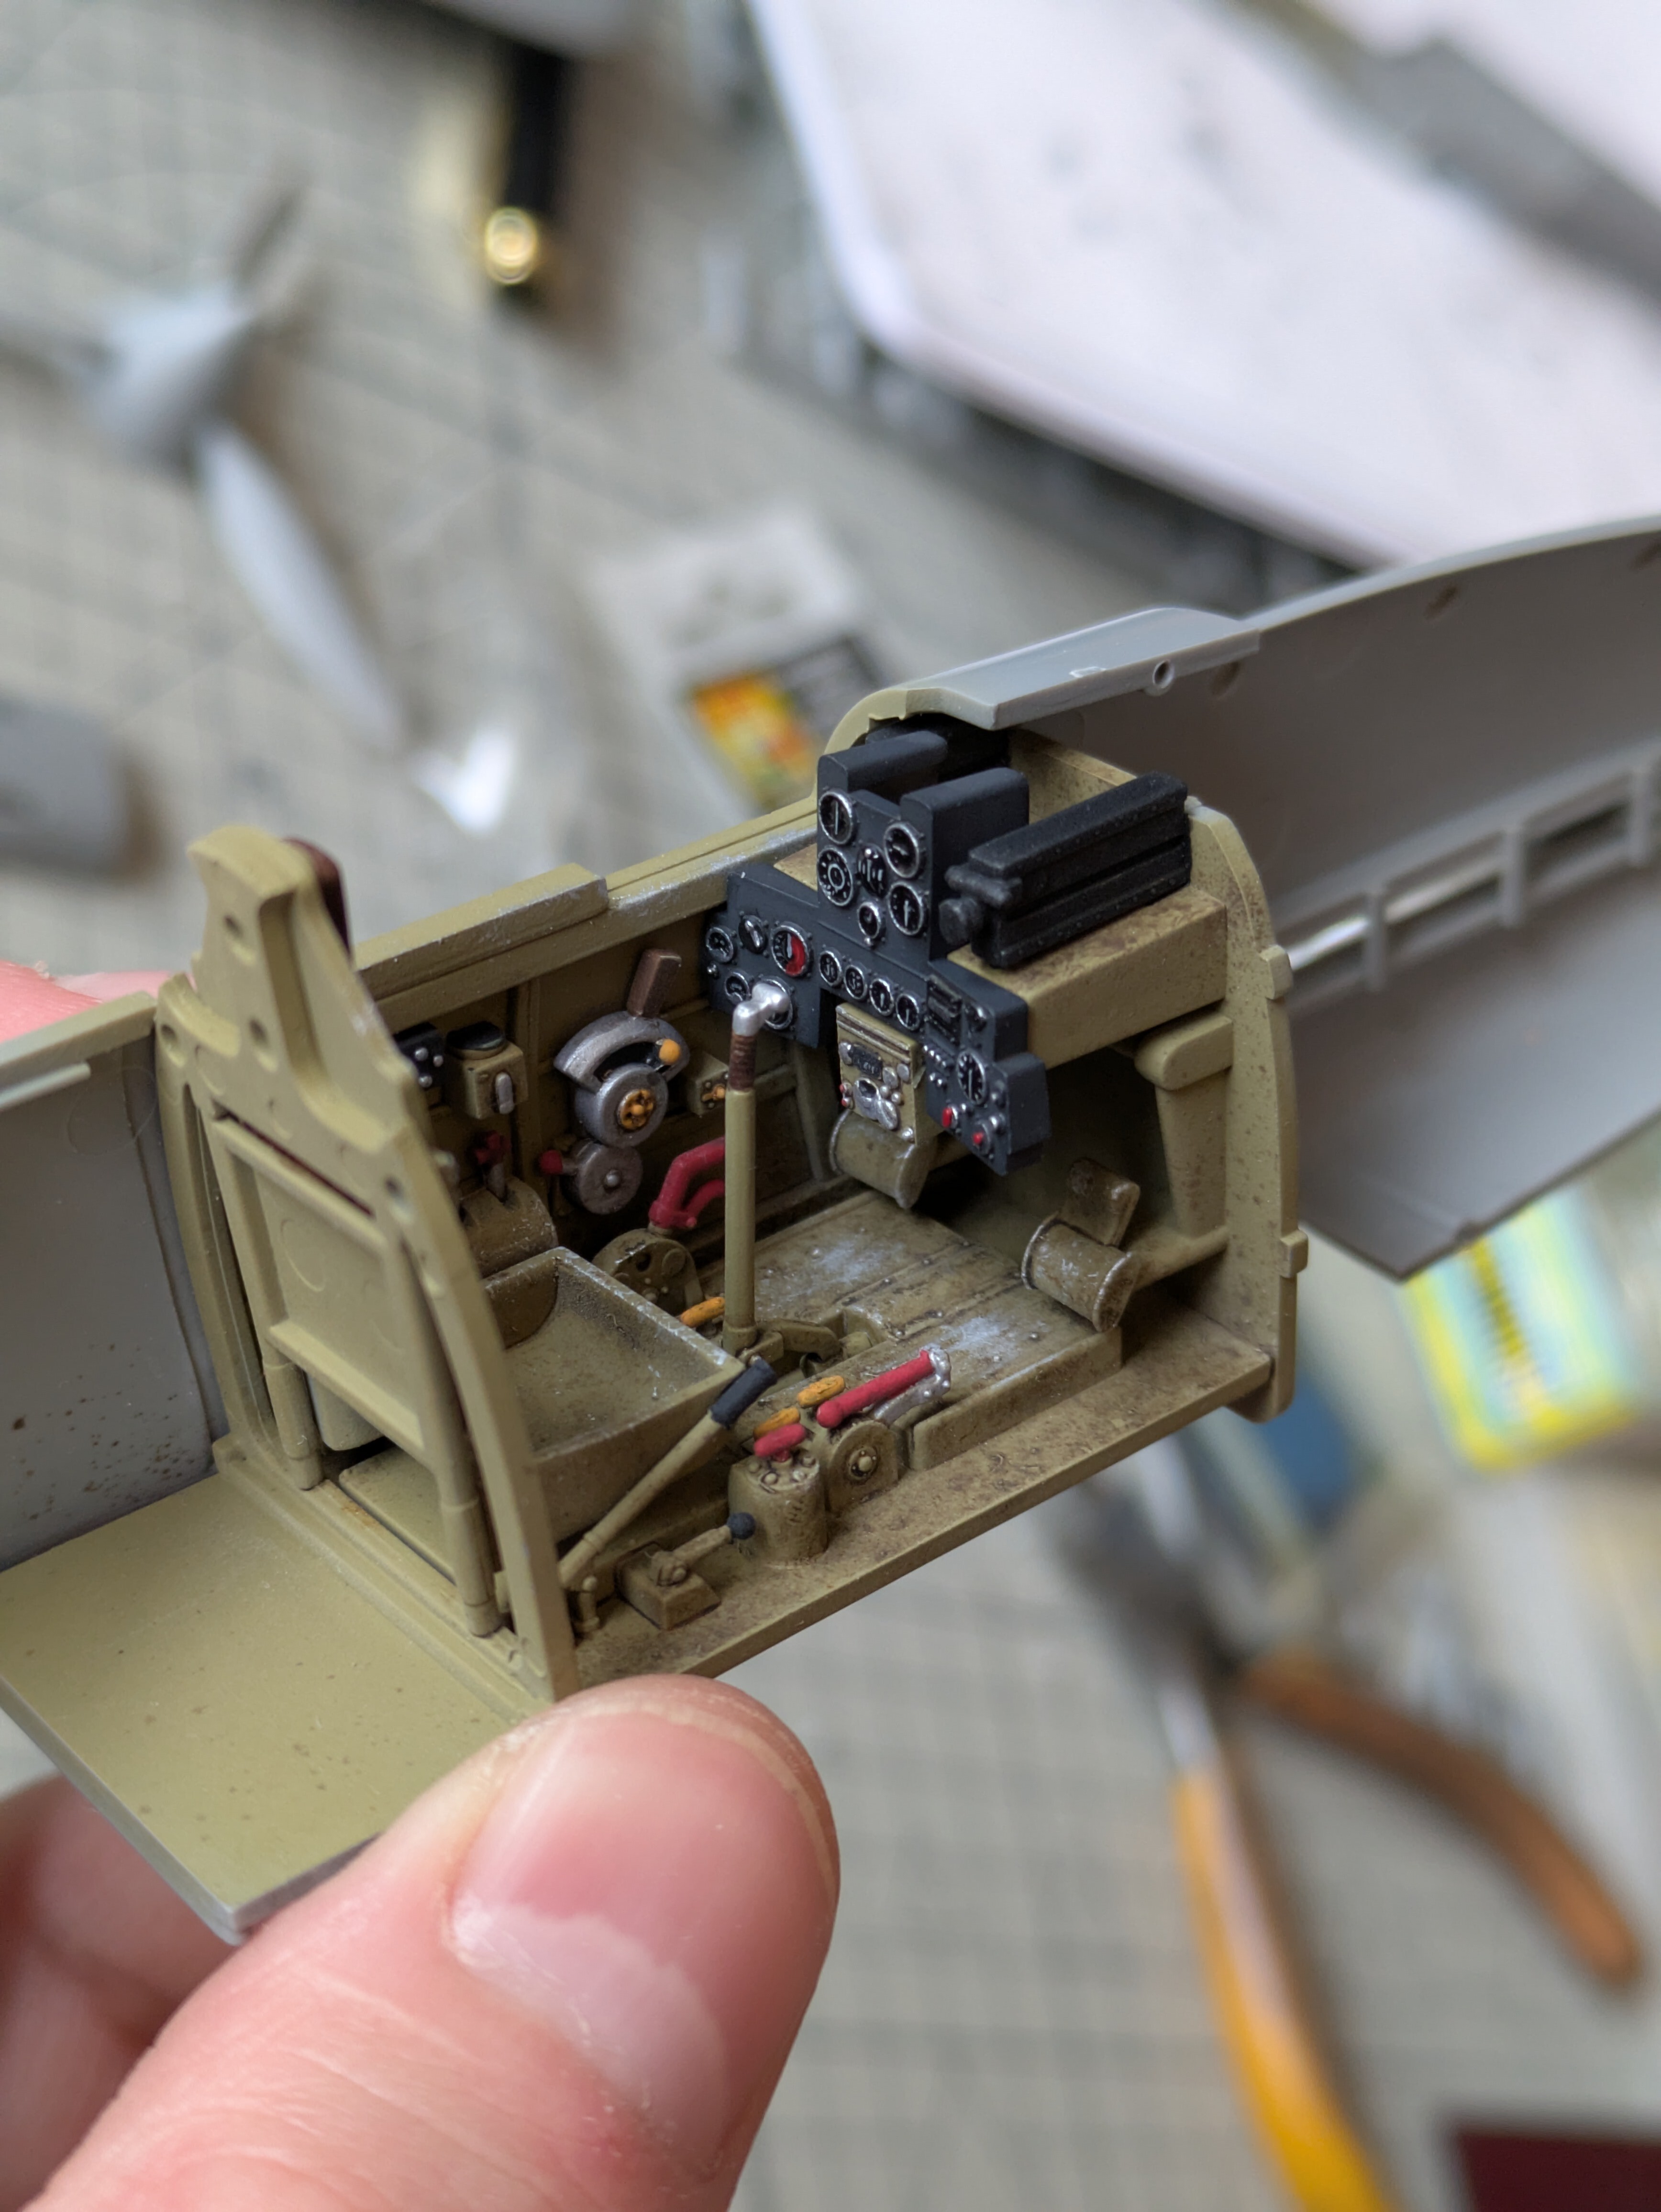
Completed cockpit - instrument panel focus.
Cockpit installed and weathered - top angle
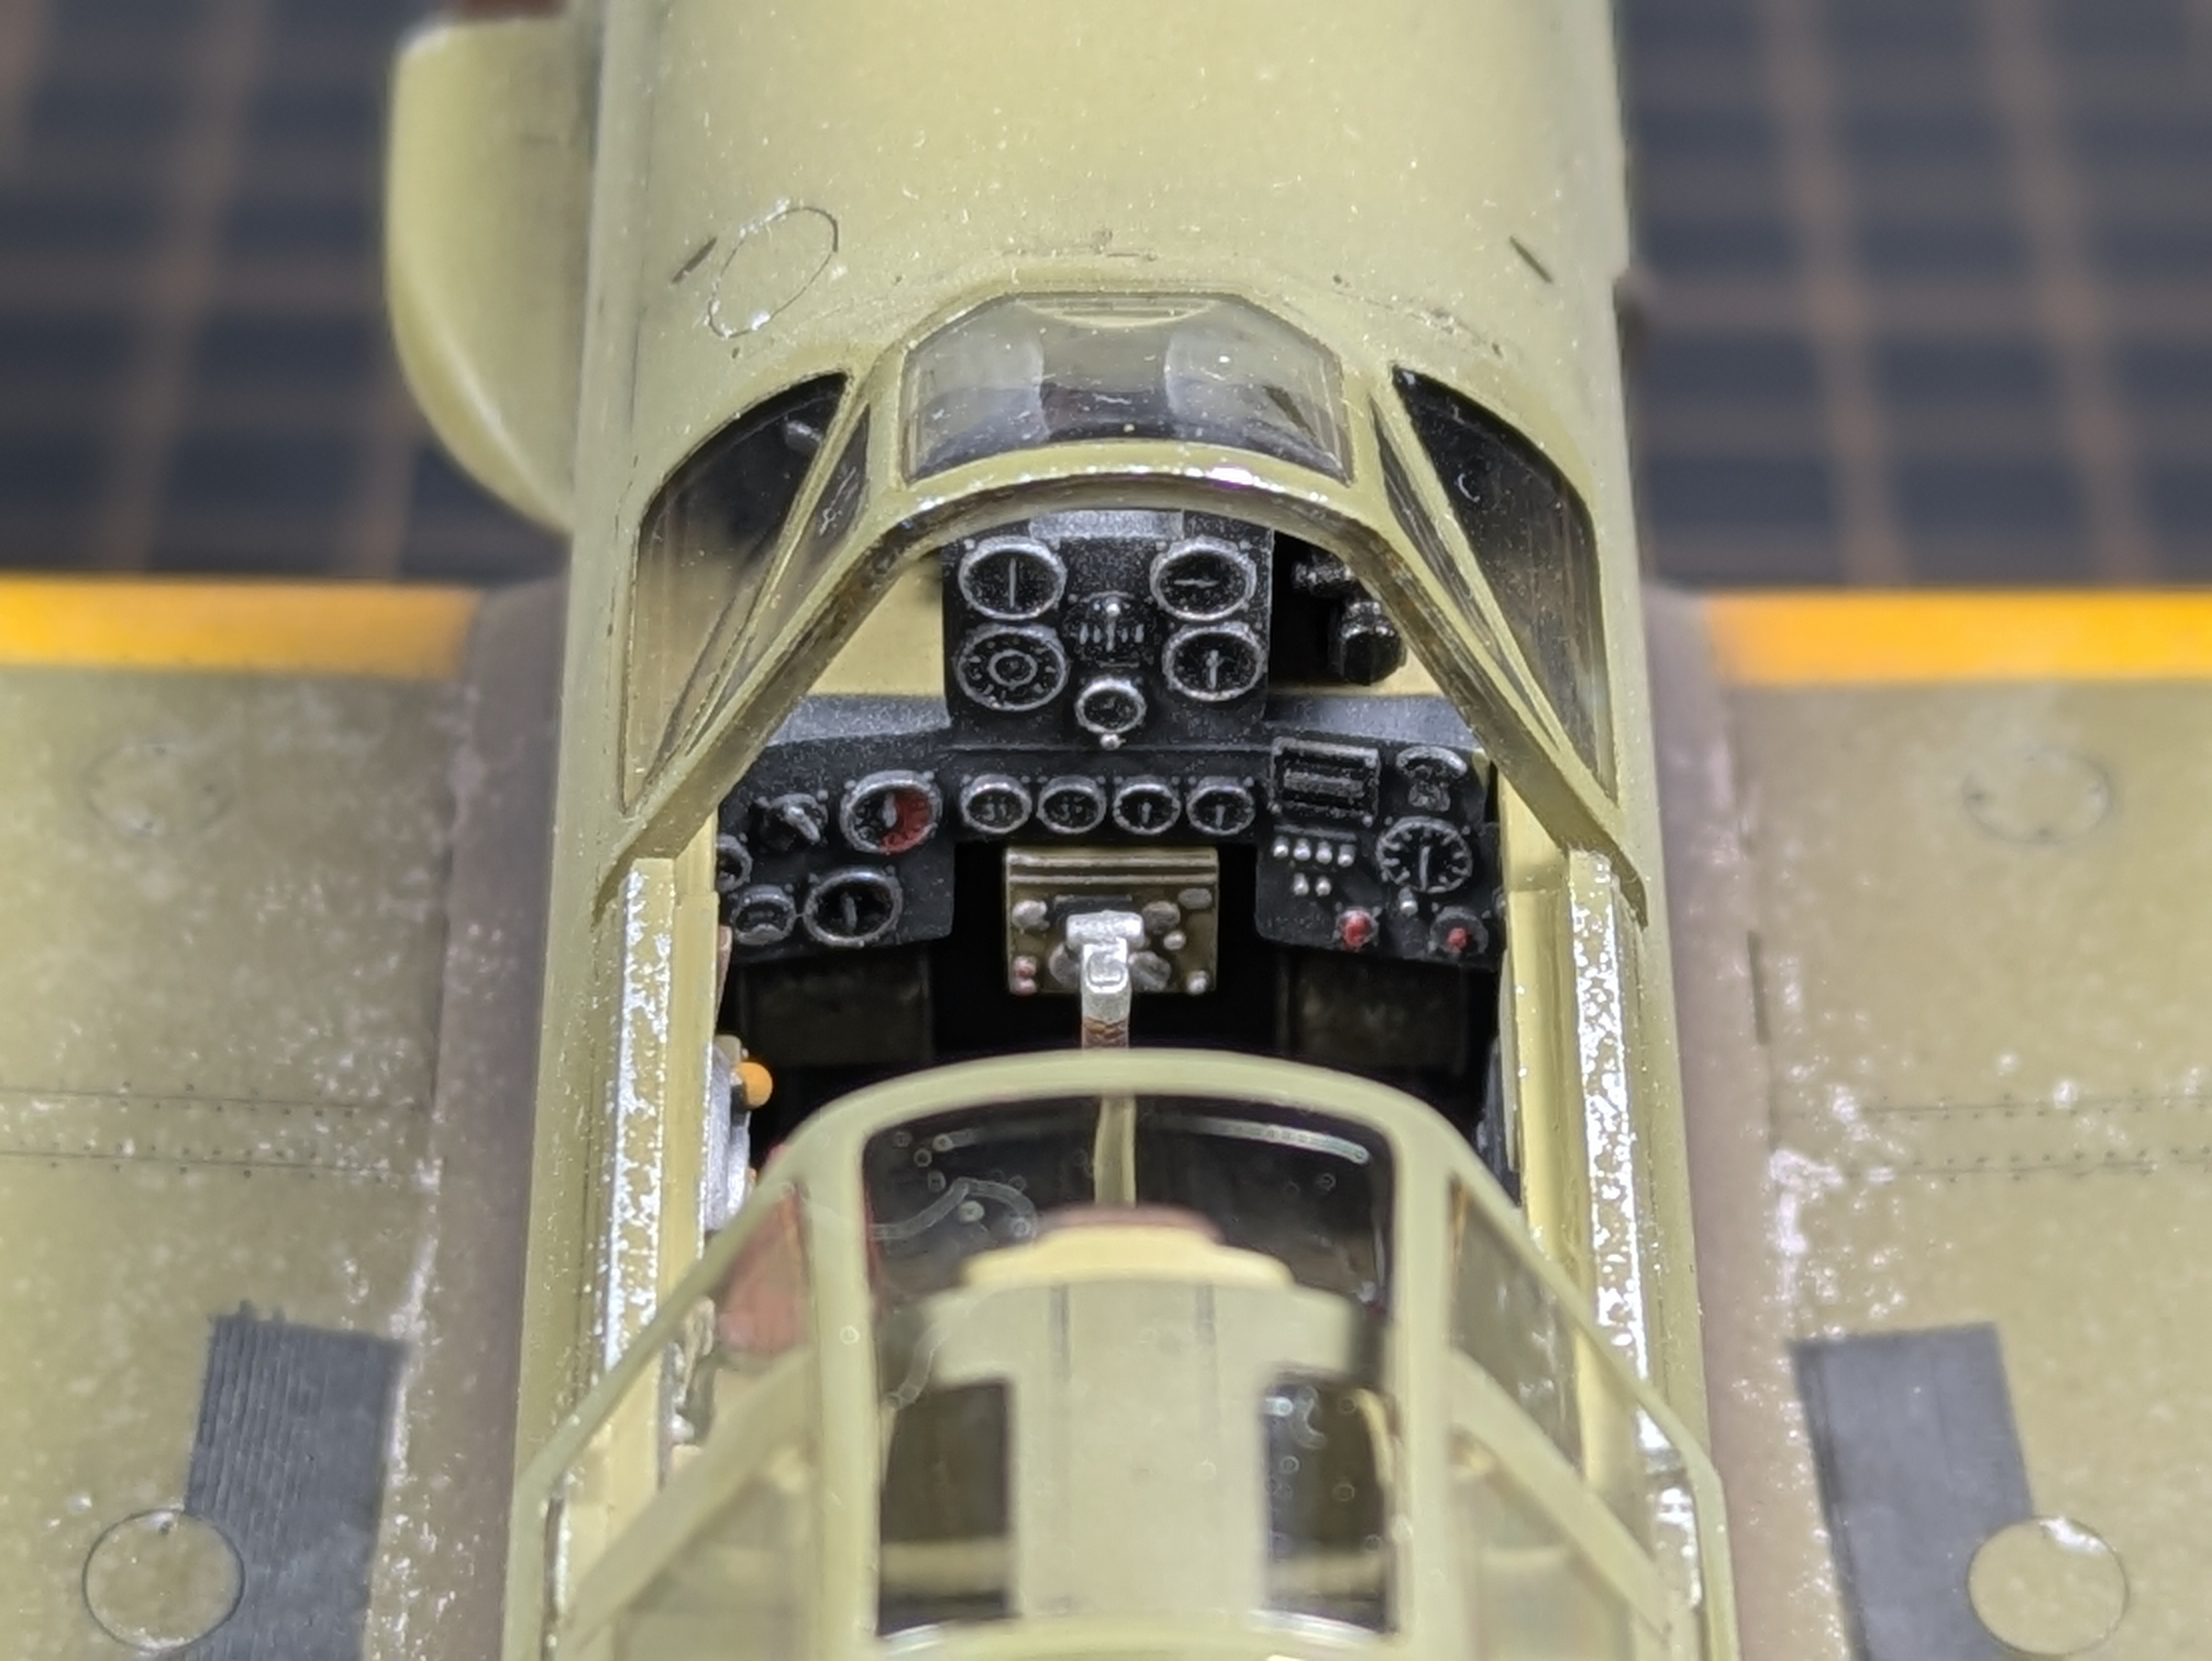
Instrument panel installed
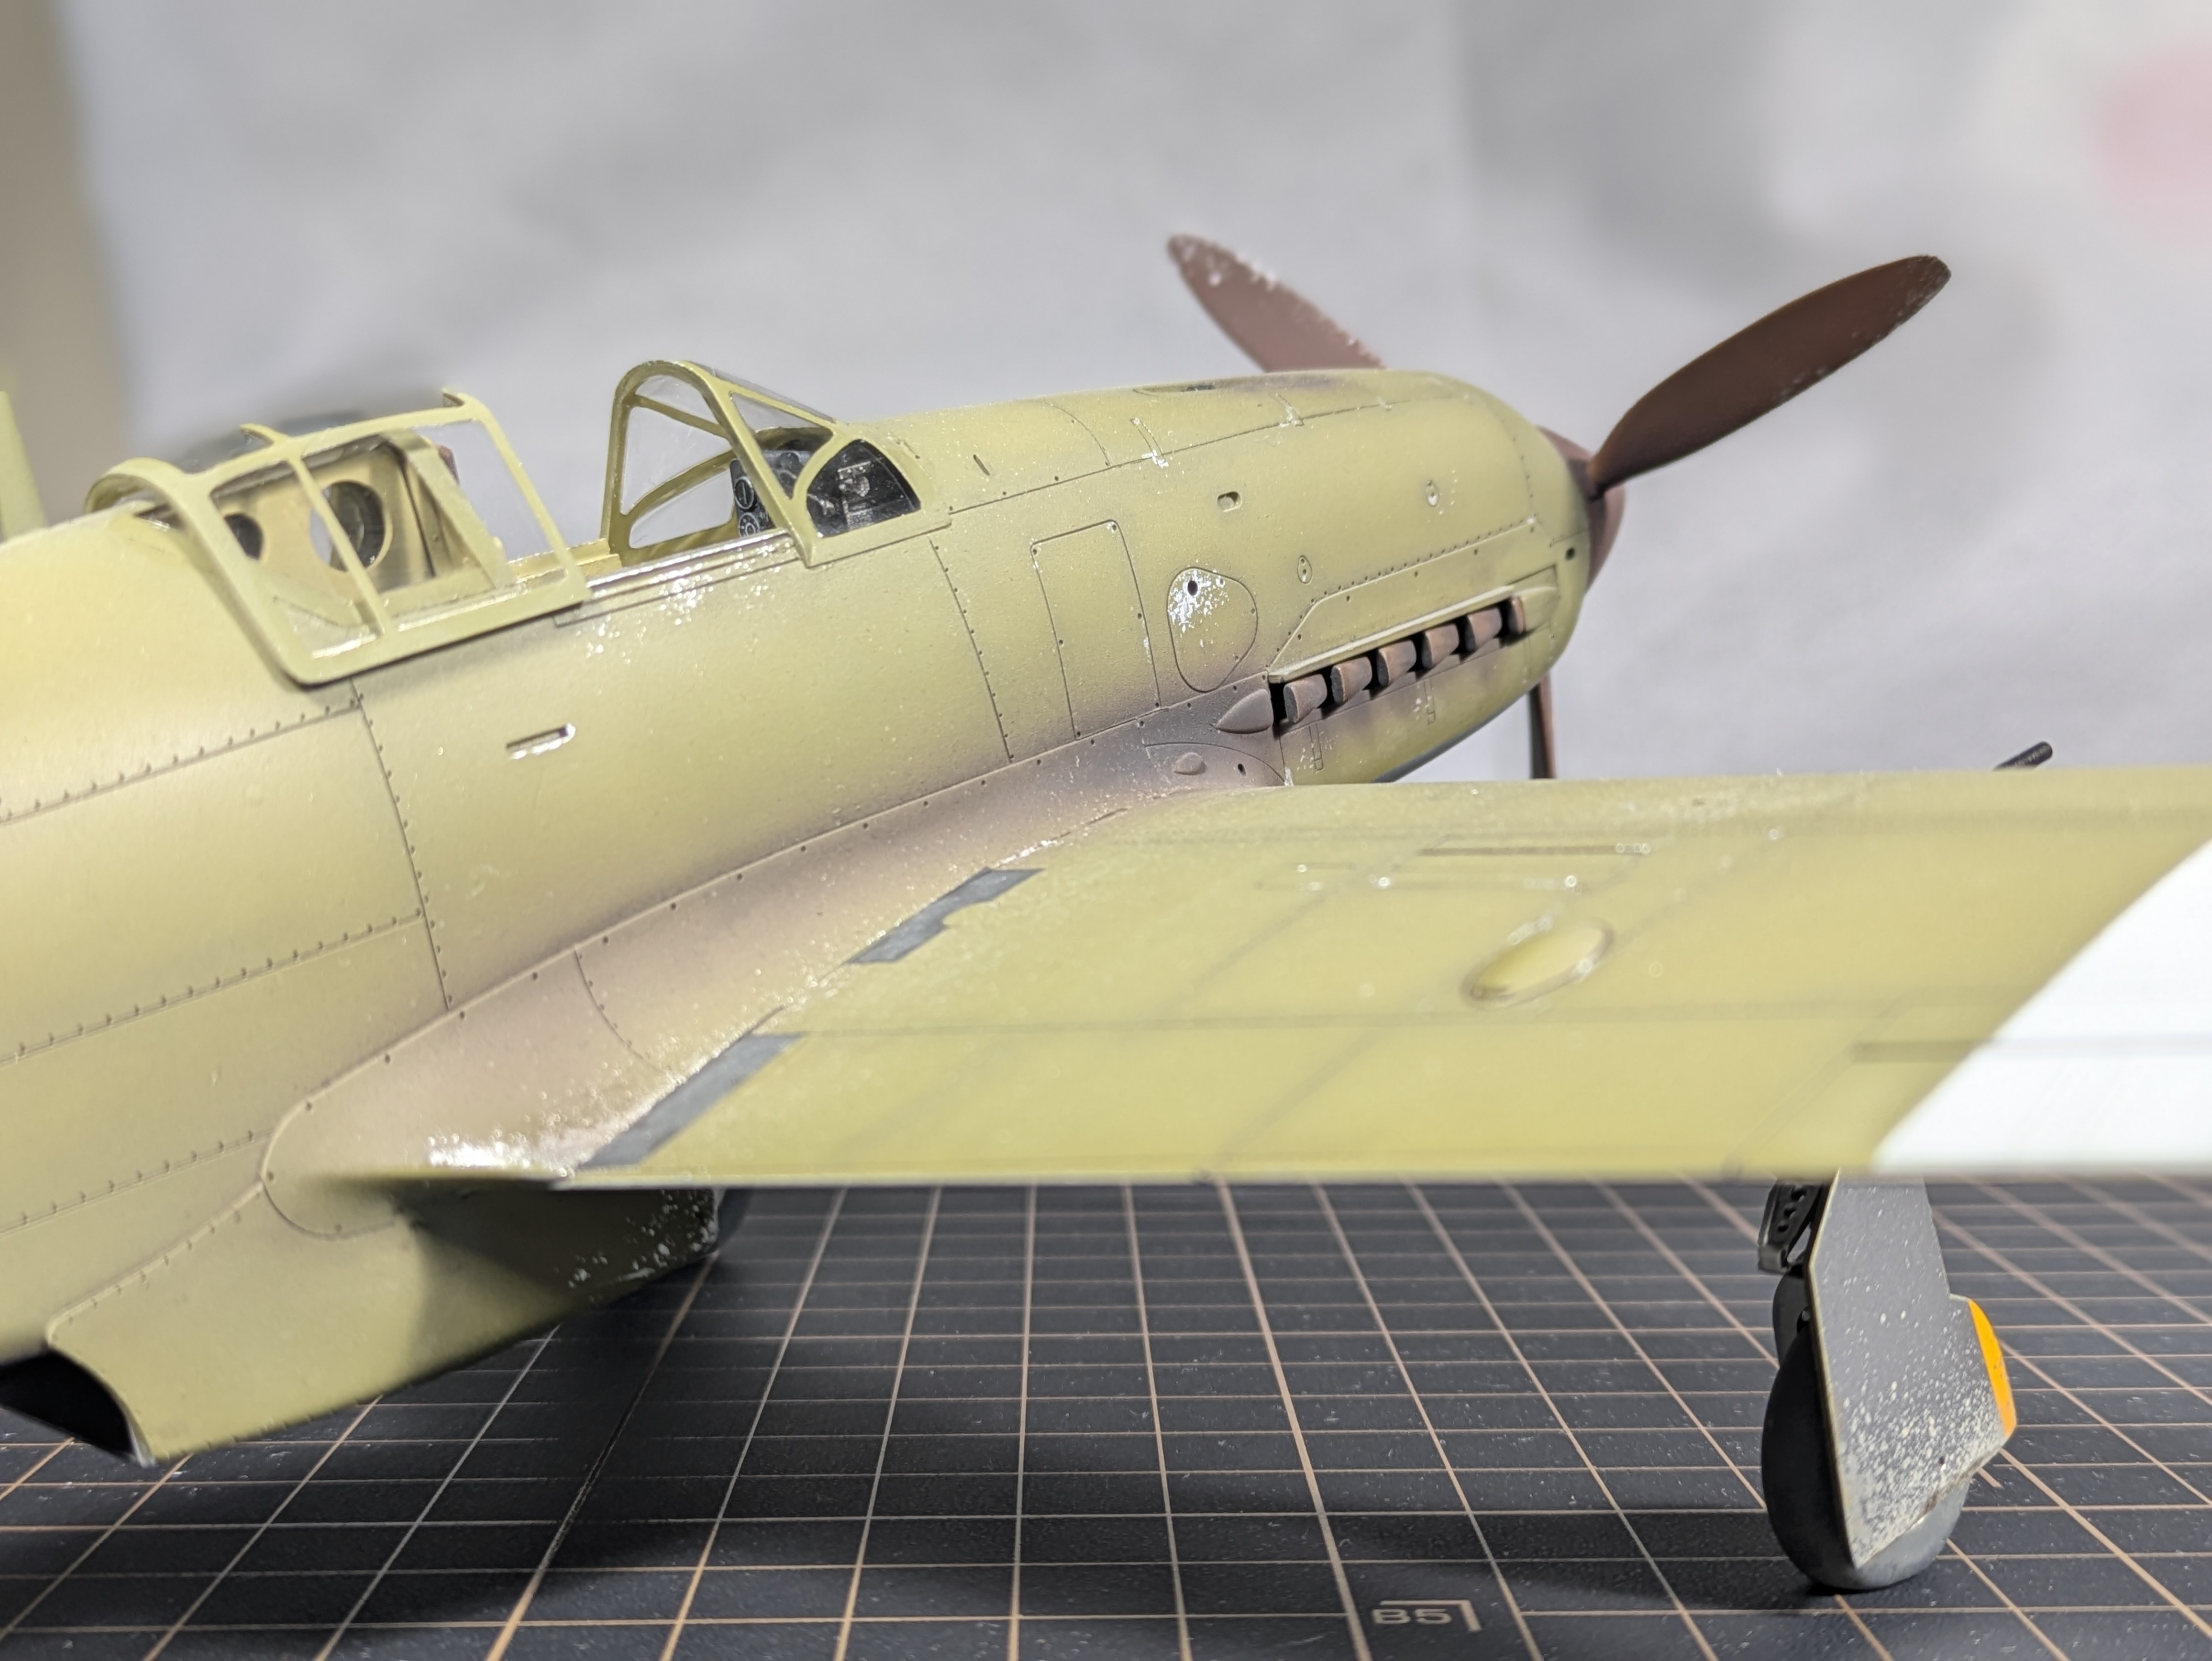
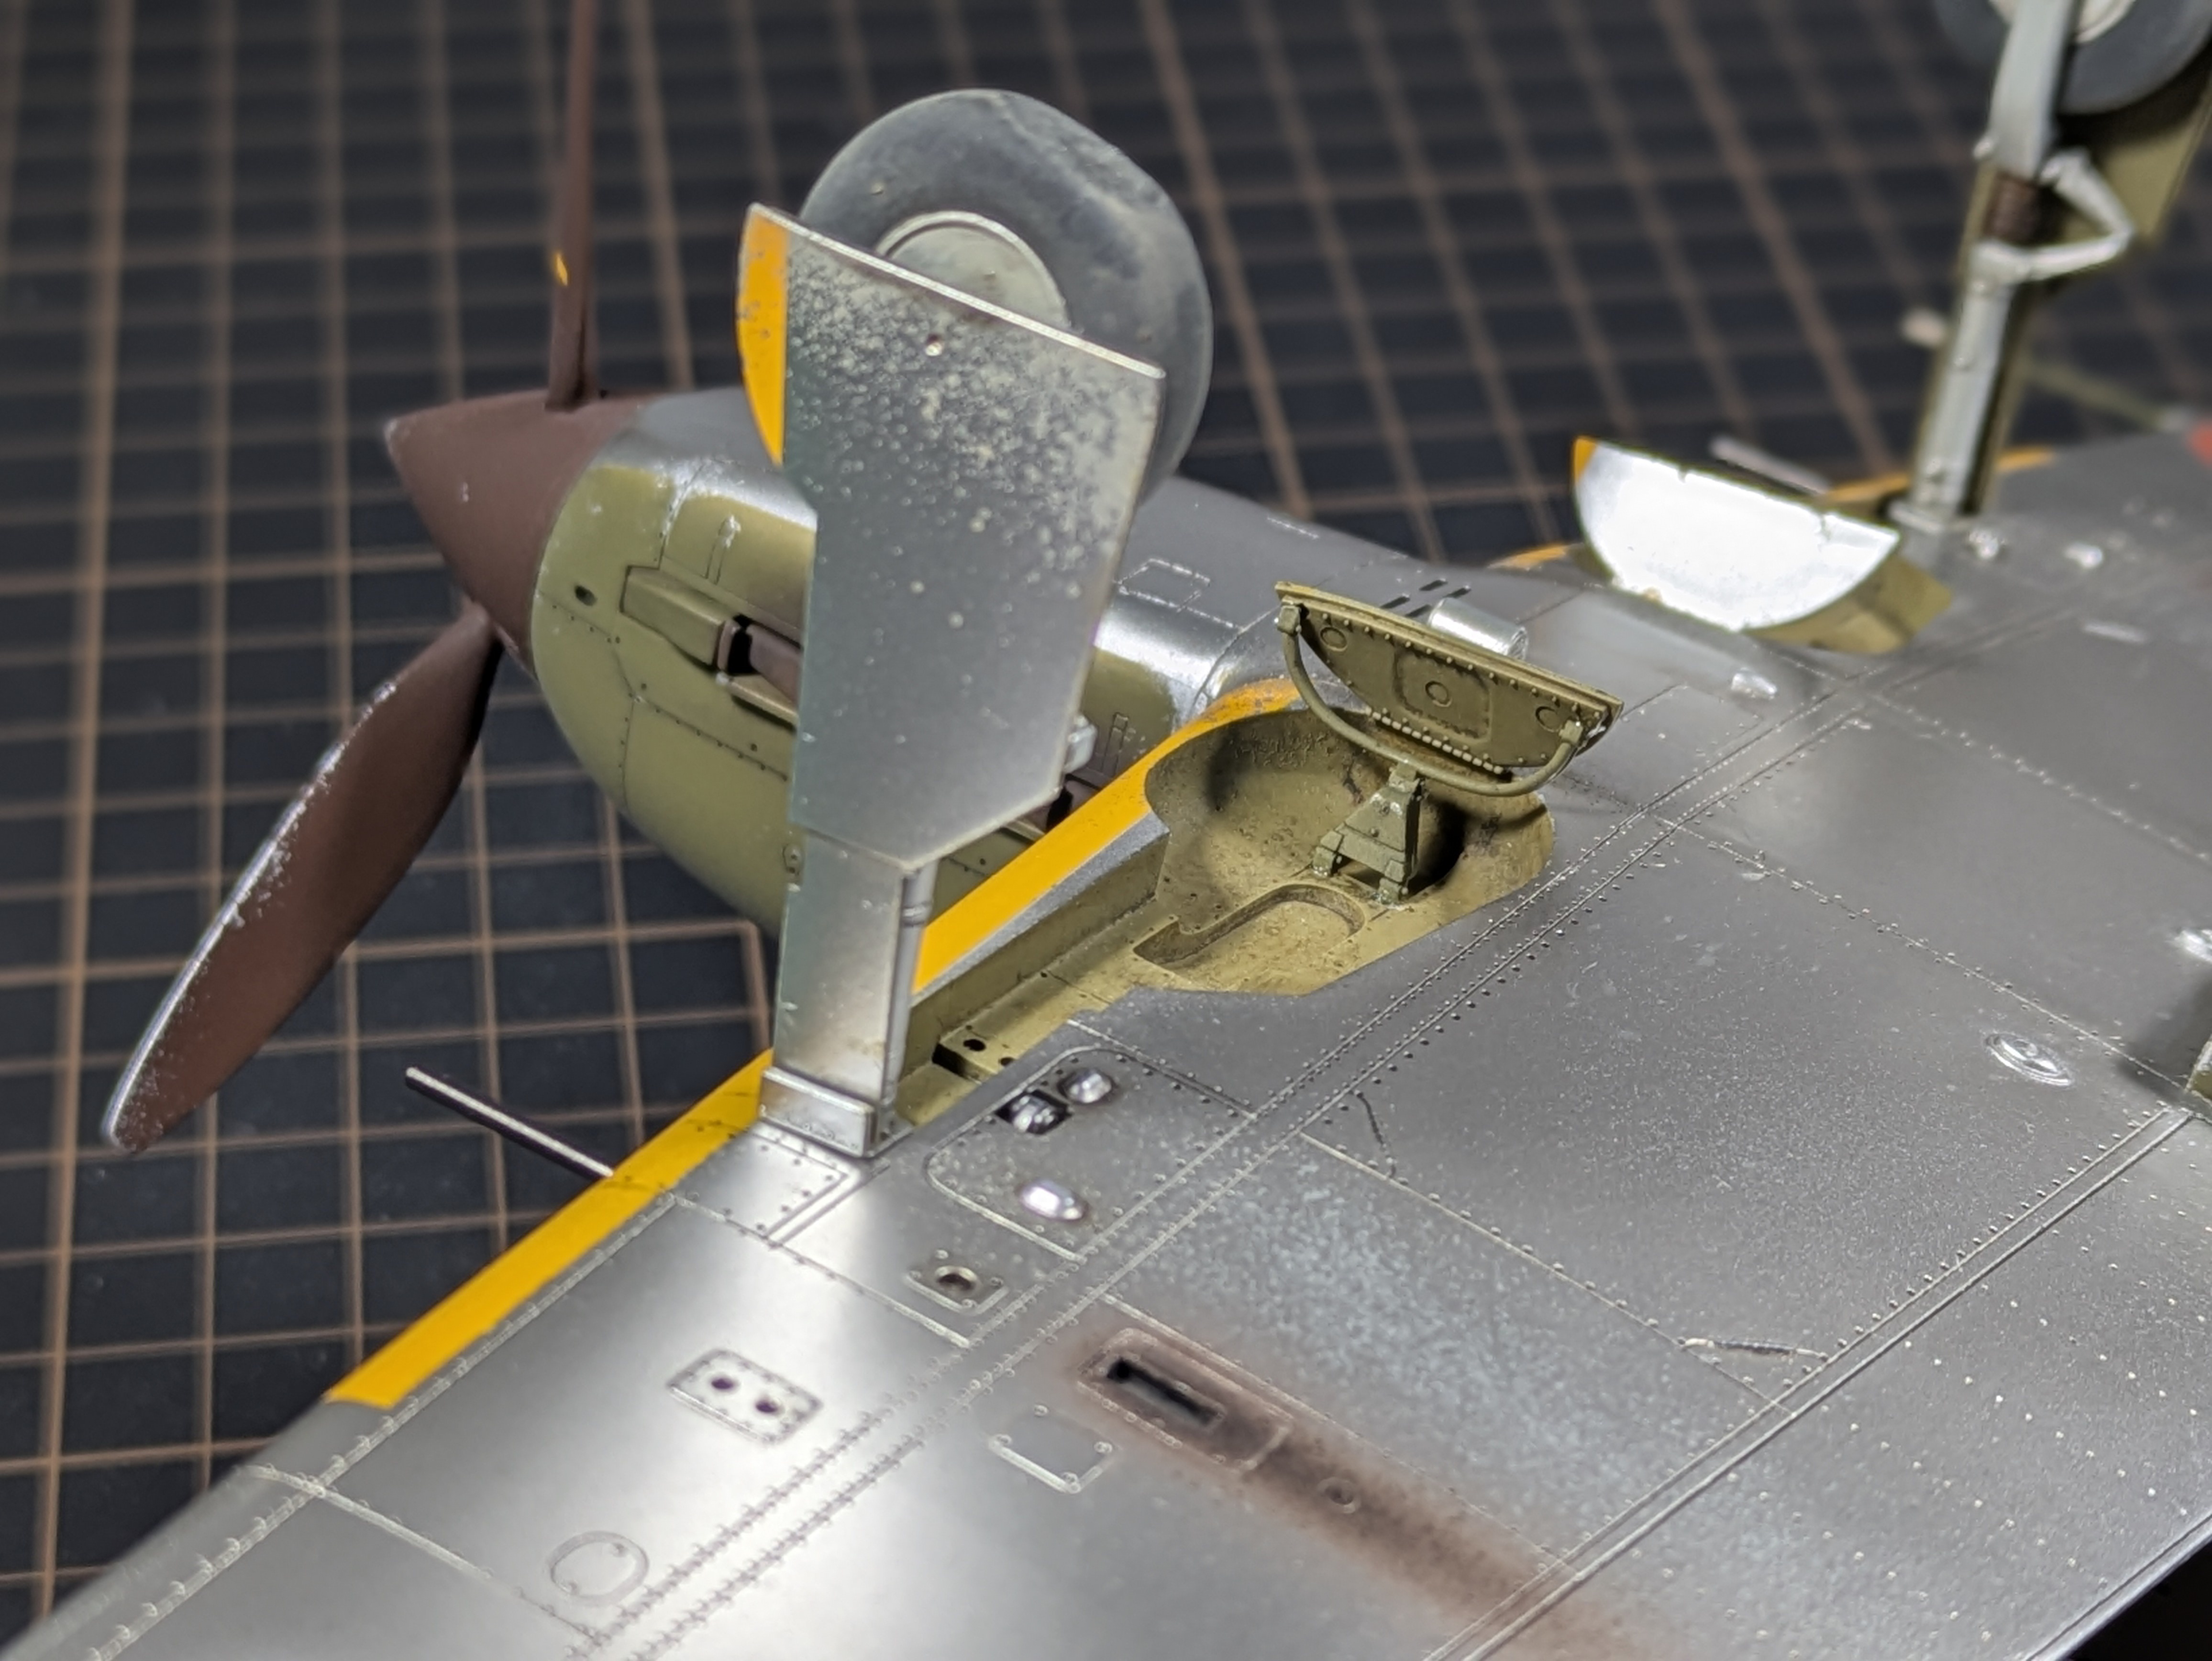
Underside - Black Primer, Kaleido Silver, Olive Control Surfaces
Underside primed with Mecha Black then covered with Kaleido Metal Silver for the natural metal finish. Control surfaces masked off and painted with Kaleido K105 Olive Green. Leading edge identification stripes in Vallejo Gold Yellow, applied before the base colour so the yellow transfers cleanly onto the metallic surface - then masked off to protect from the topside colours.
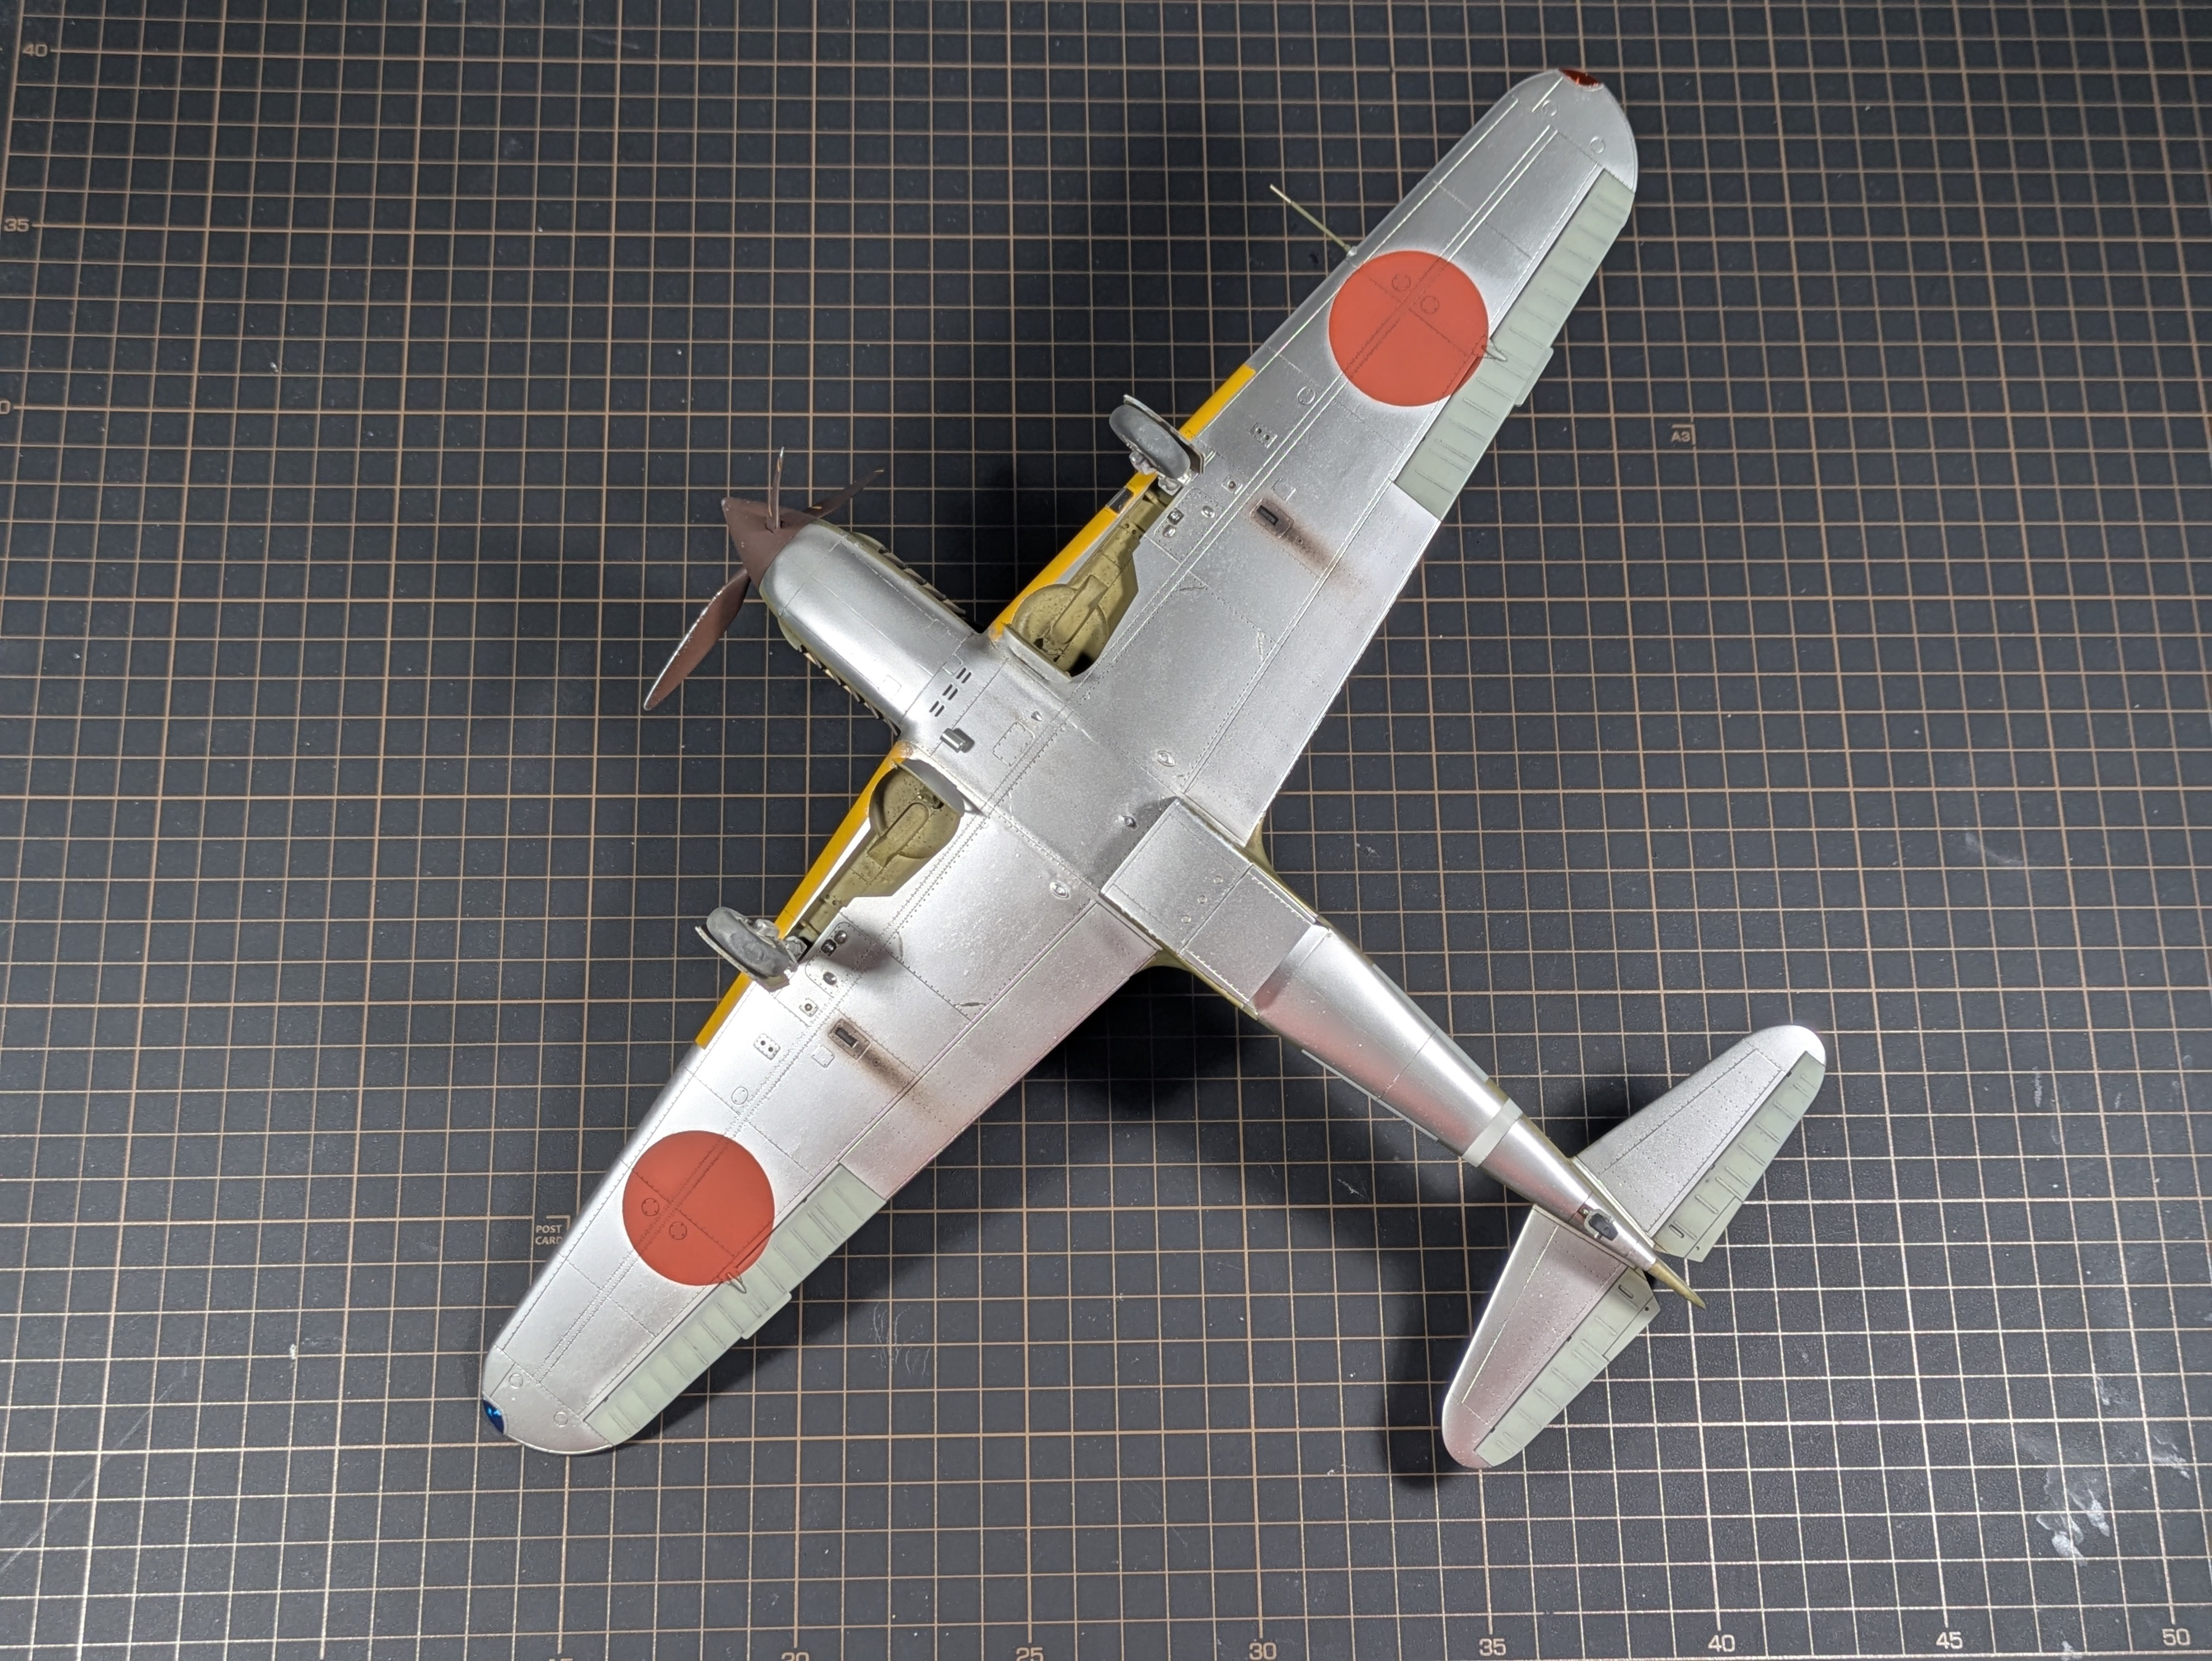
Underside complete
Underside rear - landing gear
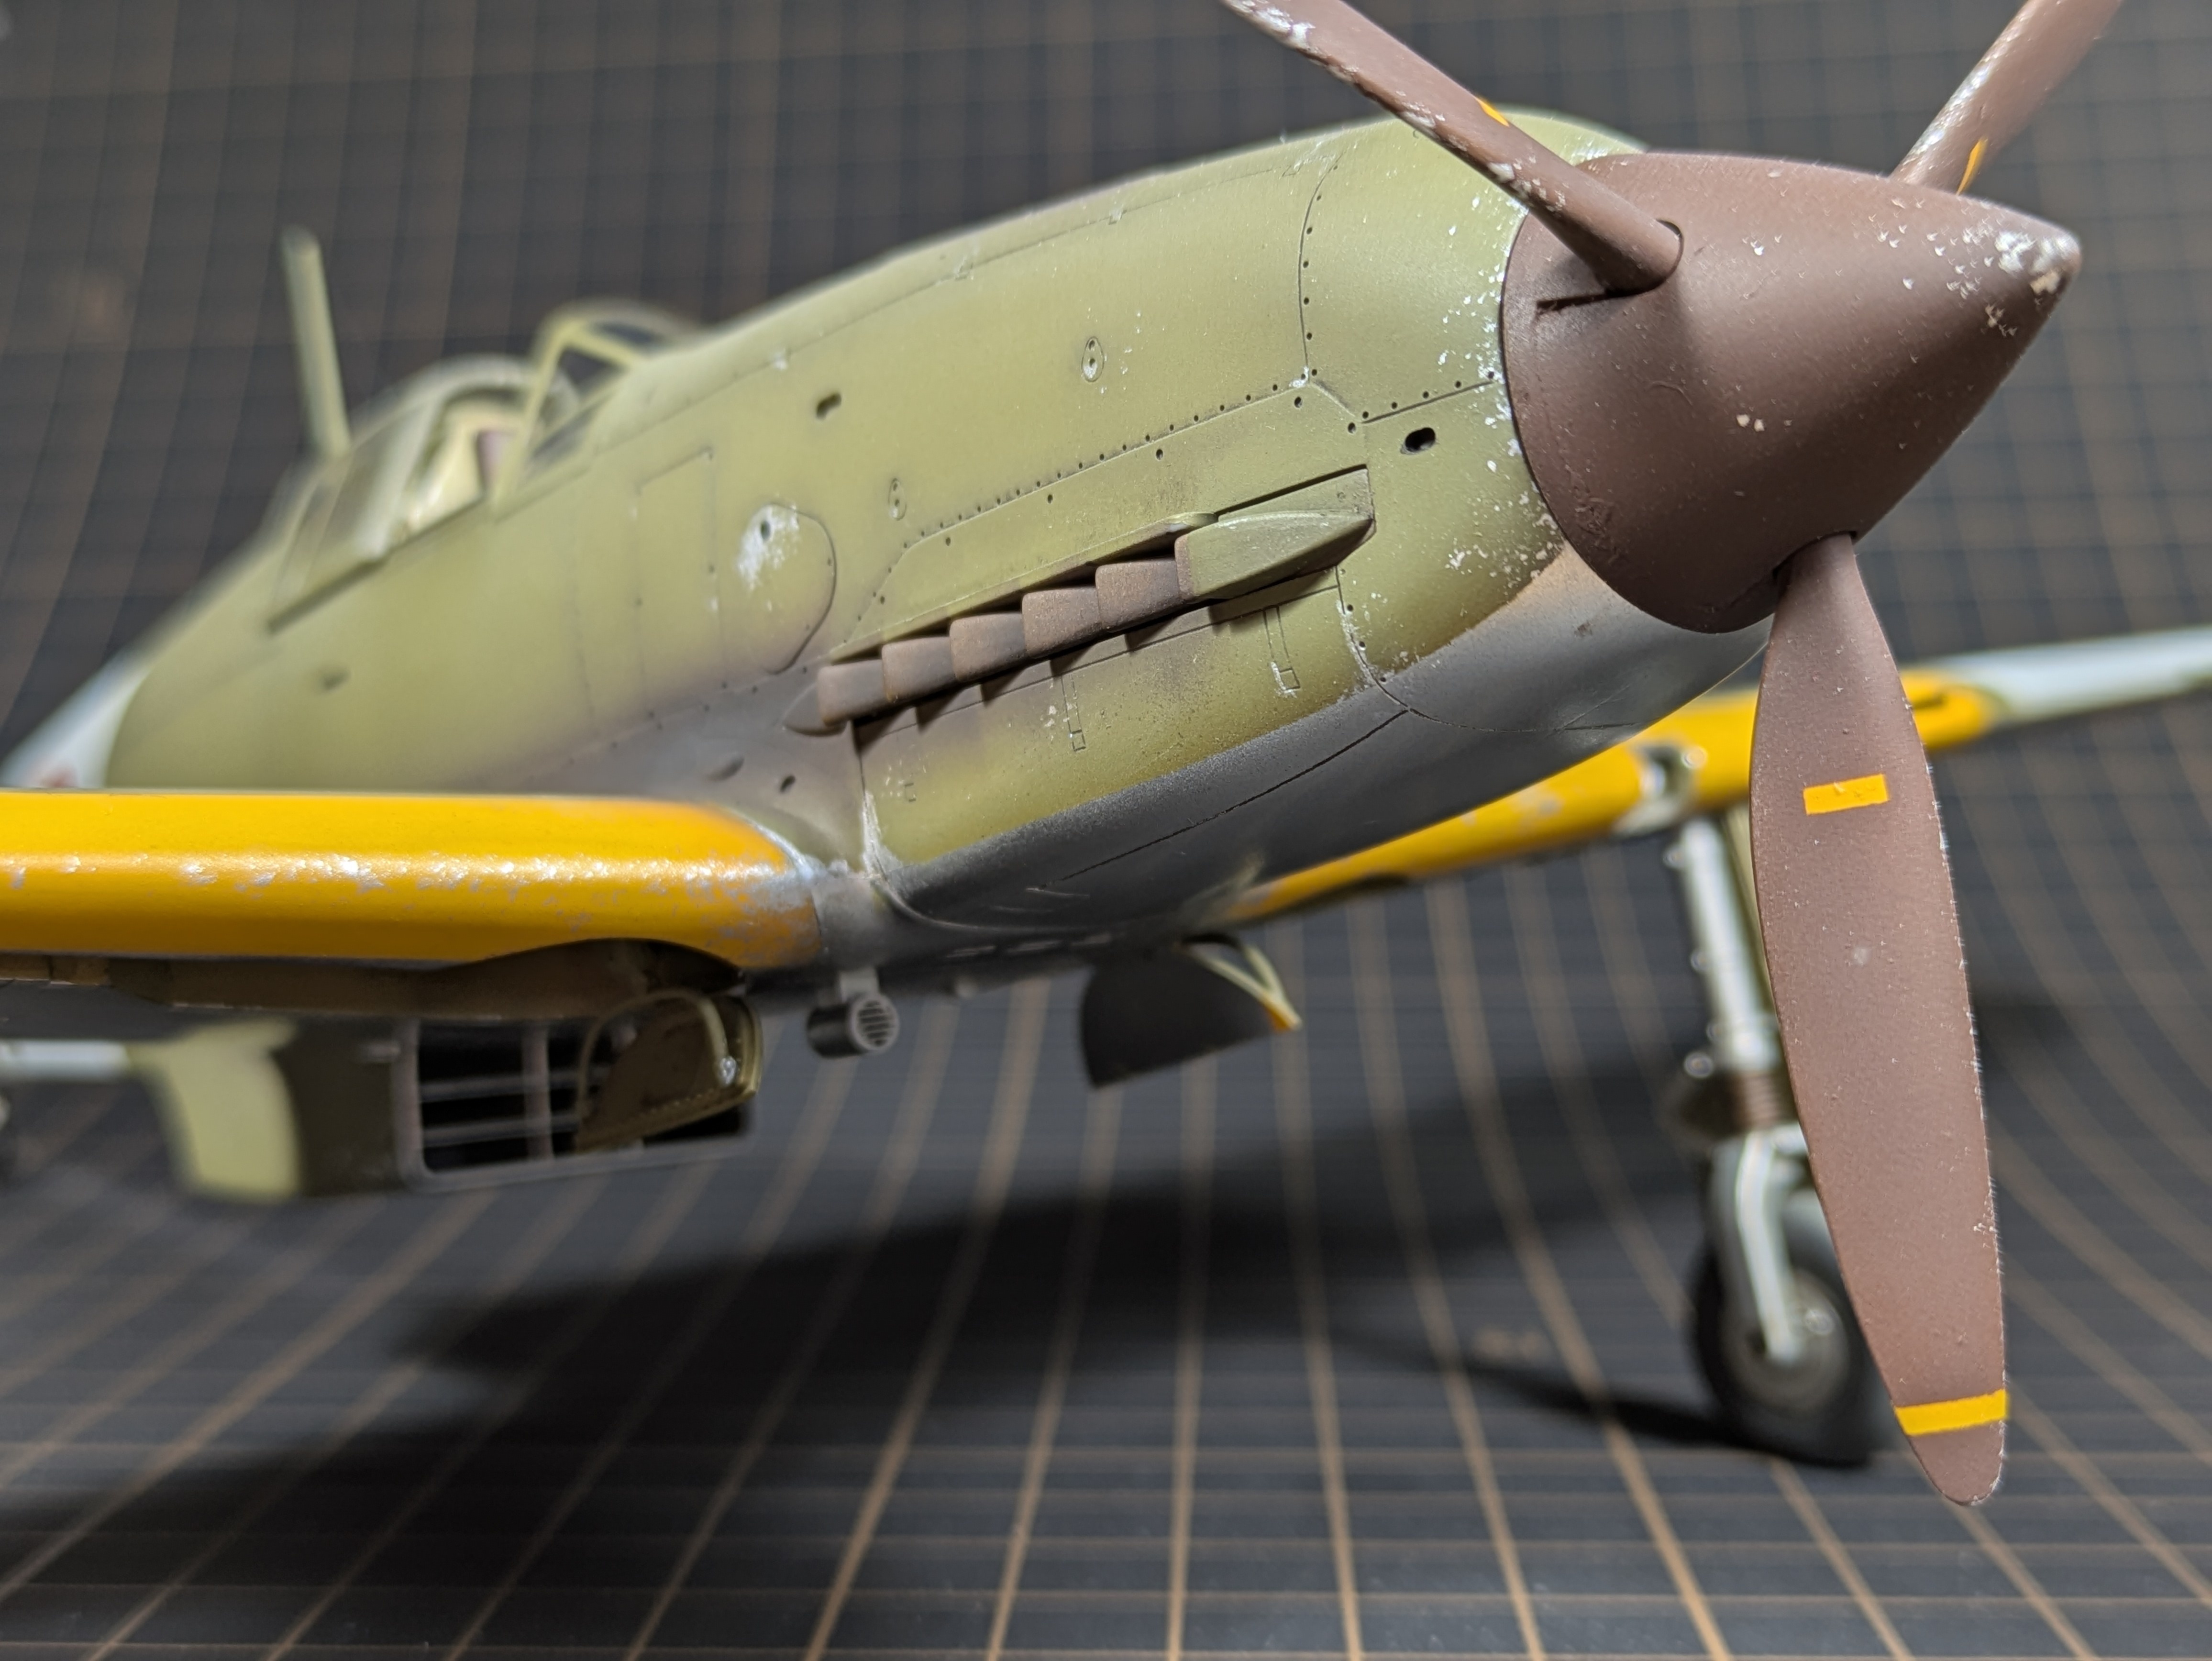
Topside Primer, Pre-Shade and Marbling
Grey primer on the topside. Charred Brown pre-shaded onto the panel lines. Messy marbling inside the panels with Vallejo Camouflage Green and Kaleido K105 highlights on the fabric control surfaces to imply fading and depth. The goal is variation that reads through the final green coats without overwhelming them. The kit came with a one-piece closed canopy which was used as a sacrificial mask to protect the finished cockpit.
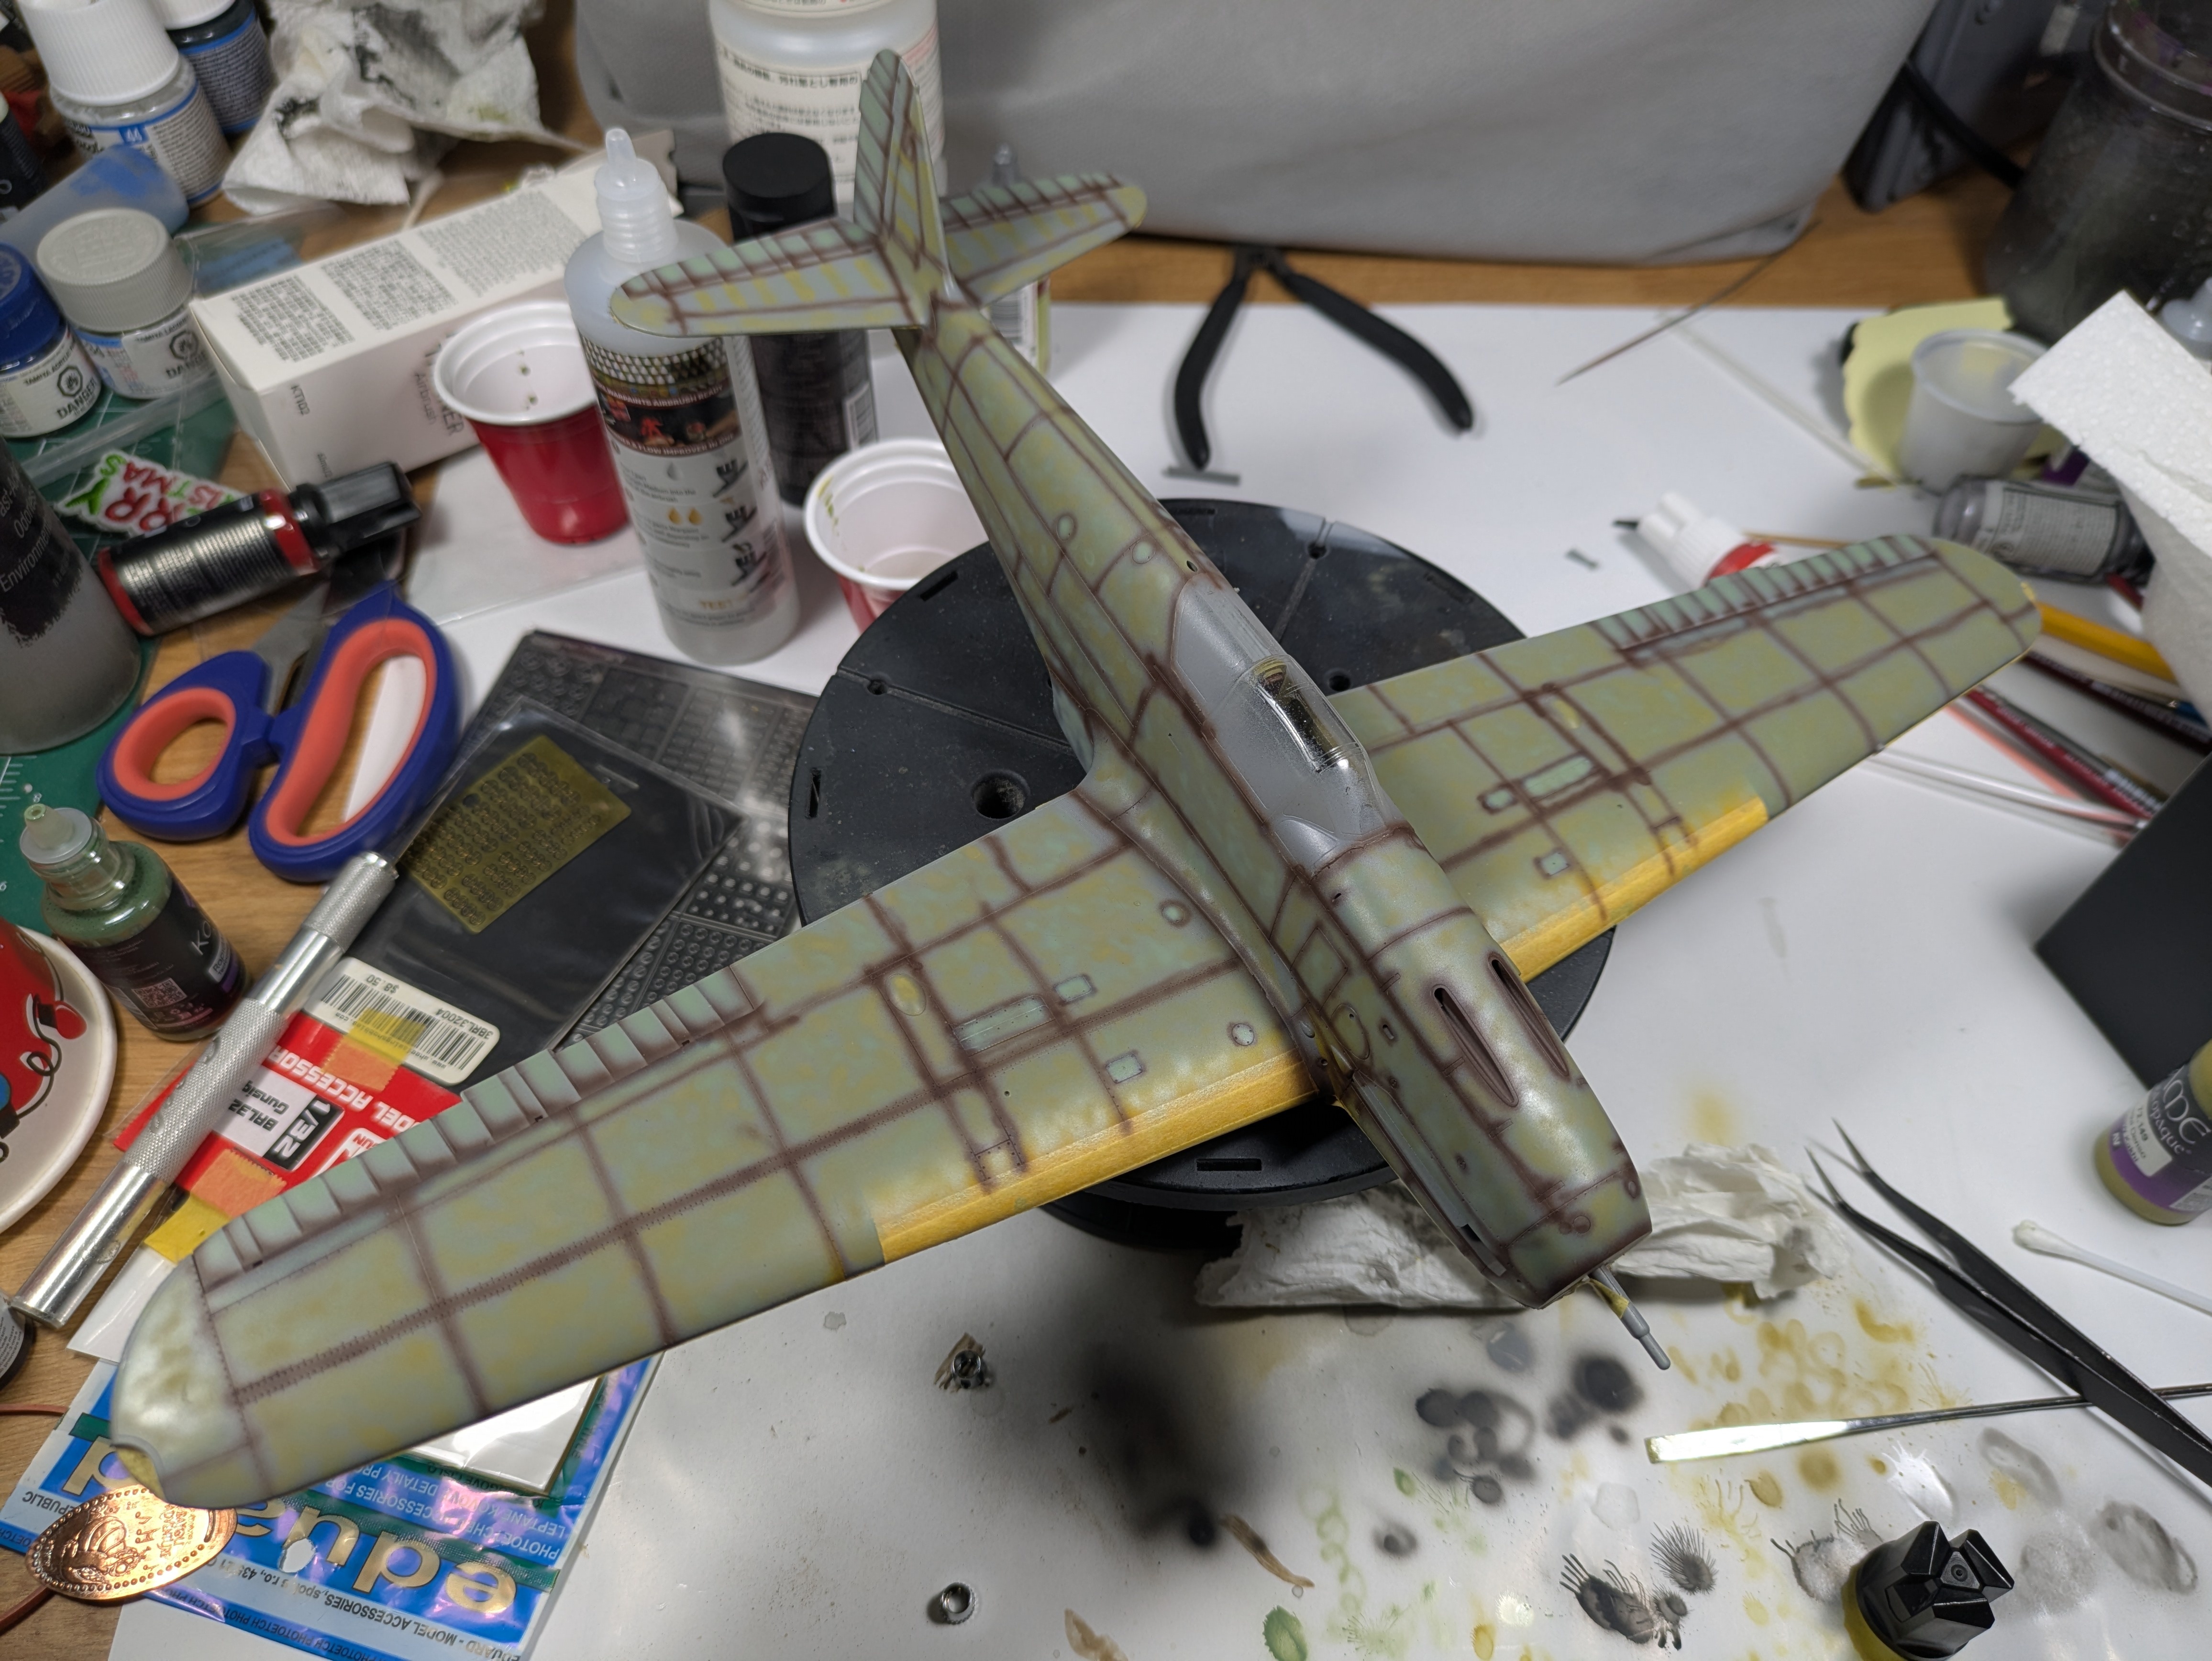
Pre-shade and marbling complete
First pass Gung-Ho Green - panel lines strong
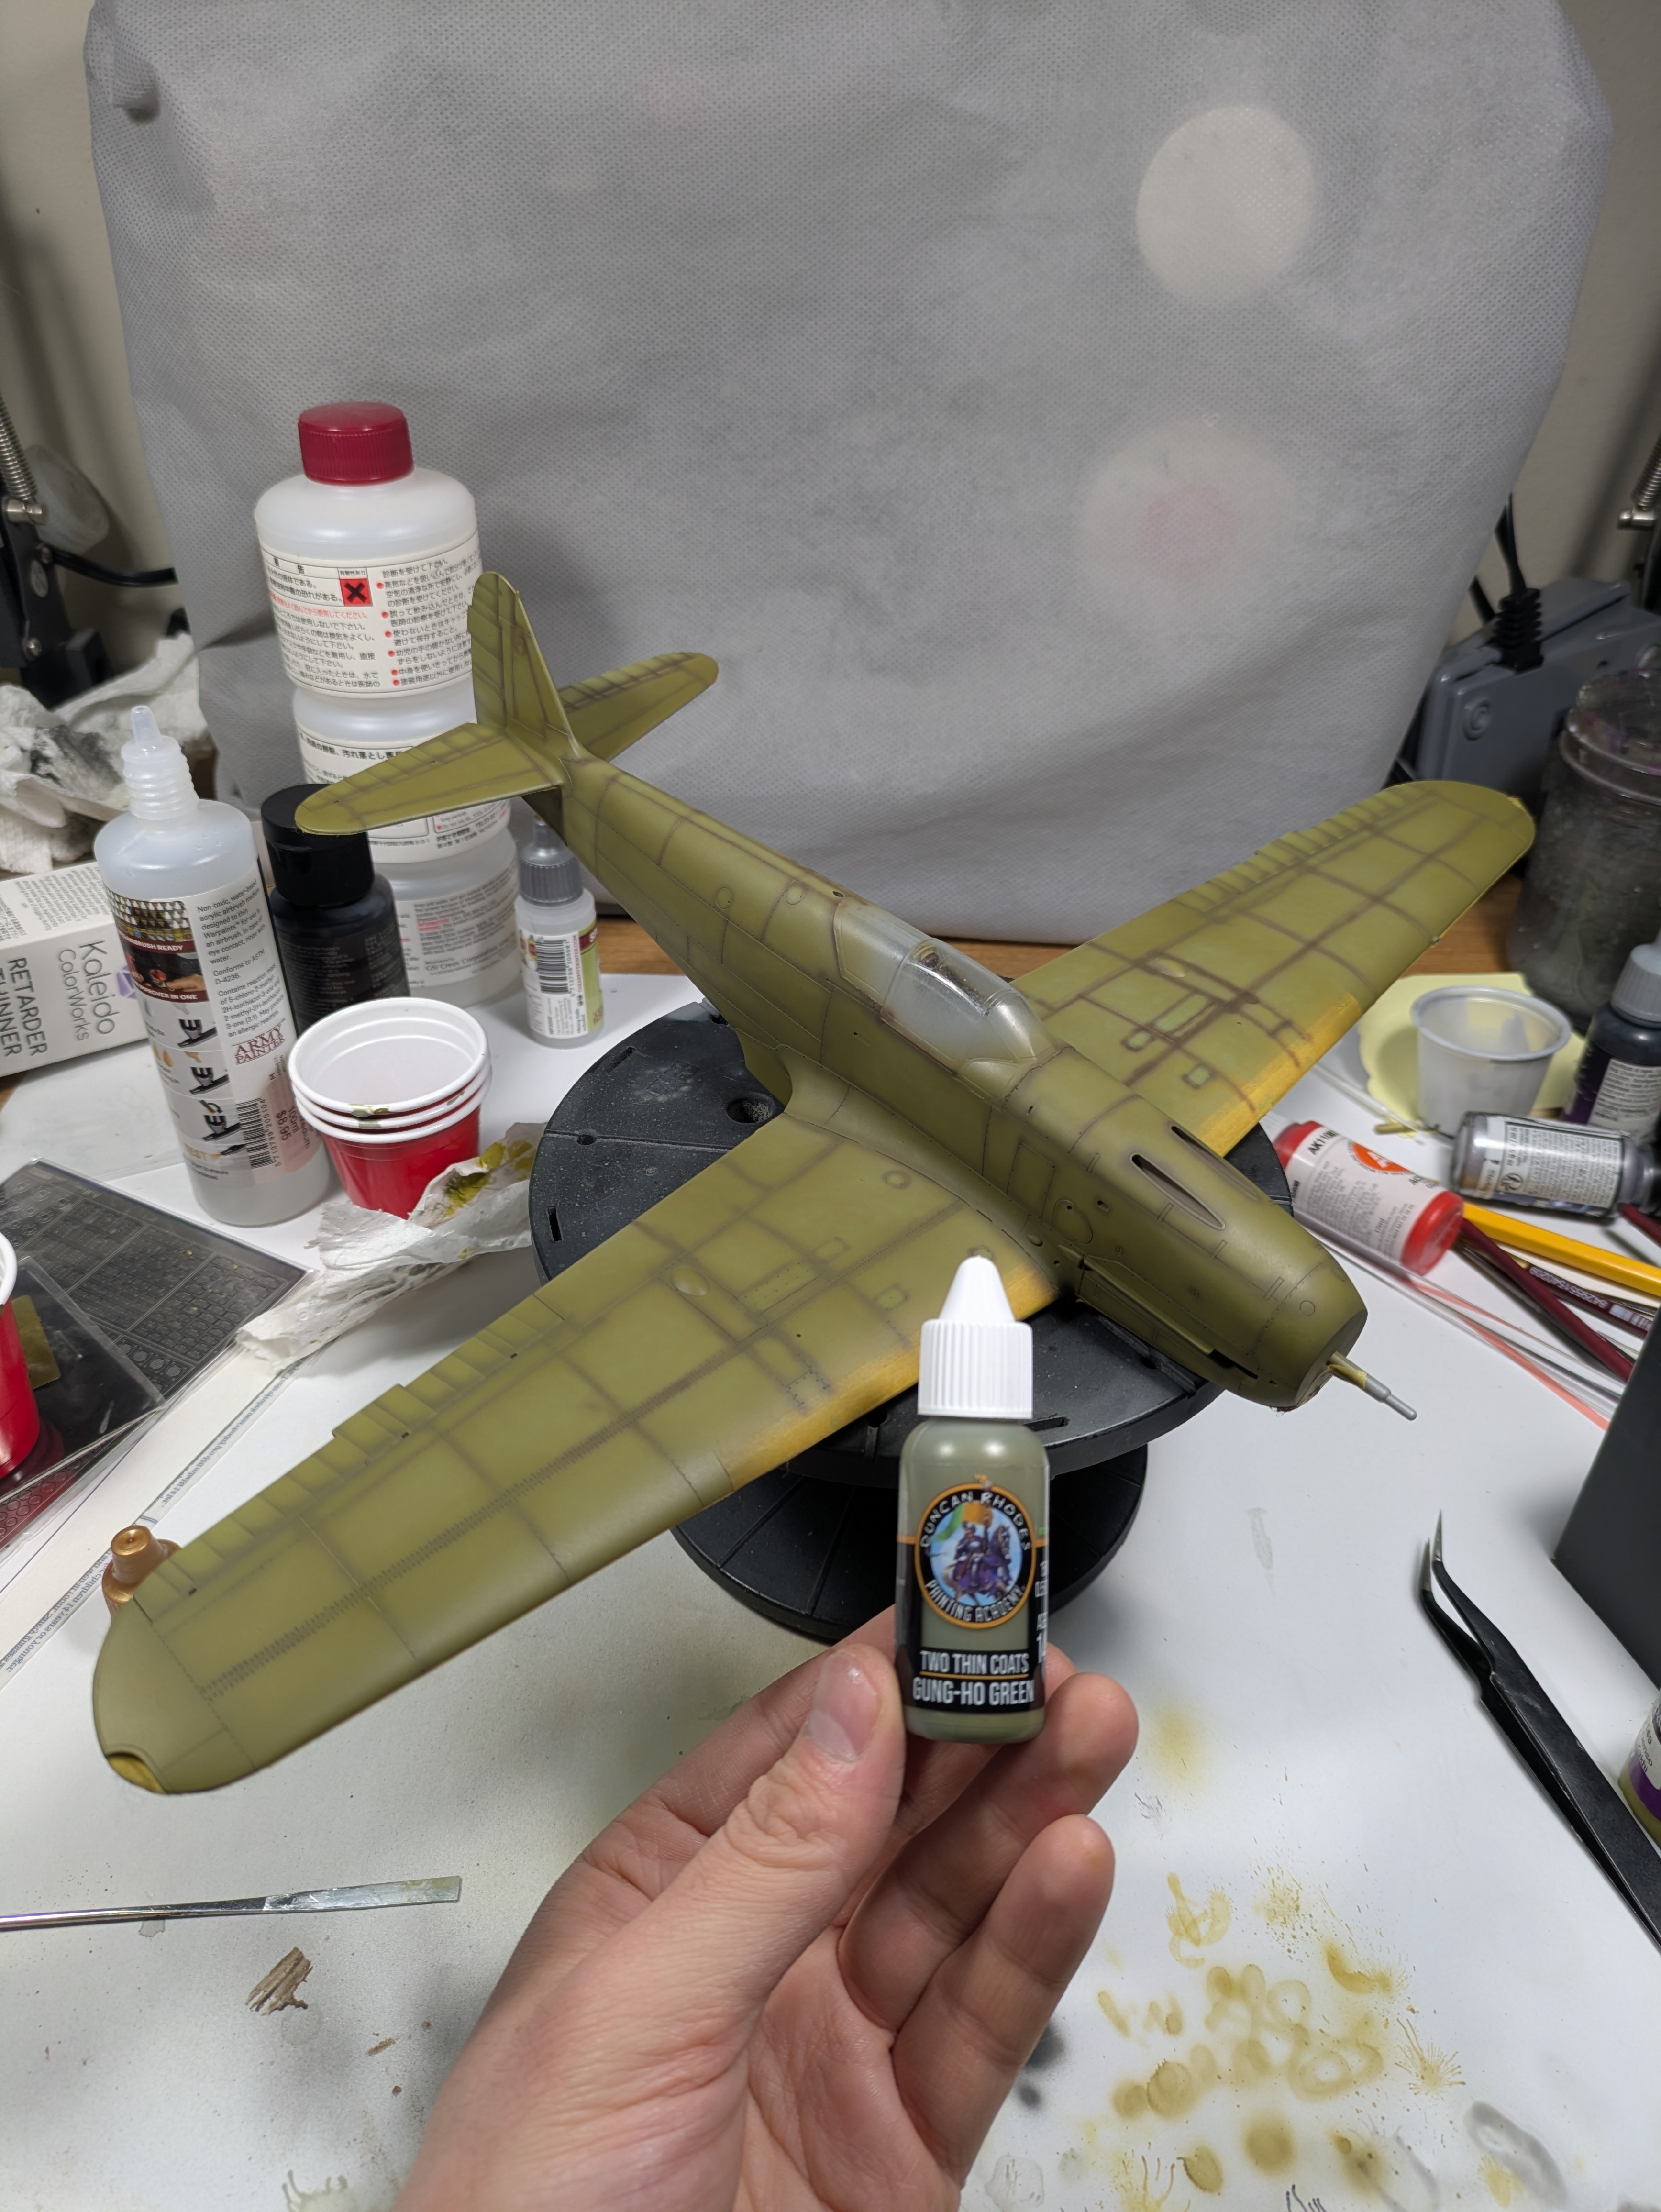
Topside Base Colour - Gung-Ho Green
Two Thin Coats Gung-Ho Green applied in two thin passes. The first pass is intentionally light - the pre-shaded panel lines show through strongly. A third pass brings it to the final result where panel variation is muted but still readable. Stop at the third pass - any more and the pre-shade work disappears entirely.
First pass - panel lines strong
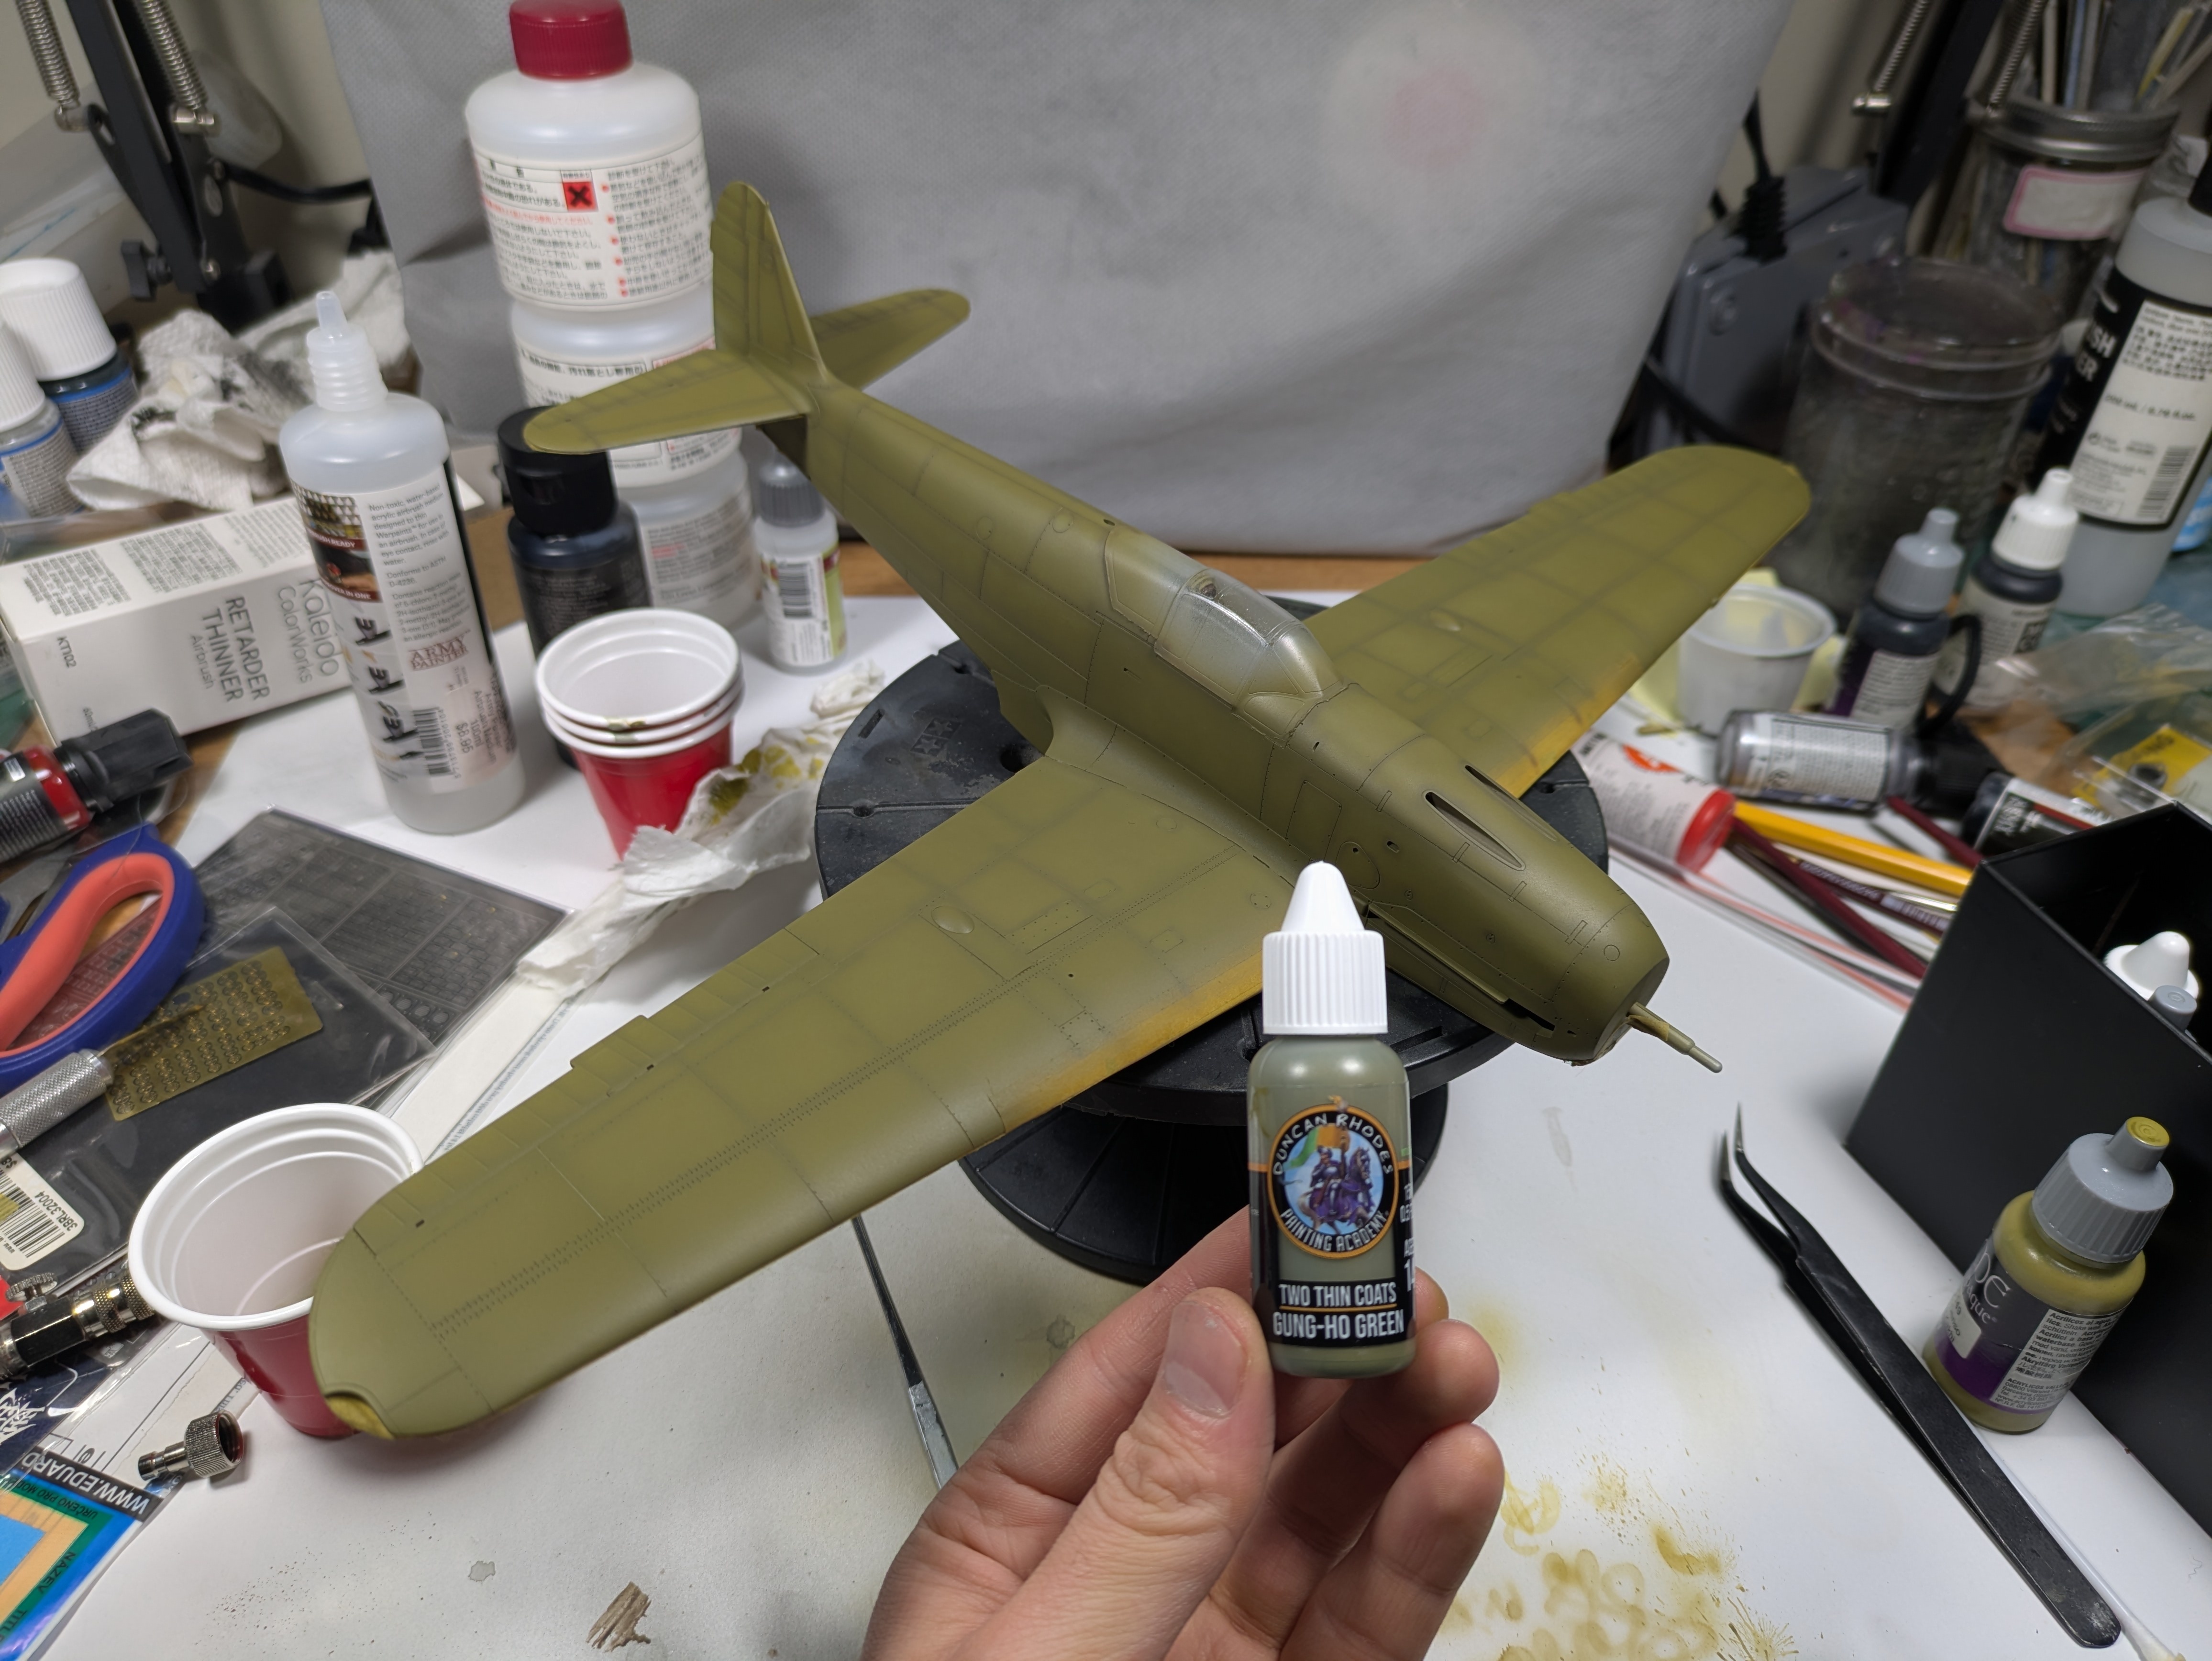
Third pass - stop here
Markings - All Masked and Painted
Every marking except the rudder number "27" was masked and painted. White bands and symbols masked off and painted in AK Off-White. Circle hinomaru cut from tape and painted Kaleido K018 Brown. Tail insignia using the same AK Off-White - see our mask-making guide for the full technique. Tamiya Mark Fit Strong for the one decal used.
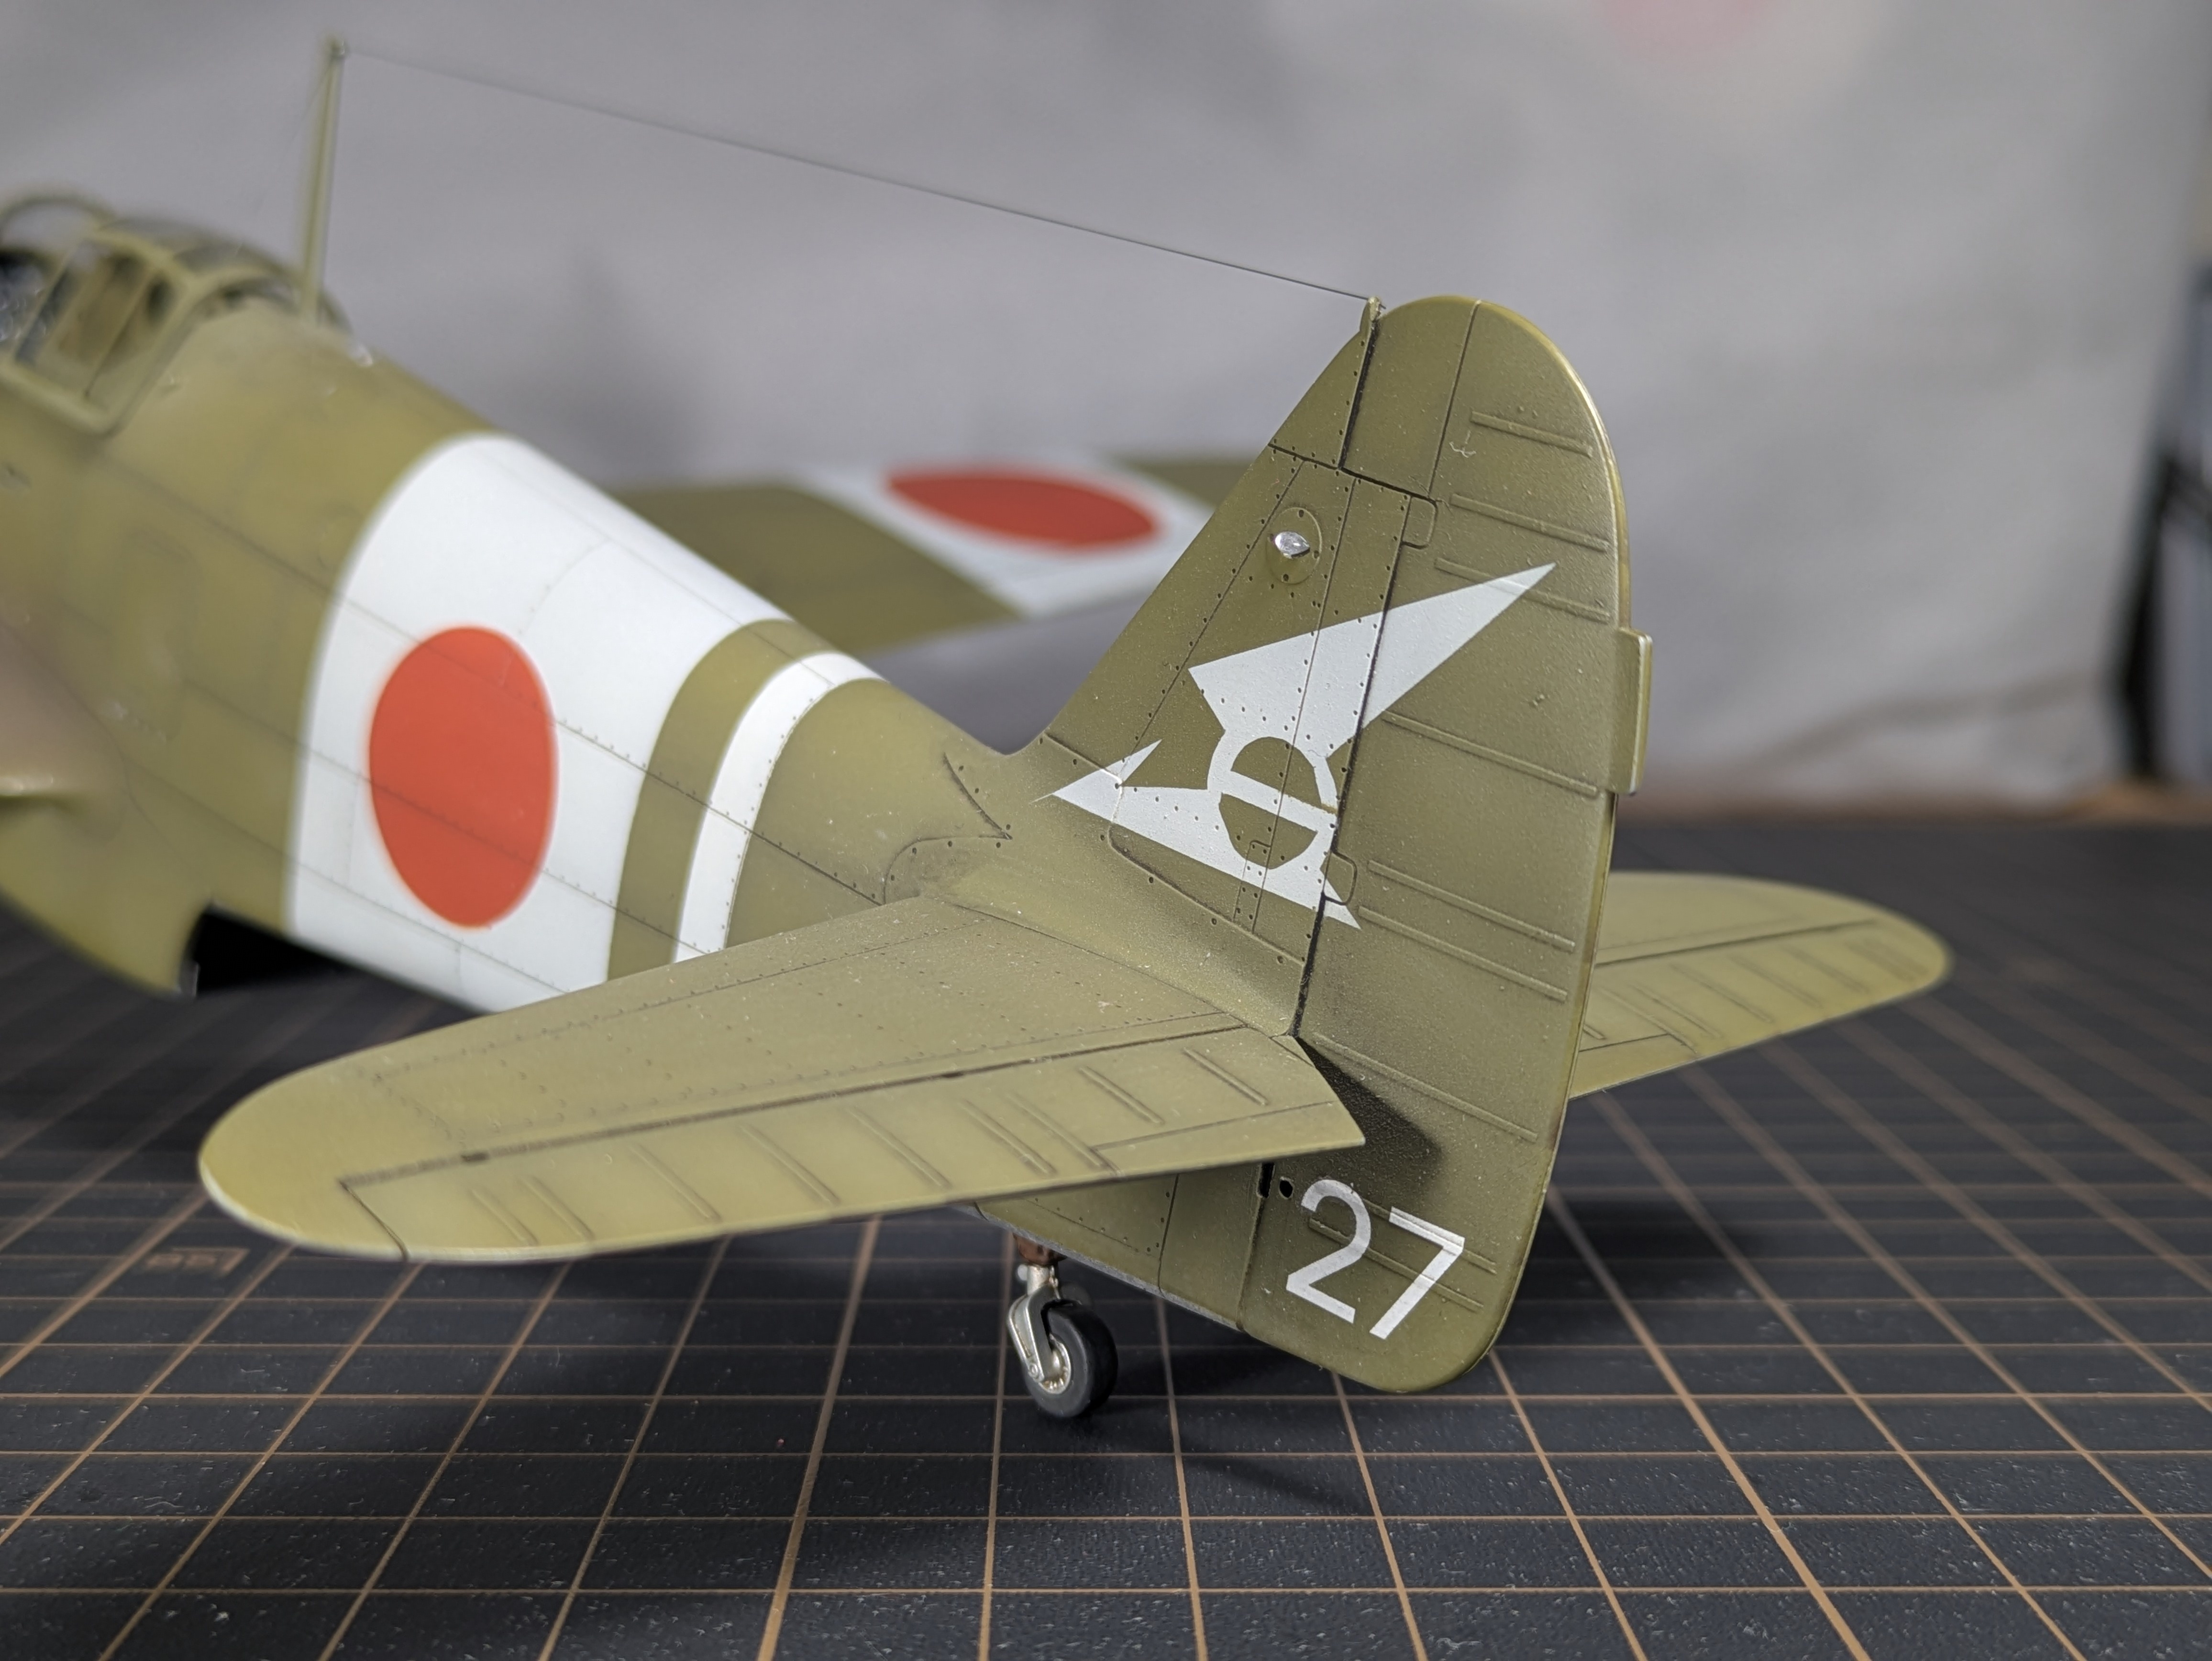
Tail markings - masked and painted
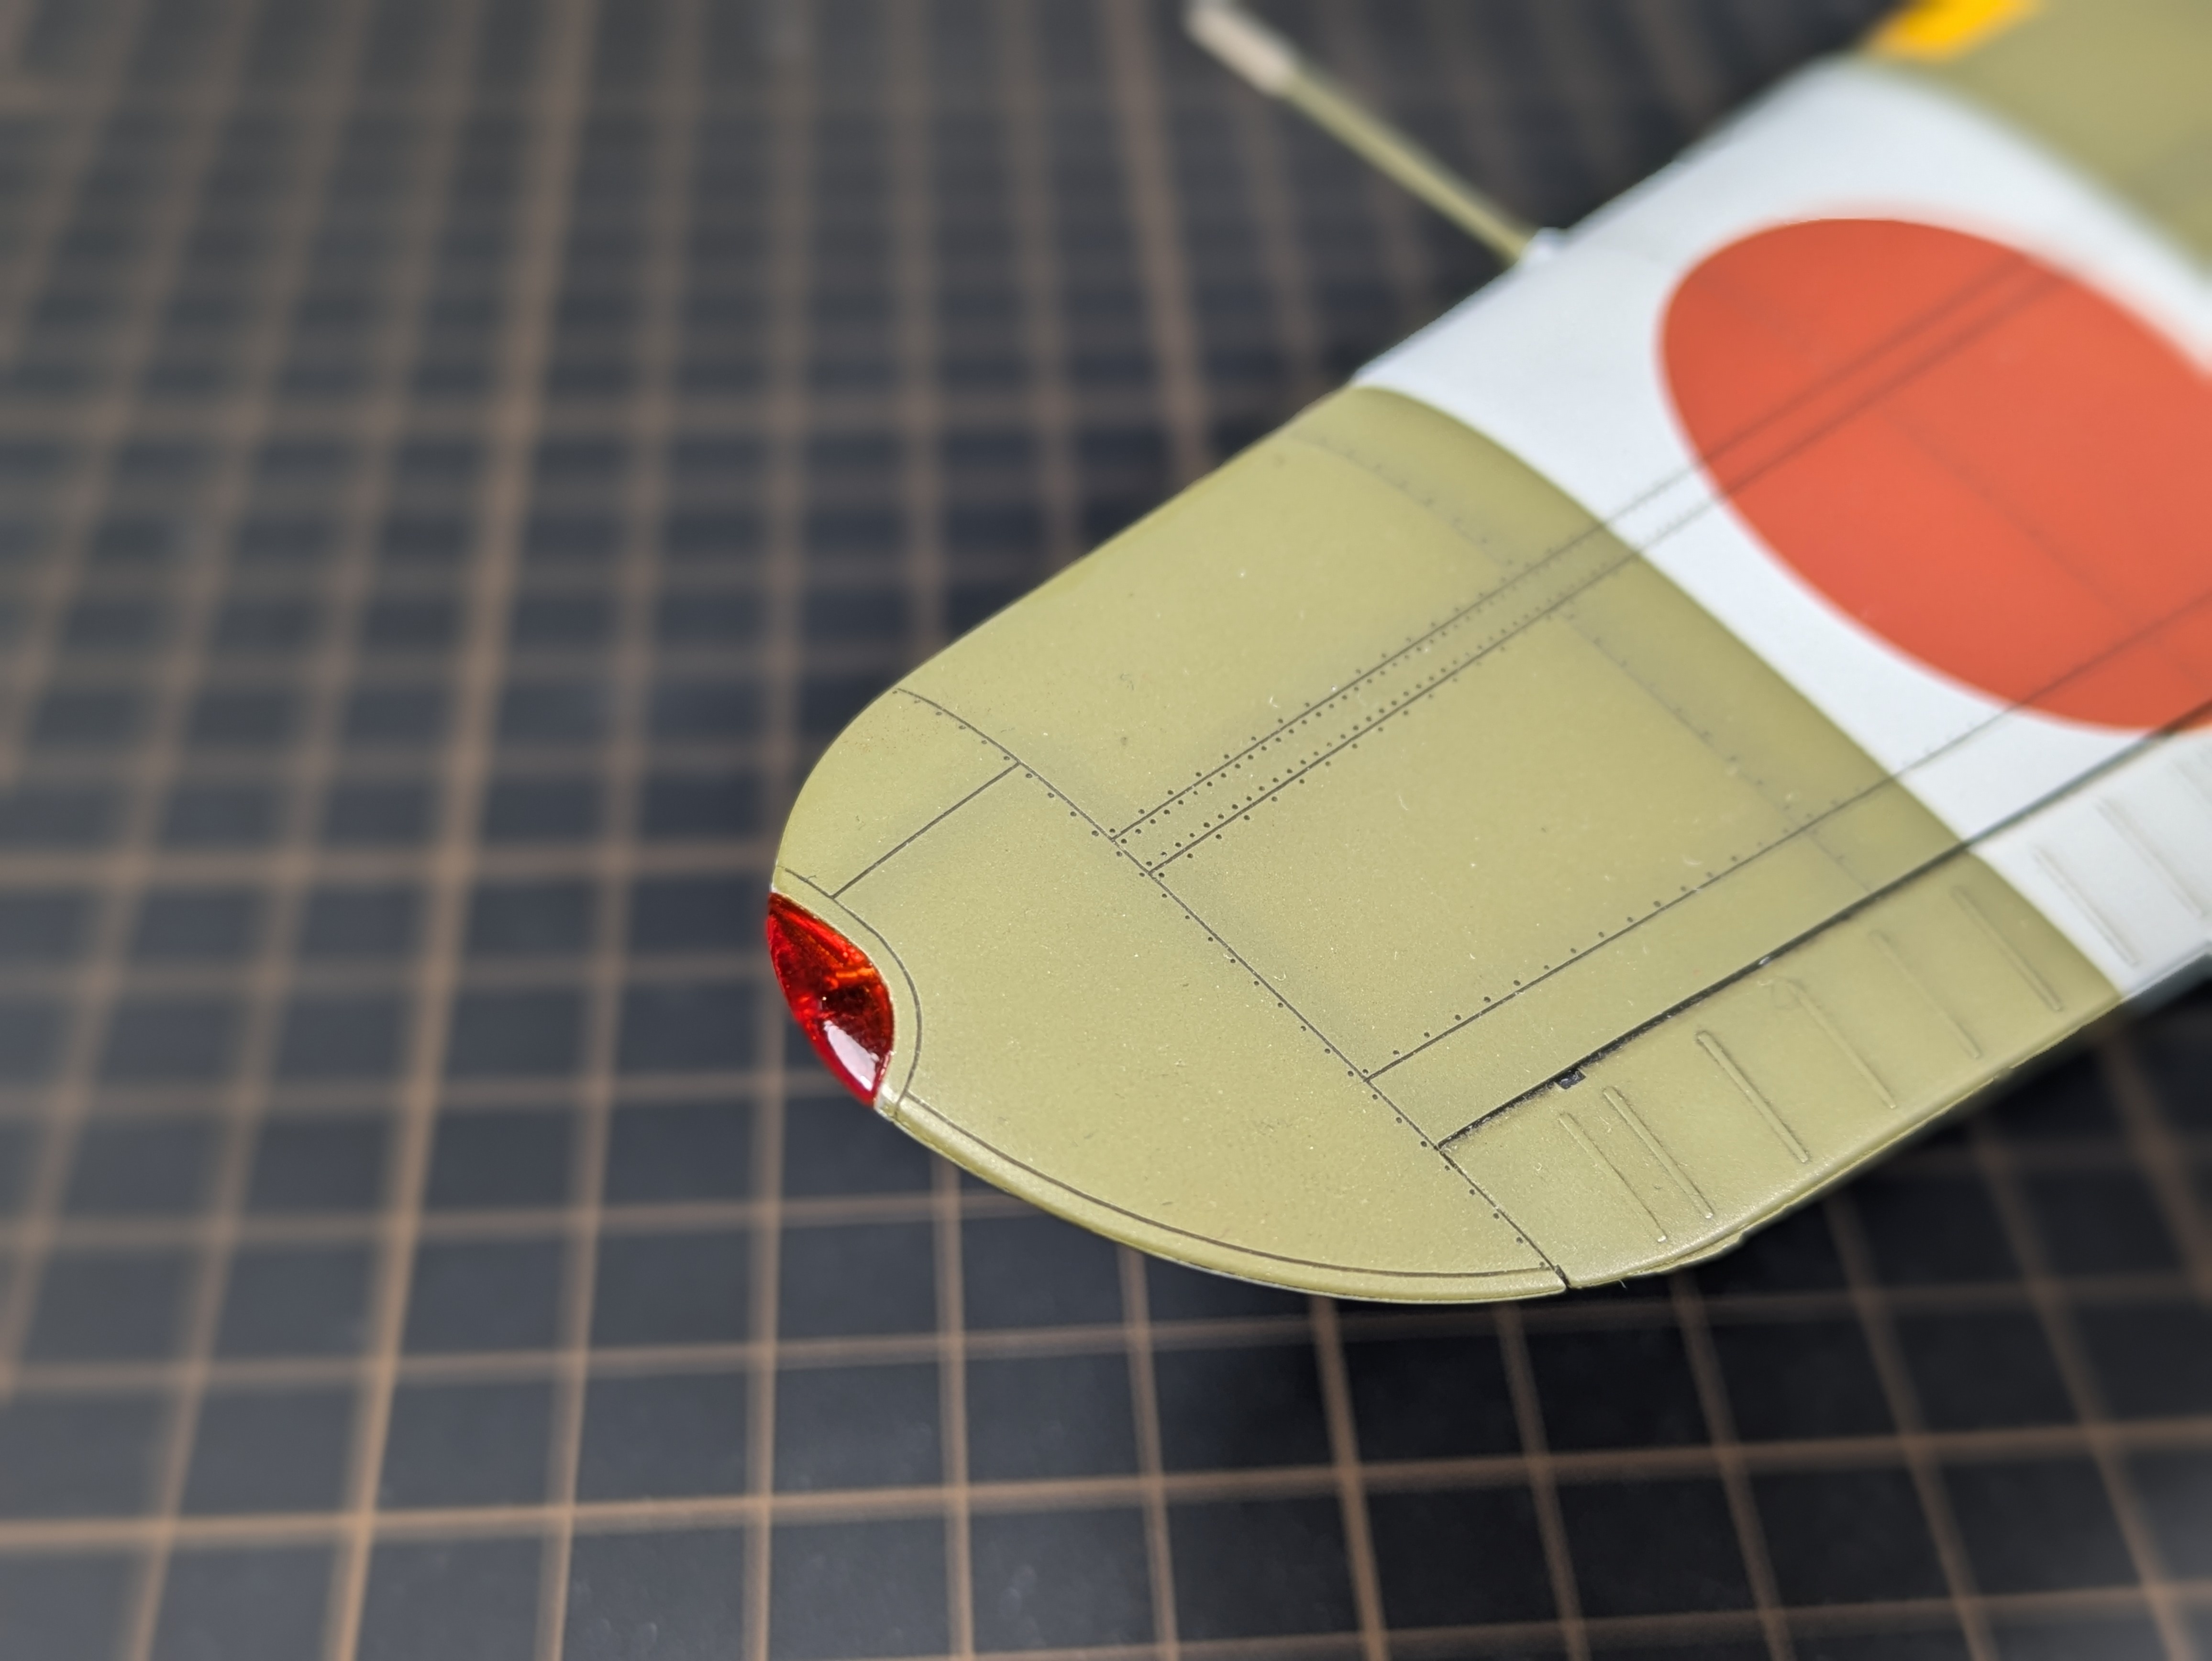
Topside red wing tip light
Gloss Coat, Panel Lines and Weathering
Kaleido Gloss coat applied over the completed airframe before weathering - giving the oil washes a smooth, workable surface to flow into panel lines and be wiped back from raised surfaces. Abteilung Sepia thinned with White Spirit used as the panel liner throughout. Chipping on wing roots and cockpit done with Vallejo Silver on a sponge; controlled areas with a brush.
Right wing rear - walk area weathering and exhaust stains
Left wing rear - exhaust staining
Exhausts and Guns - Added After Final Matt Coat
Exhausts left separate and added at the very end. Kaleido Gun Metal base, over-sprayed with Kaleido Zirconium Black, then AK Rust Streaks applied all over. Exhaust staining on the airframe done with Tamiya Hull Red and Rubber Black thinned with Mr. Rapid Thinner - applied after the final matt coat so it sits on top. The same staining effect is used around the gun ports. Gun barrels in Kaleido Zirconium Black.
Prop, leading edge and exhaust detail.
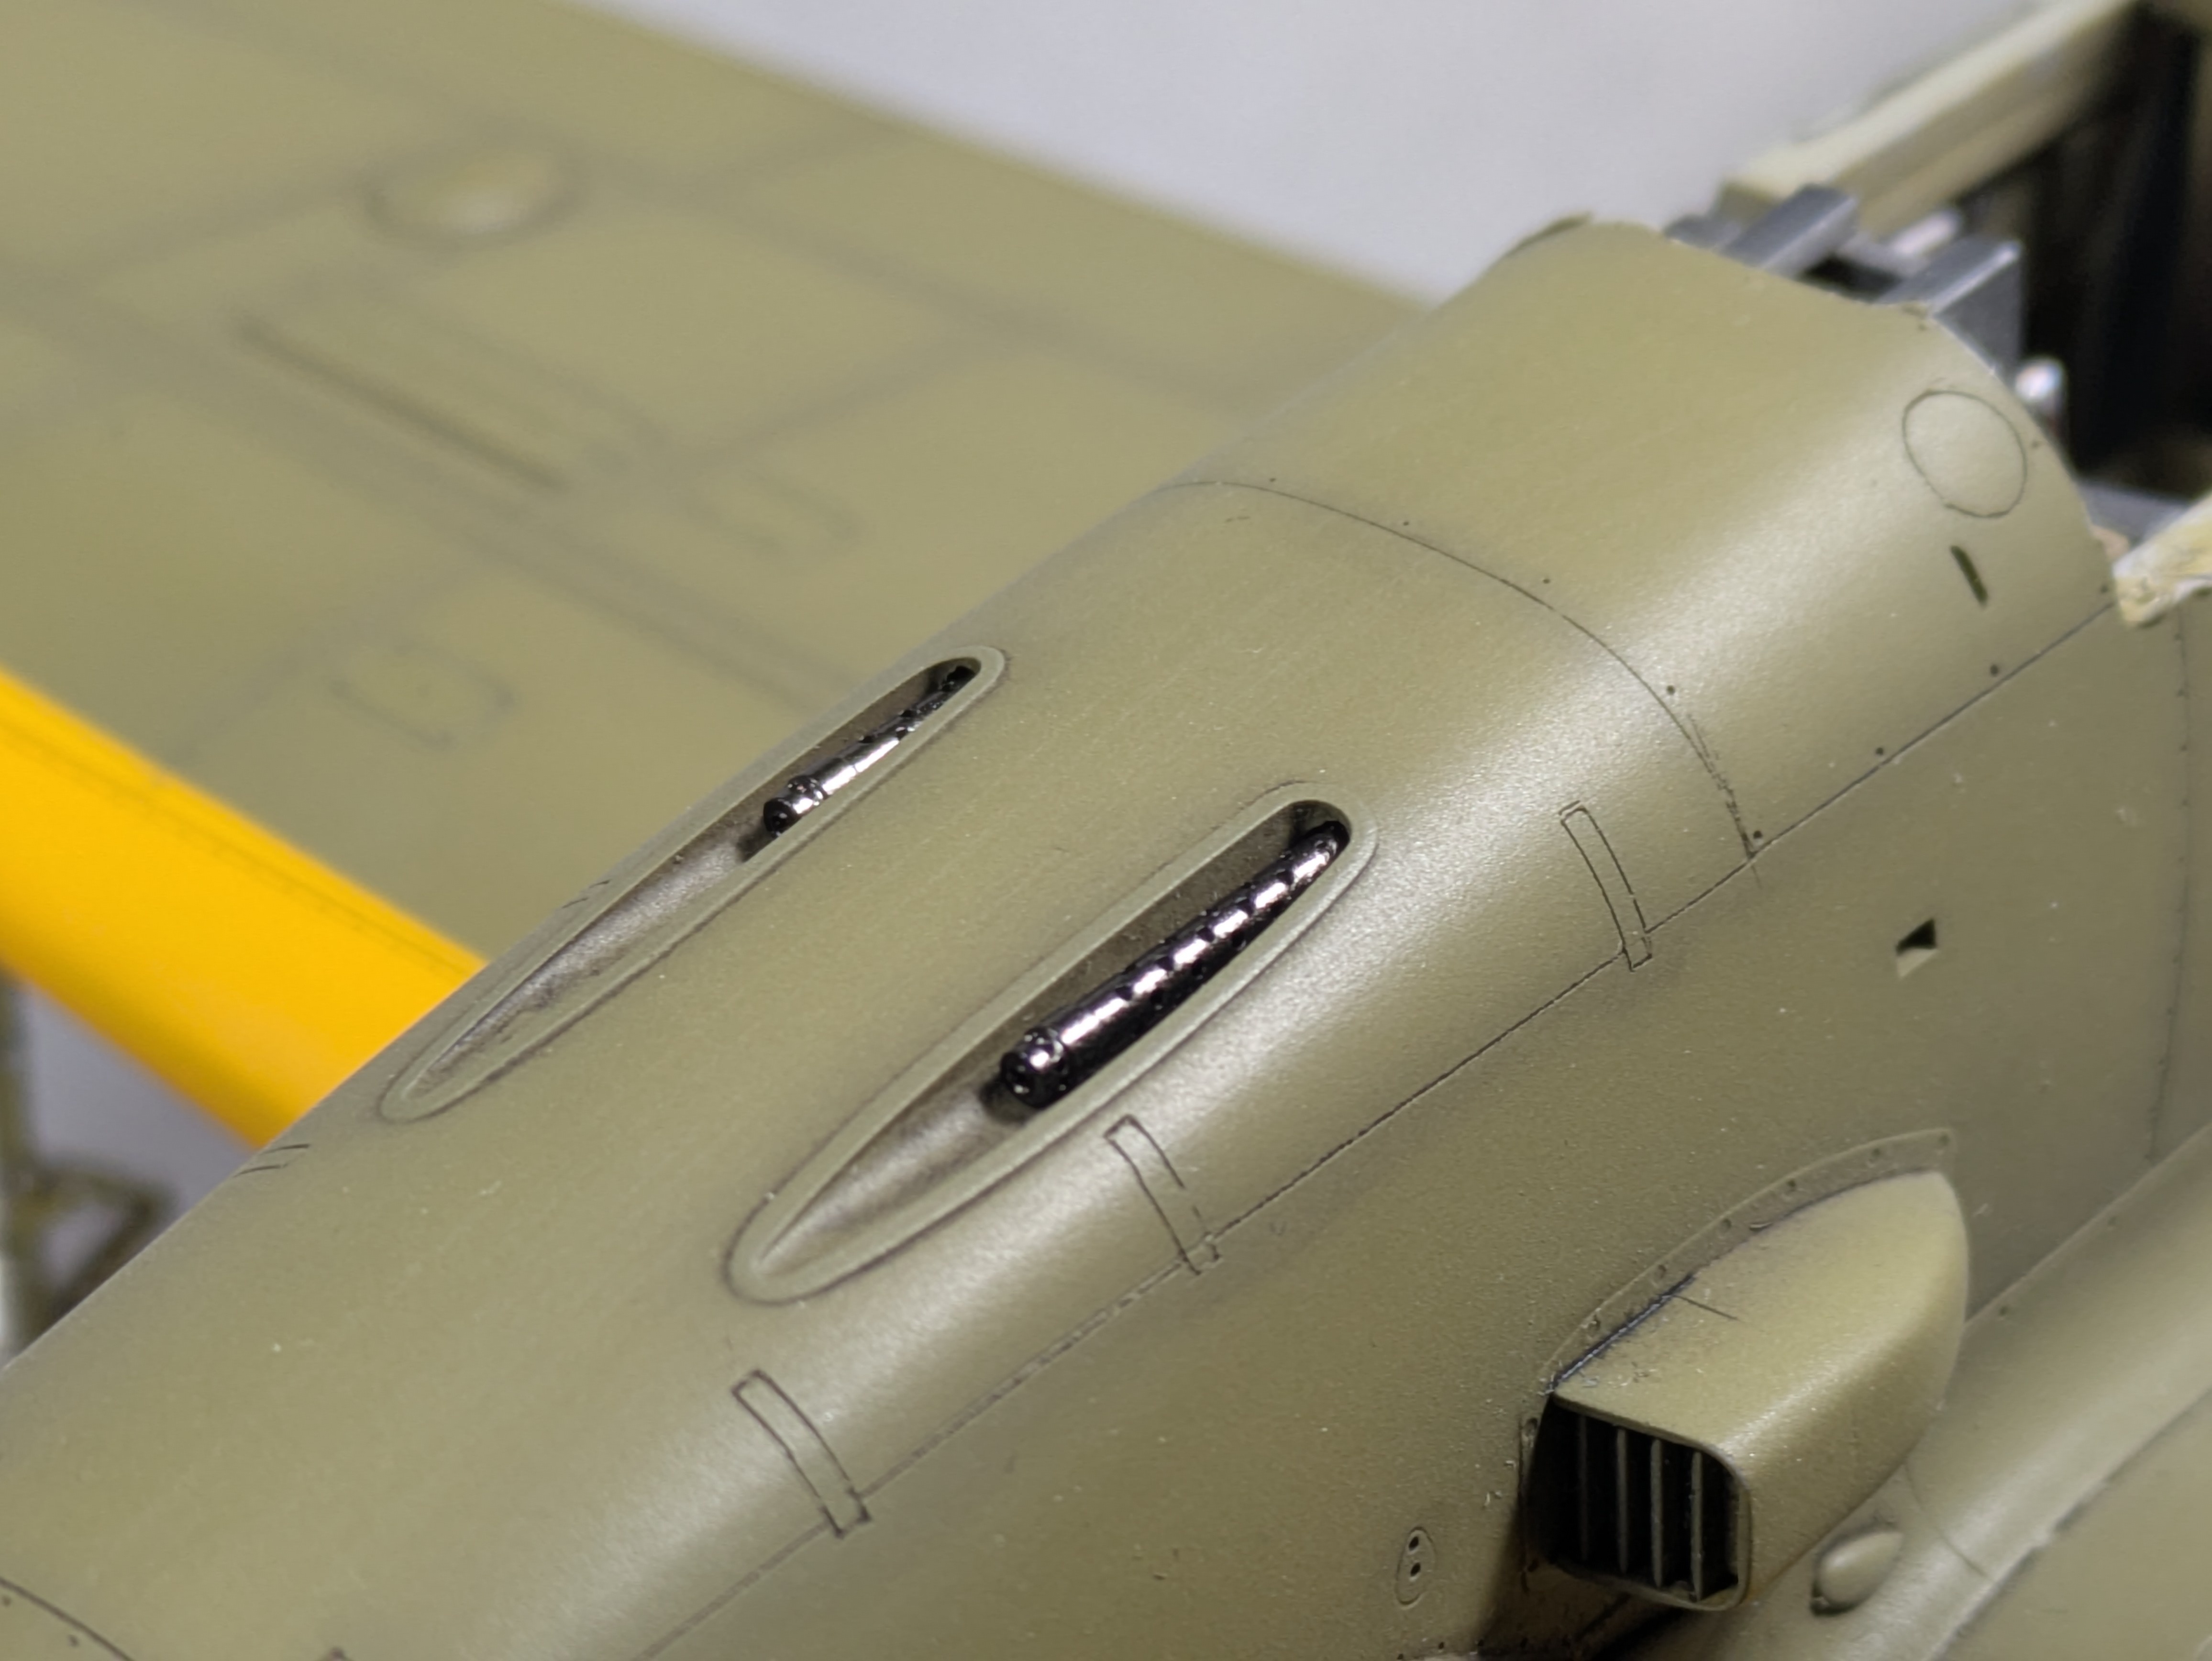
Fuselage guns - Zirconium Black barrels
Exhaust staining on wing surface
Yellow Tips, Charred Brown Blades, Sponge Chipping
Vallejo Gold Yellow sprayed over the yellow areas first, then masked over the stripes before painting Charred Brown over the rest of the blade. Always go light to dark - the yellow underneath means better coverage of the lighter colour and no fighting against a dark base. Chipping done with a sponge and Vallejo Silver - Kyle found Silver the brightest and most brushable option for this use case.
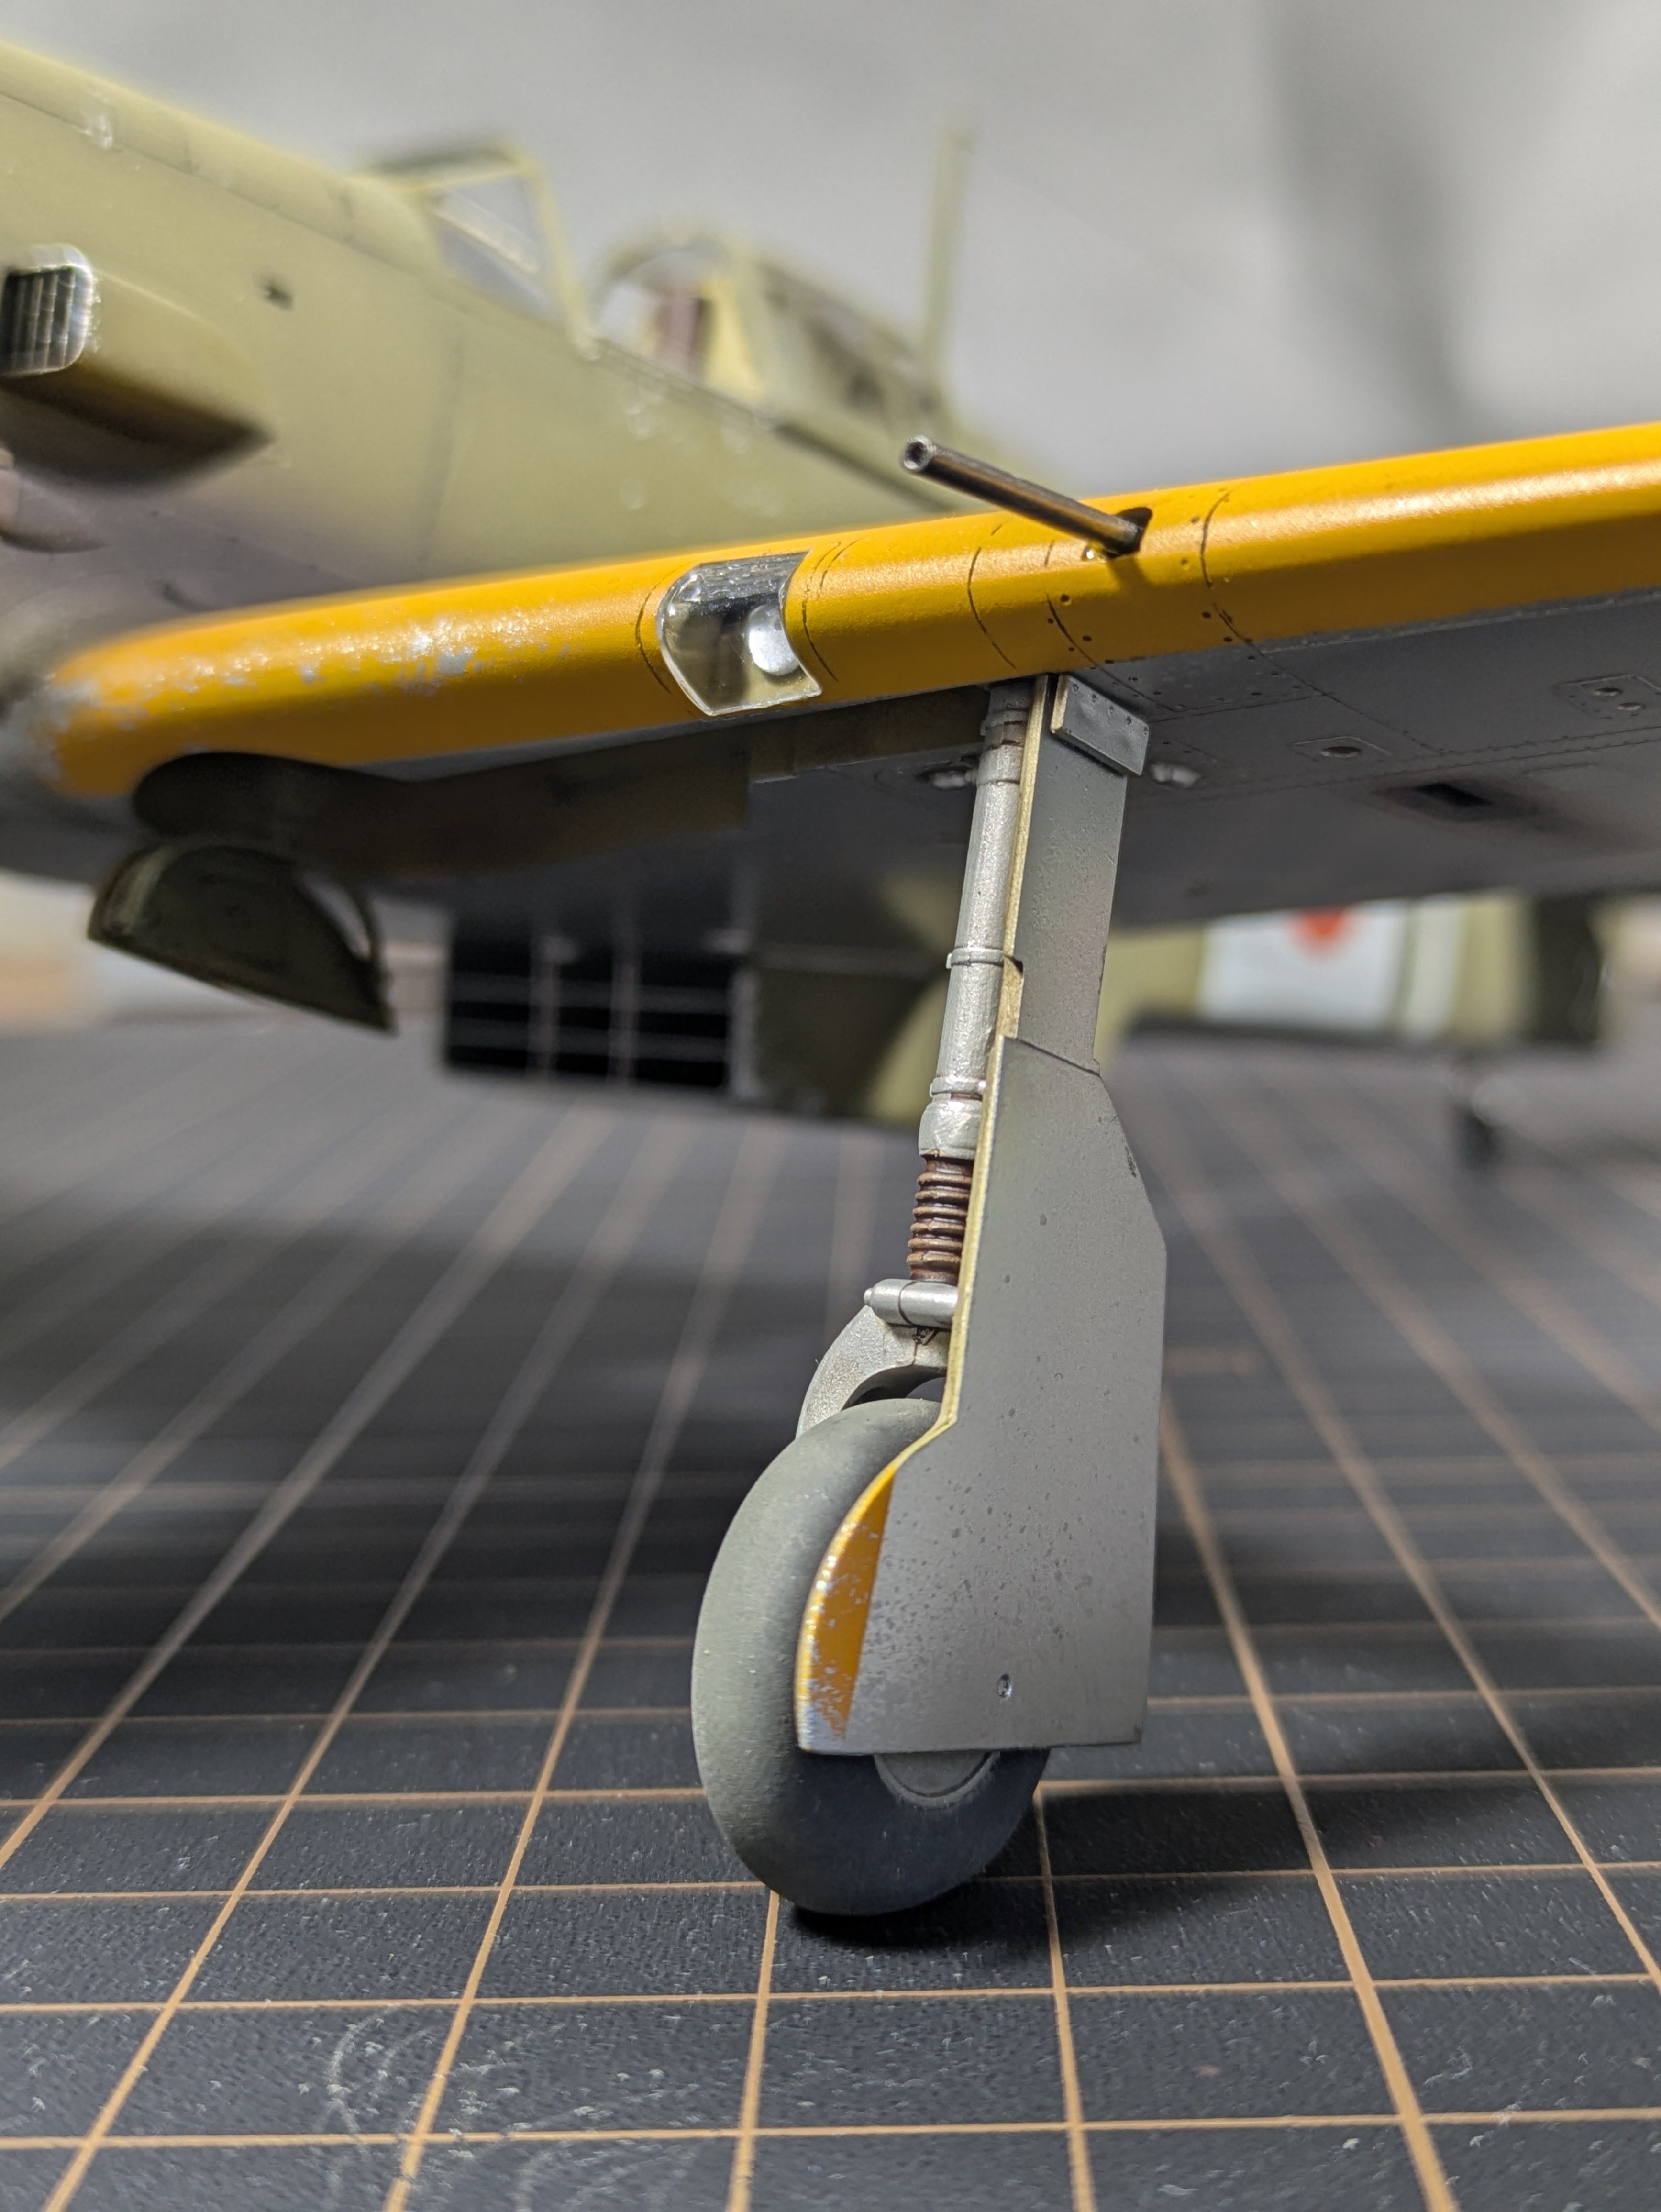
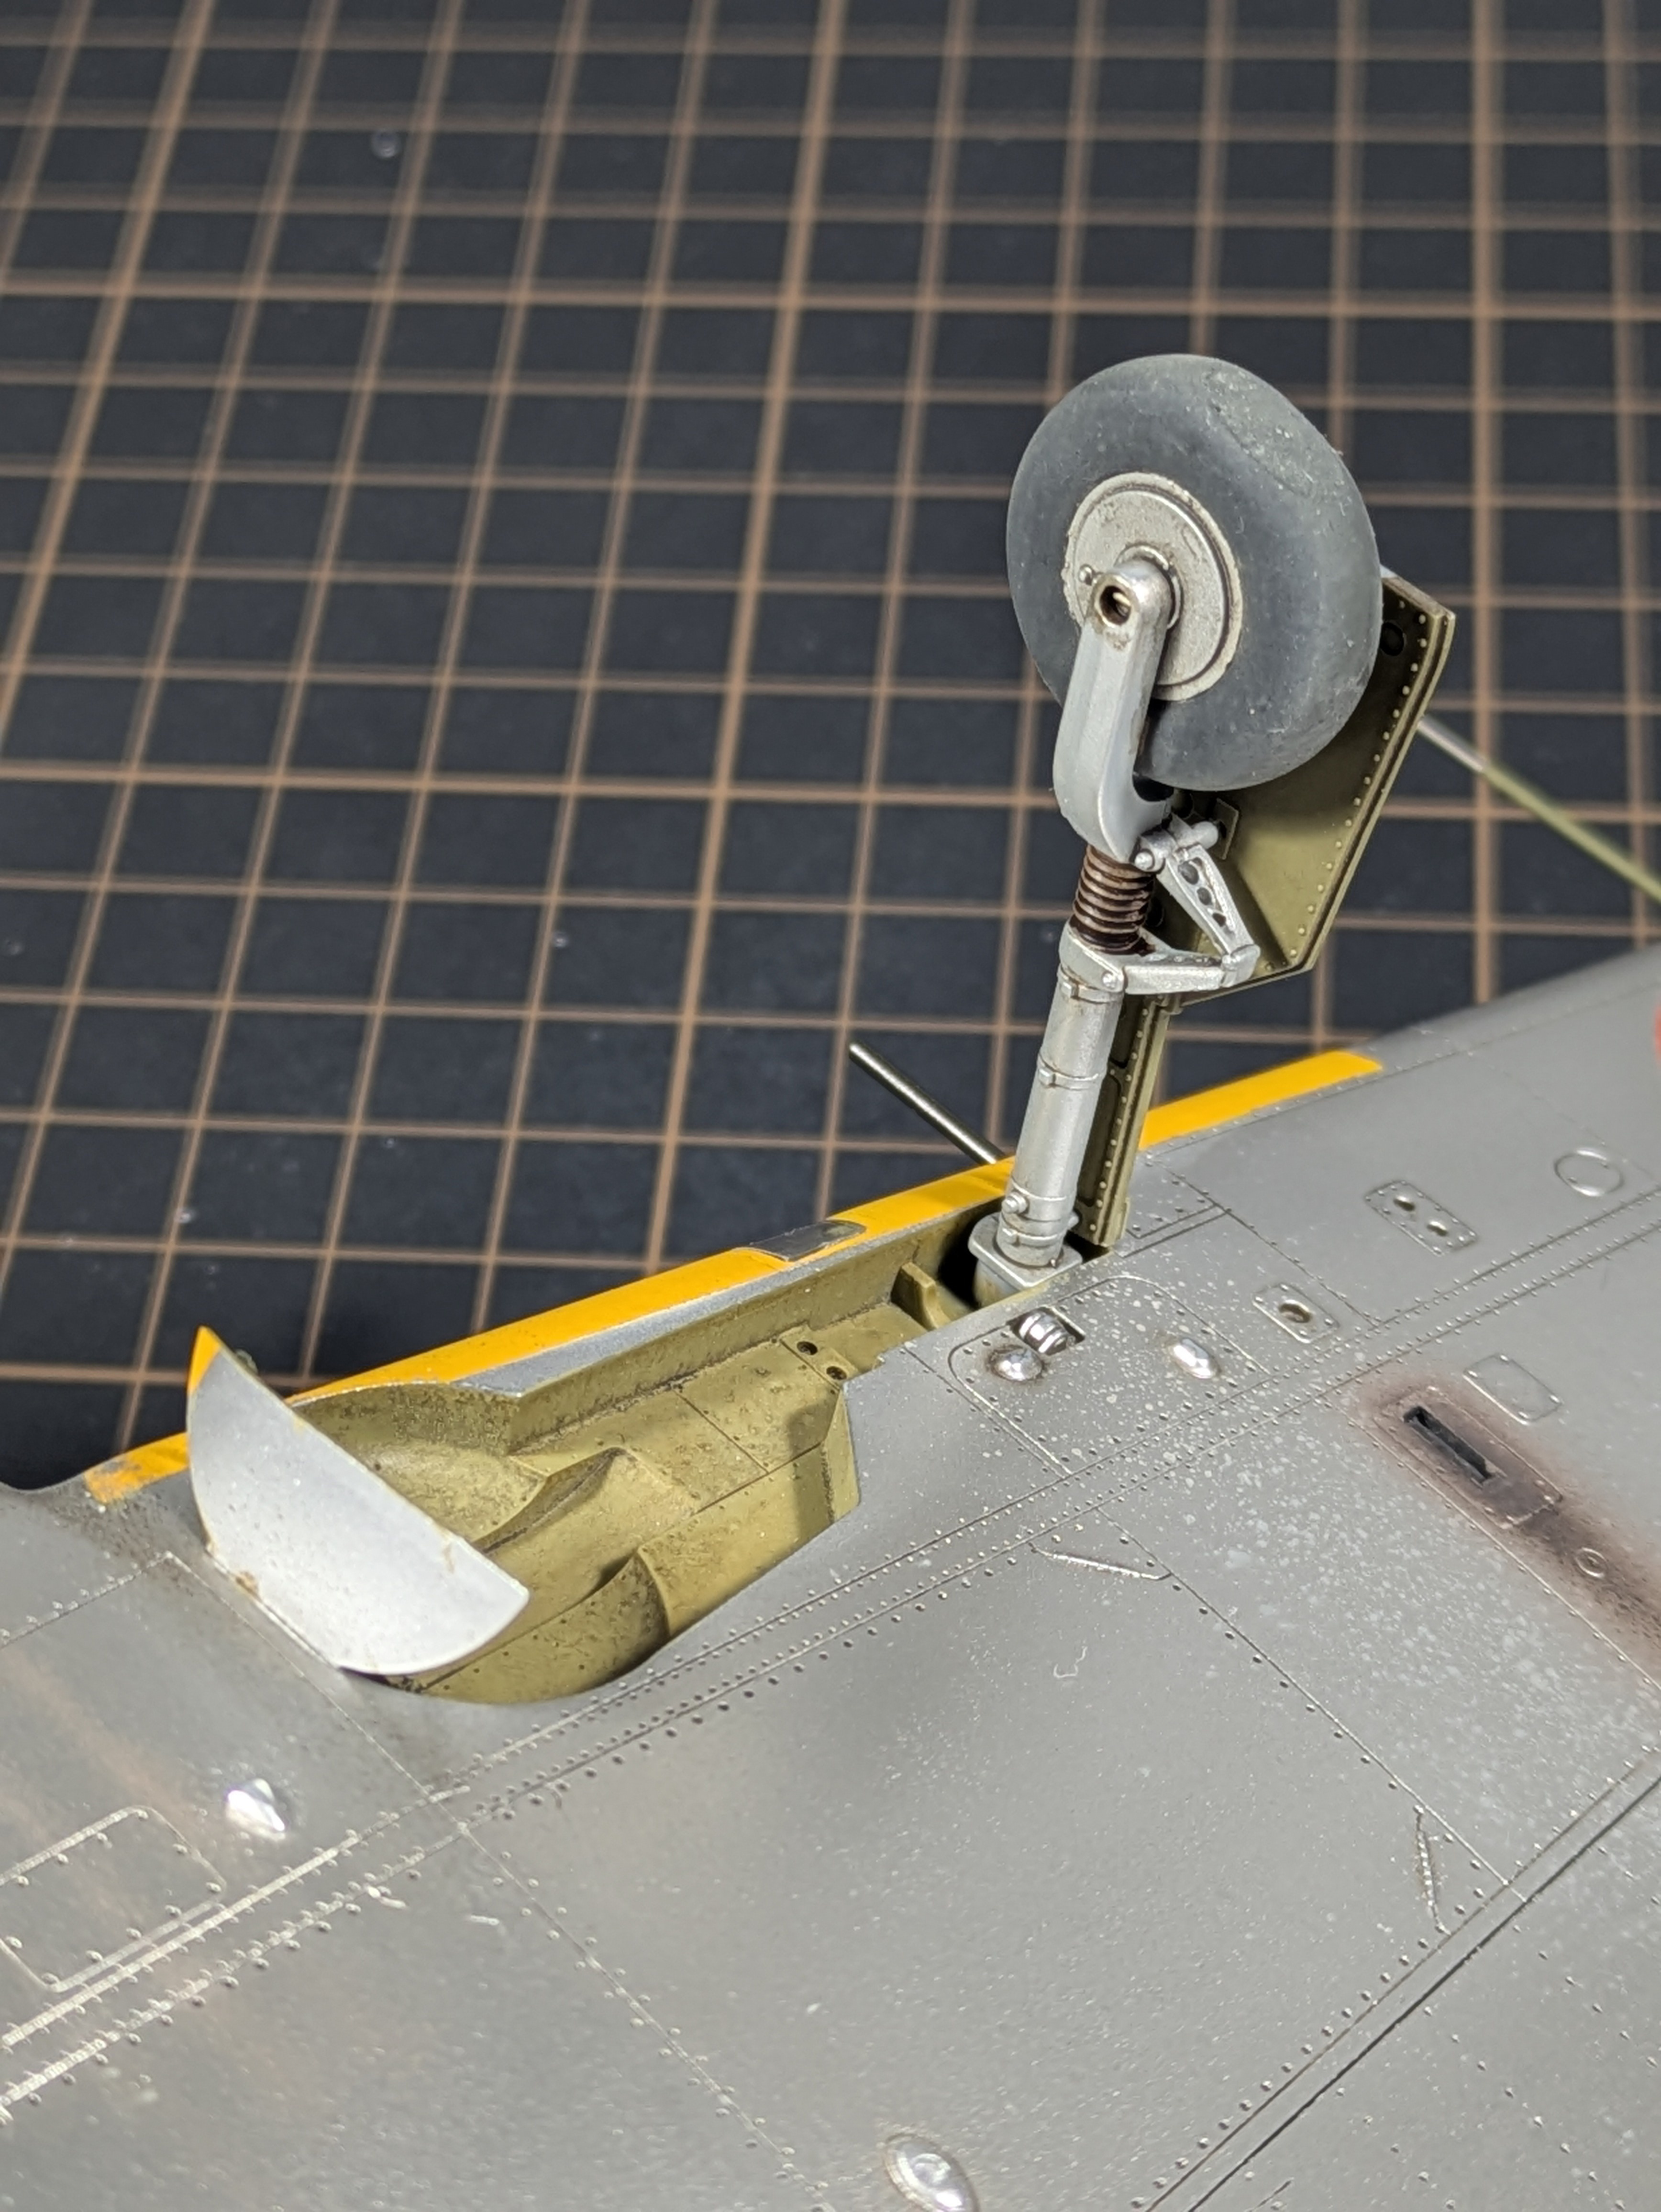
Pro Acryl Silver Legs, Rubber Wheels, Stainless Hubs
Landing gear completed separately and fitted after painting. Legs in Pro Acryl Silver. Rubber boot painted AK Rubber Black then Dark Wood Speedpaint over the top. Wheel hubs in Kaleido Stainless Steel. Sepia wash over the whole assembly. Wheel wells painted in the same cockpit colour (Two Thin Coats Green Beret). Abteilung Sepia mixed with Faded White oil paint speckled around the wheels and along the wing walk areas to imply kicked-up debris - a pale earth tone that reads as dried dust and dirt without looking like a conventional wash.
Right landing gear - weathering detail
Left landing gear close-up
Left landing gear underside
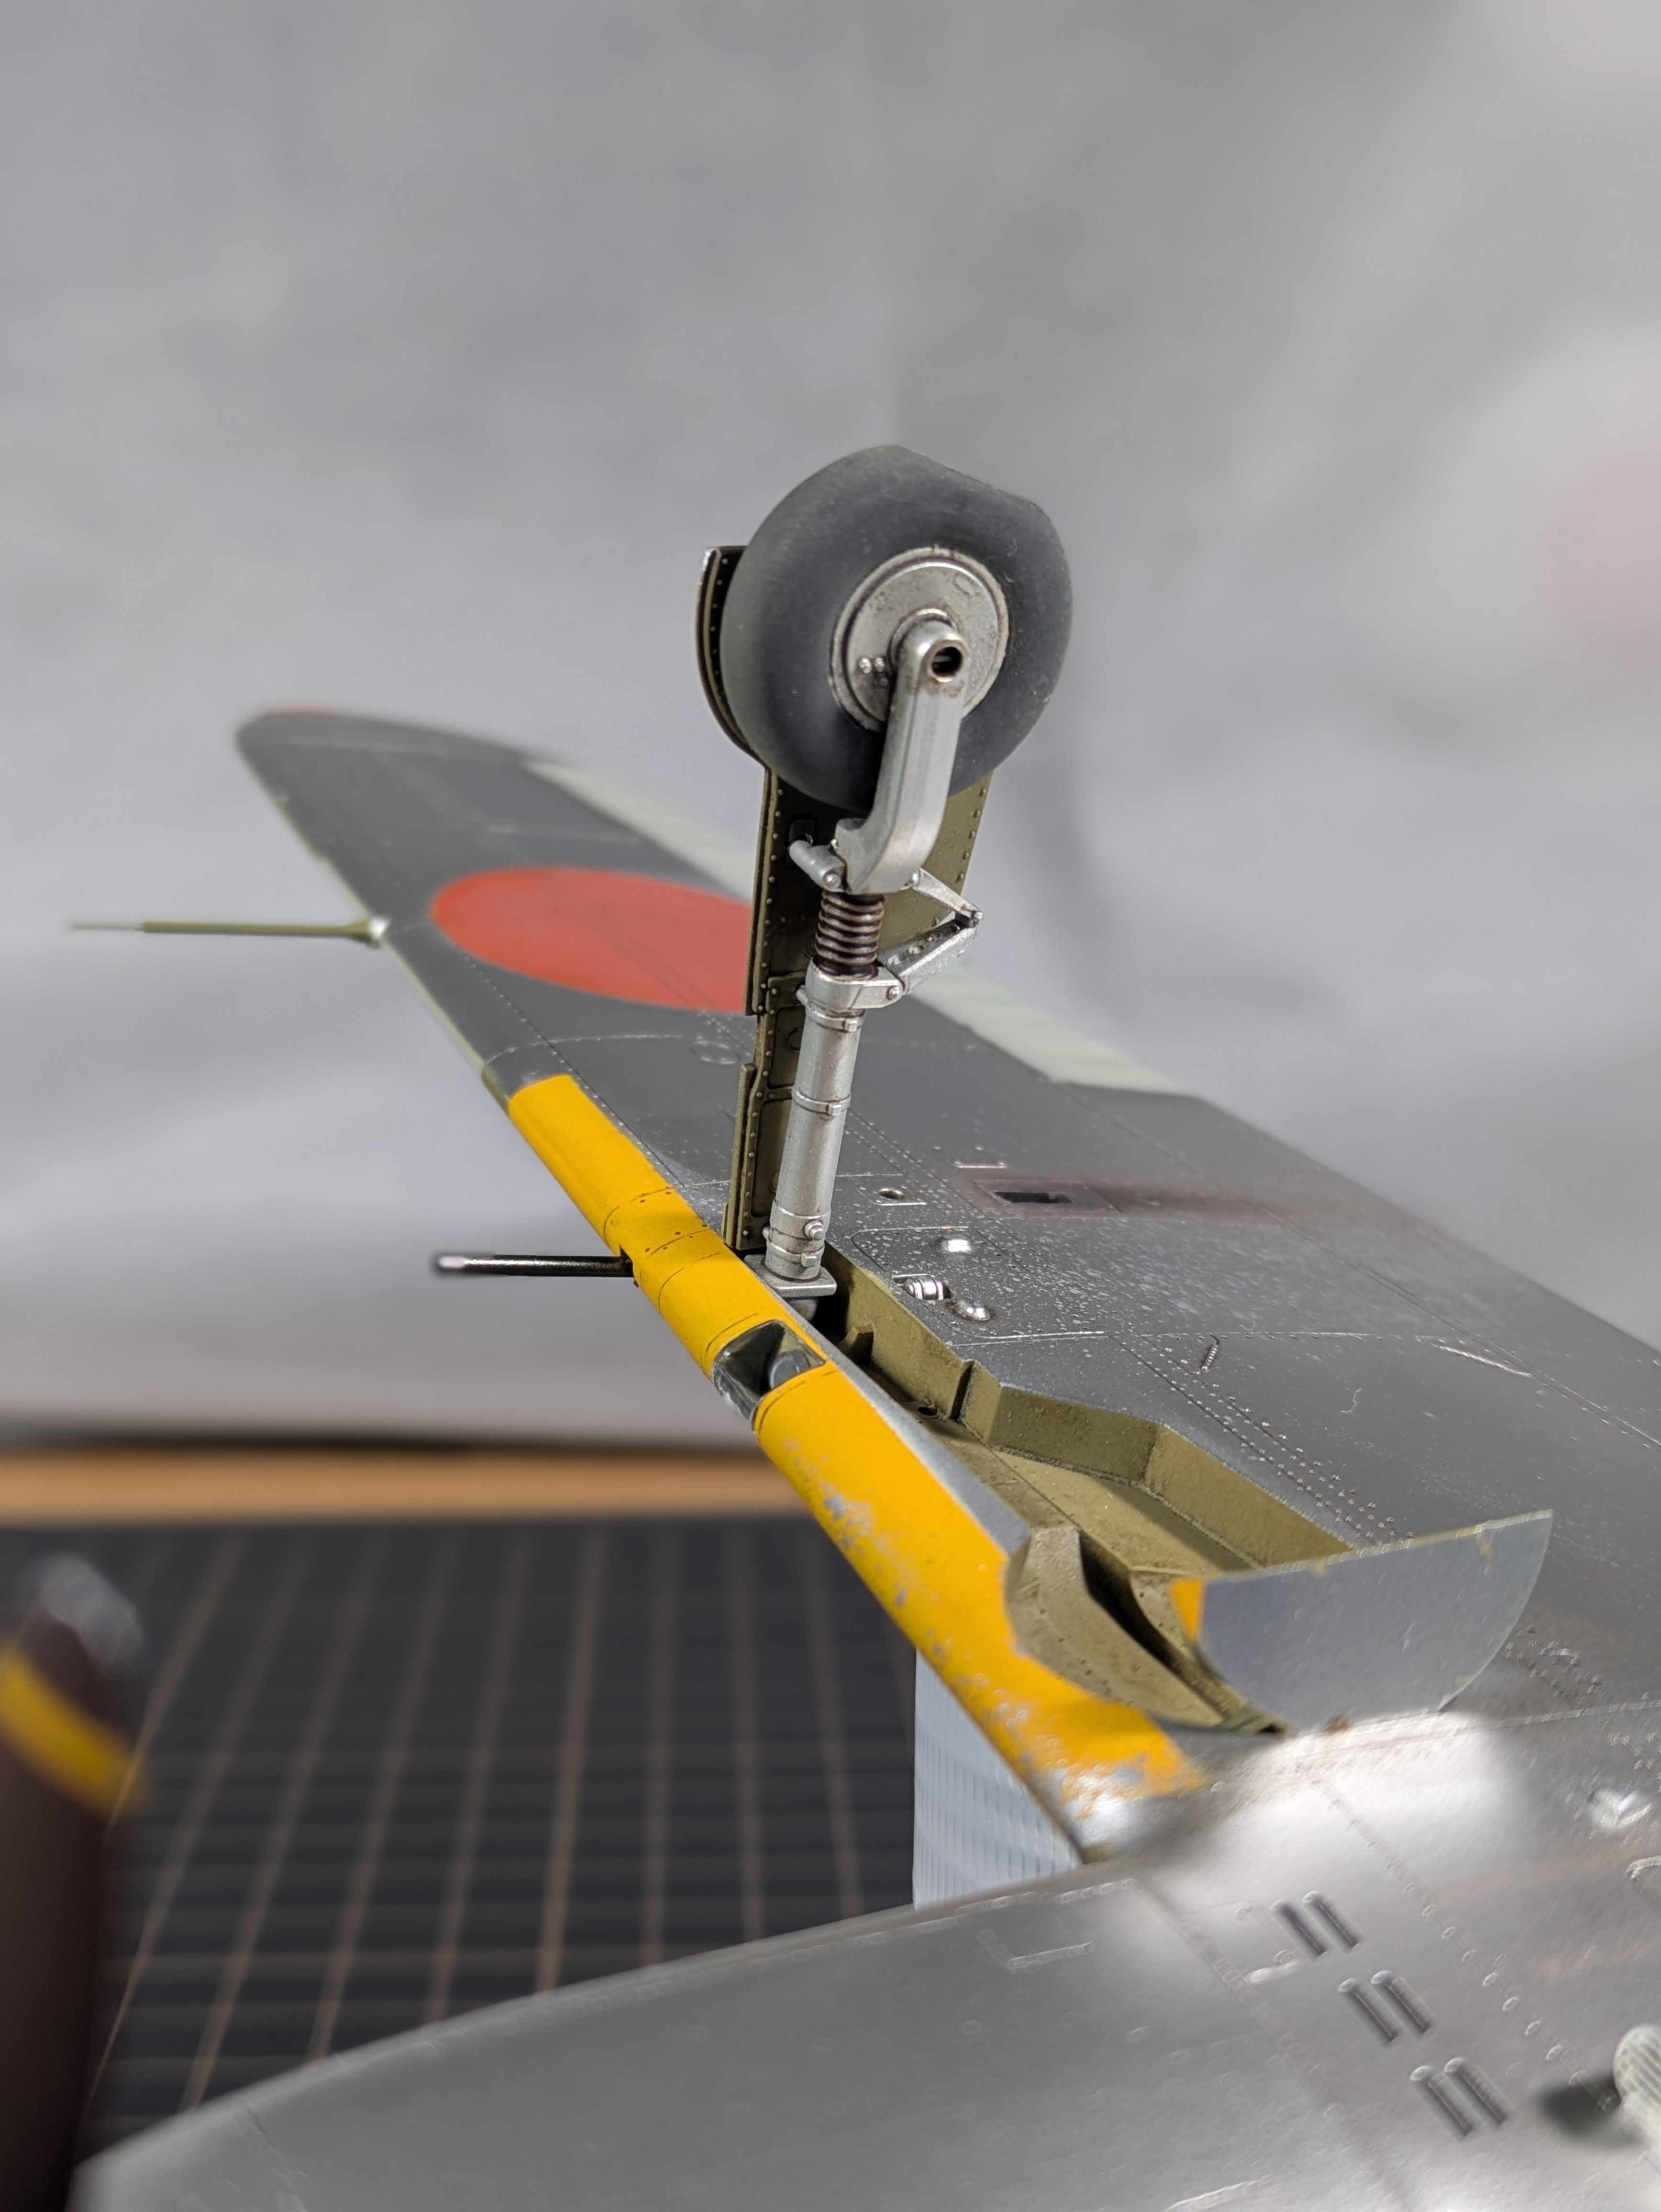
Inner side - left landing gear
The Finished Build
Hasegawa 1/32 Kawasaki Ki-61 Tony. 56th Sentai, Osaka, mid-1945. Kyle's best model.
Three-quarter right
Three-quarter left
Three-quarter rear right
Three-quarter rear left
Underside complete
Tail markings
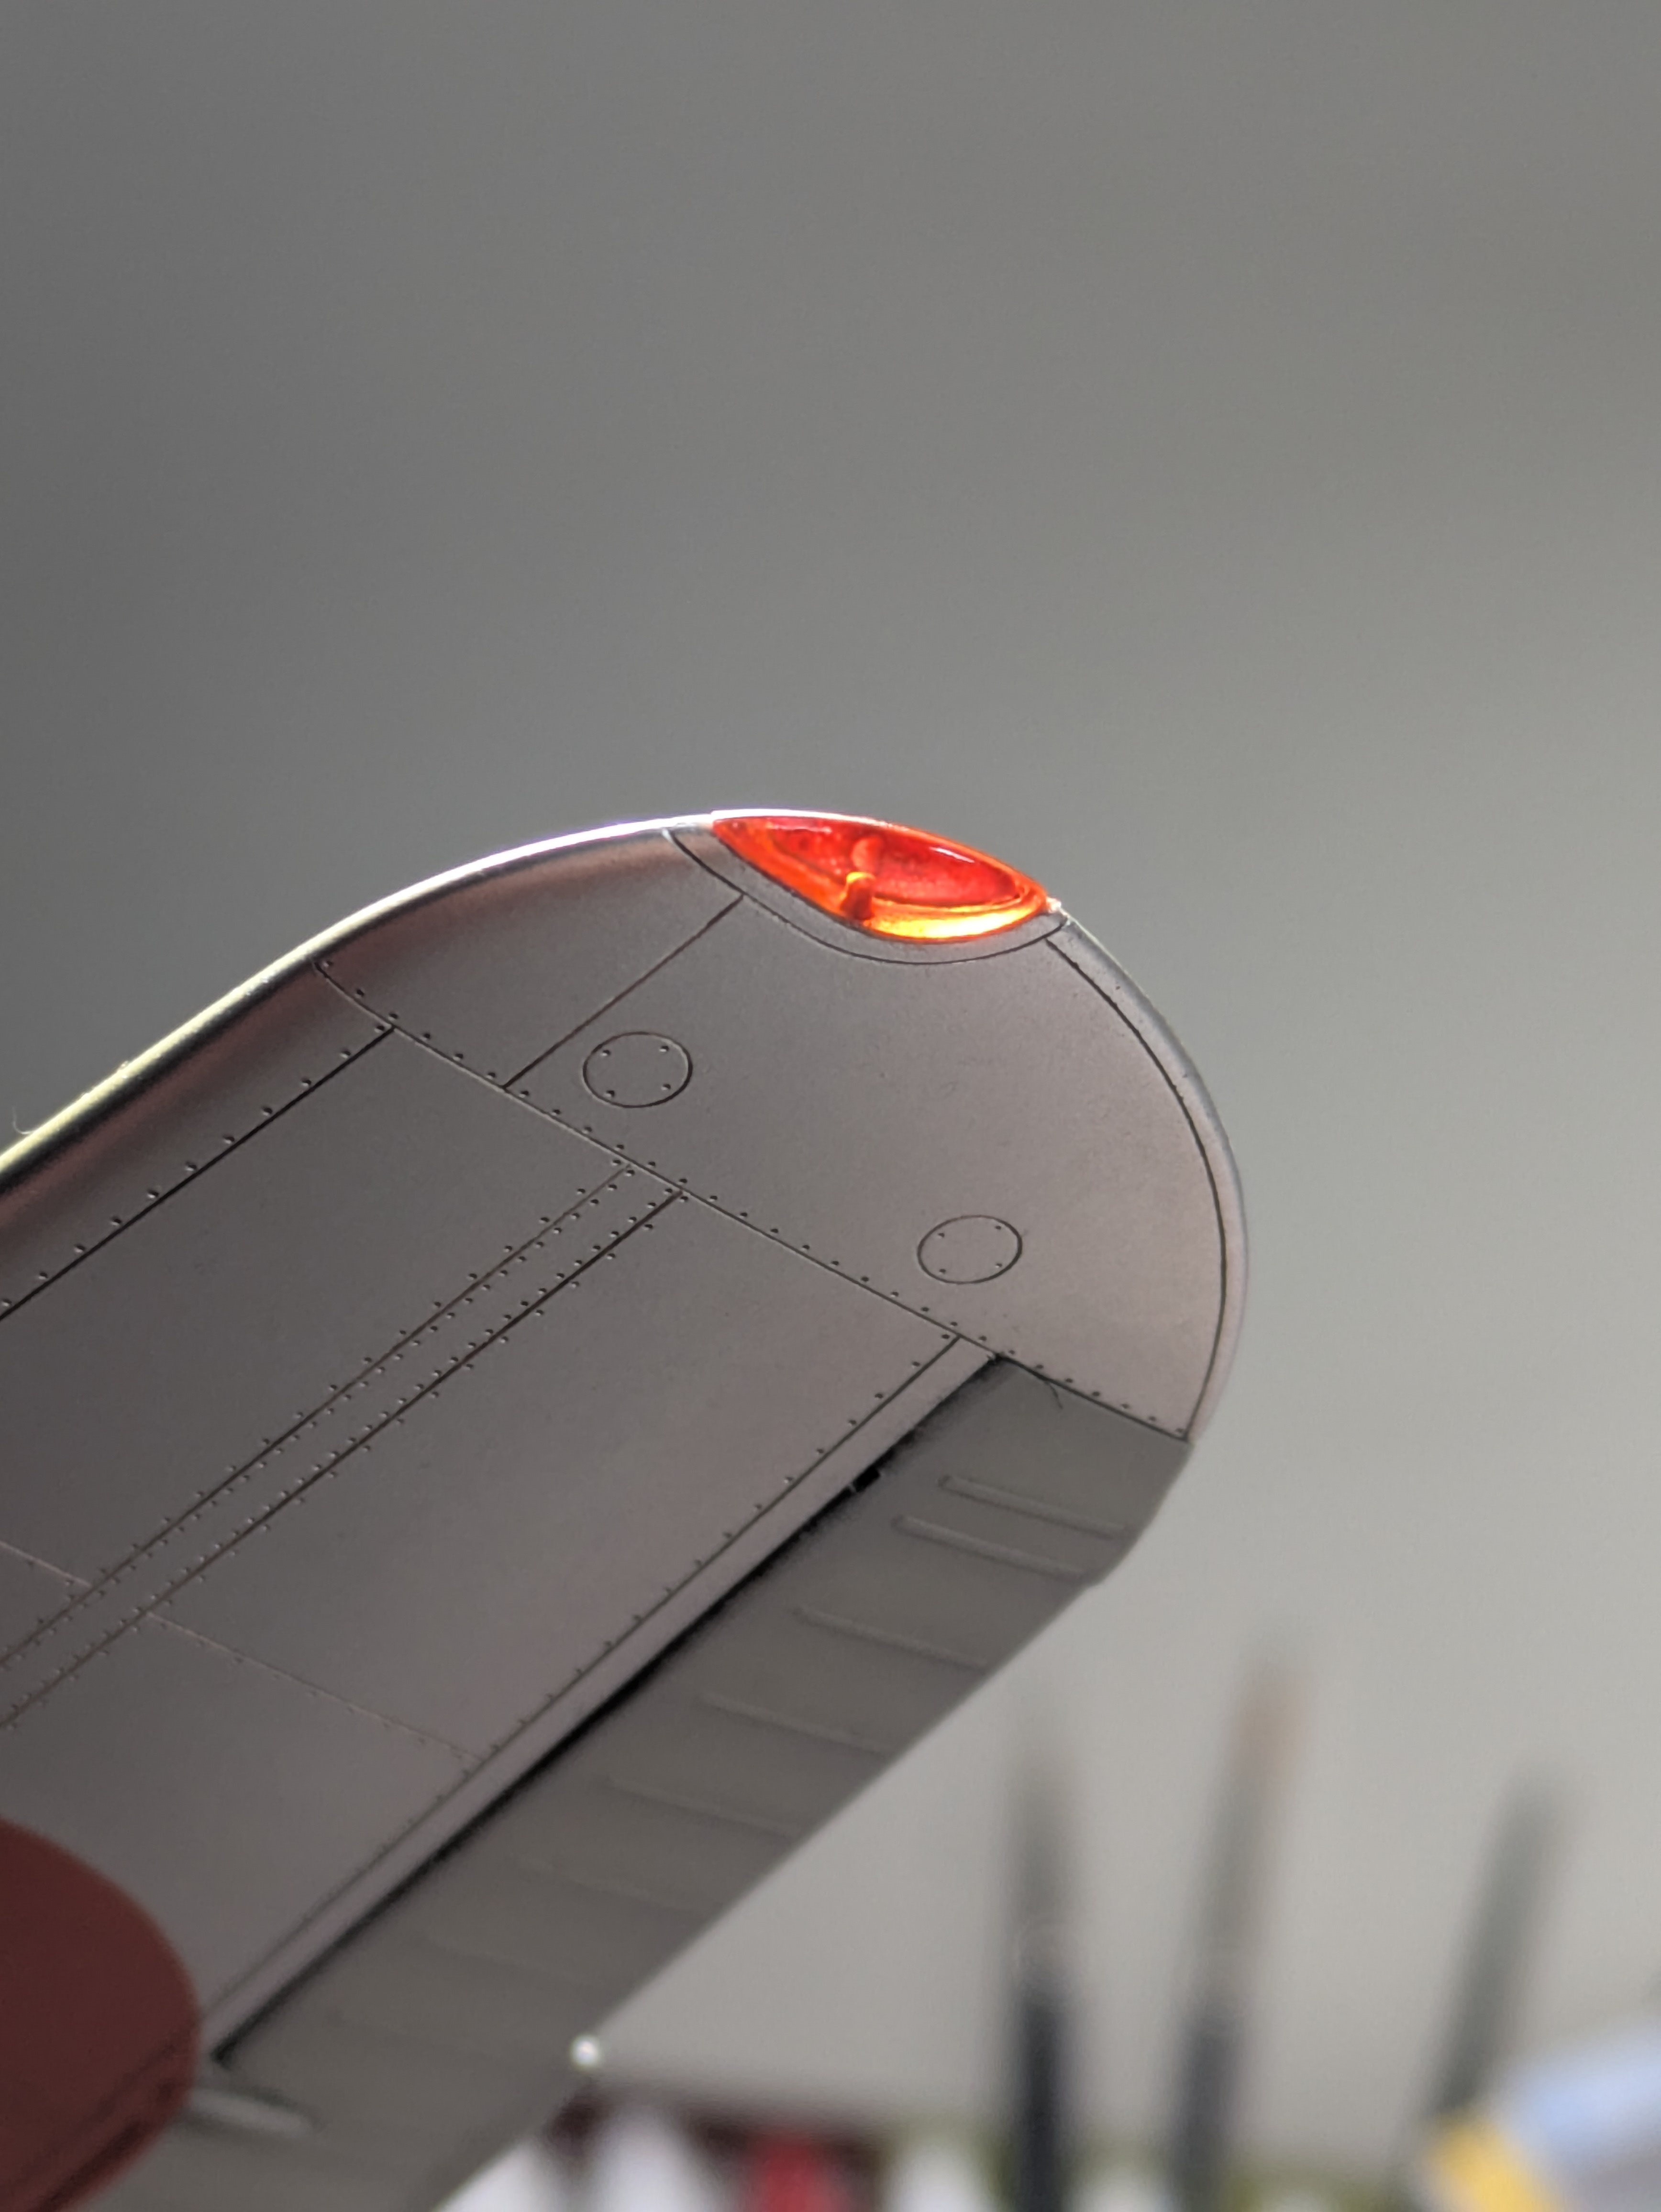
Underside red wing tip light
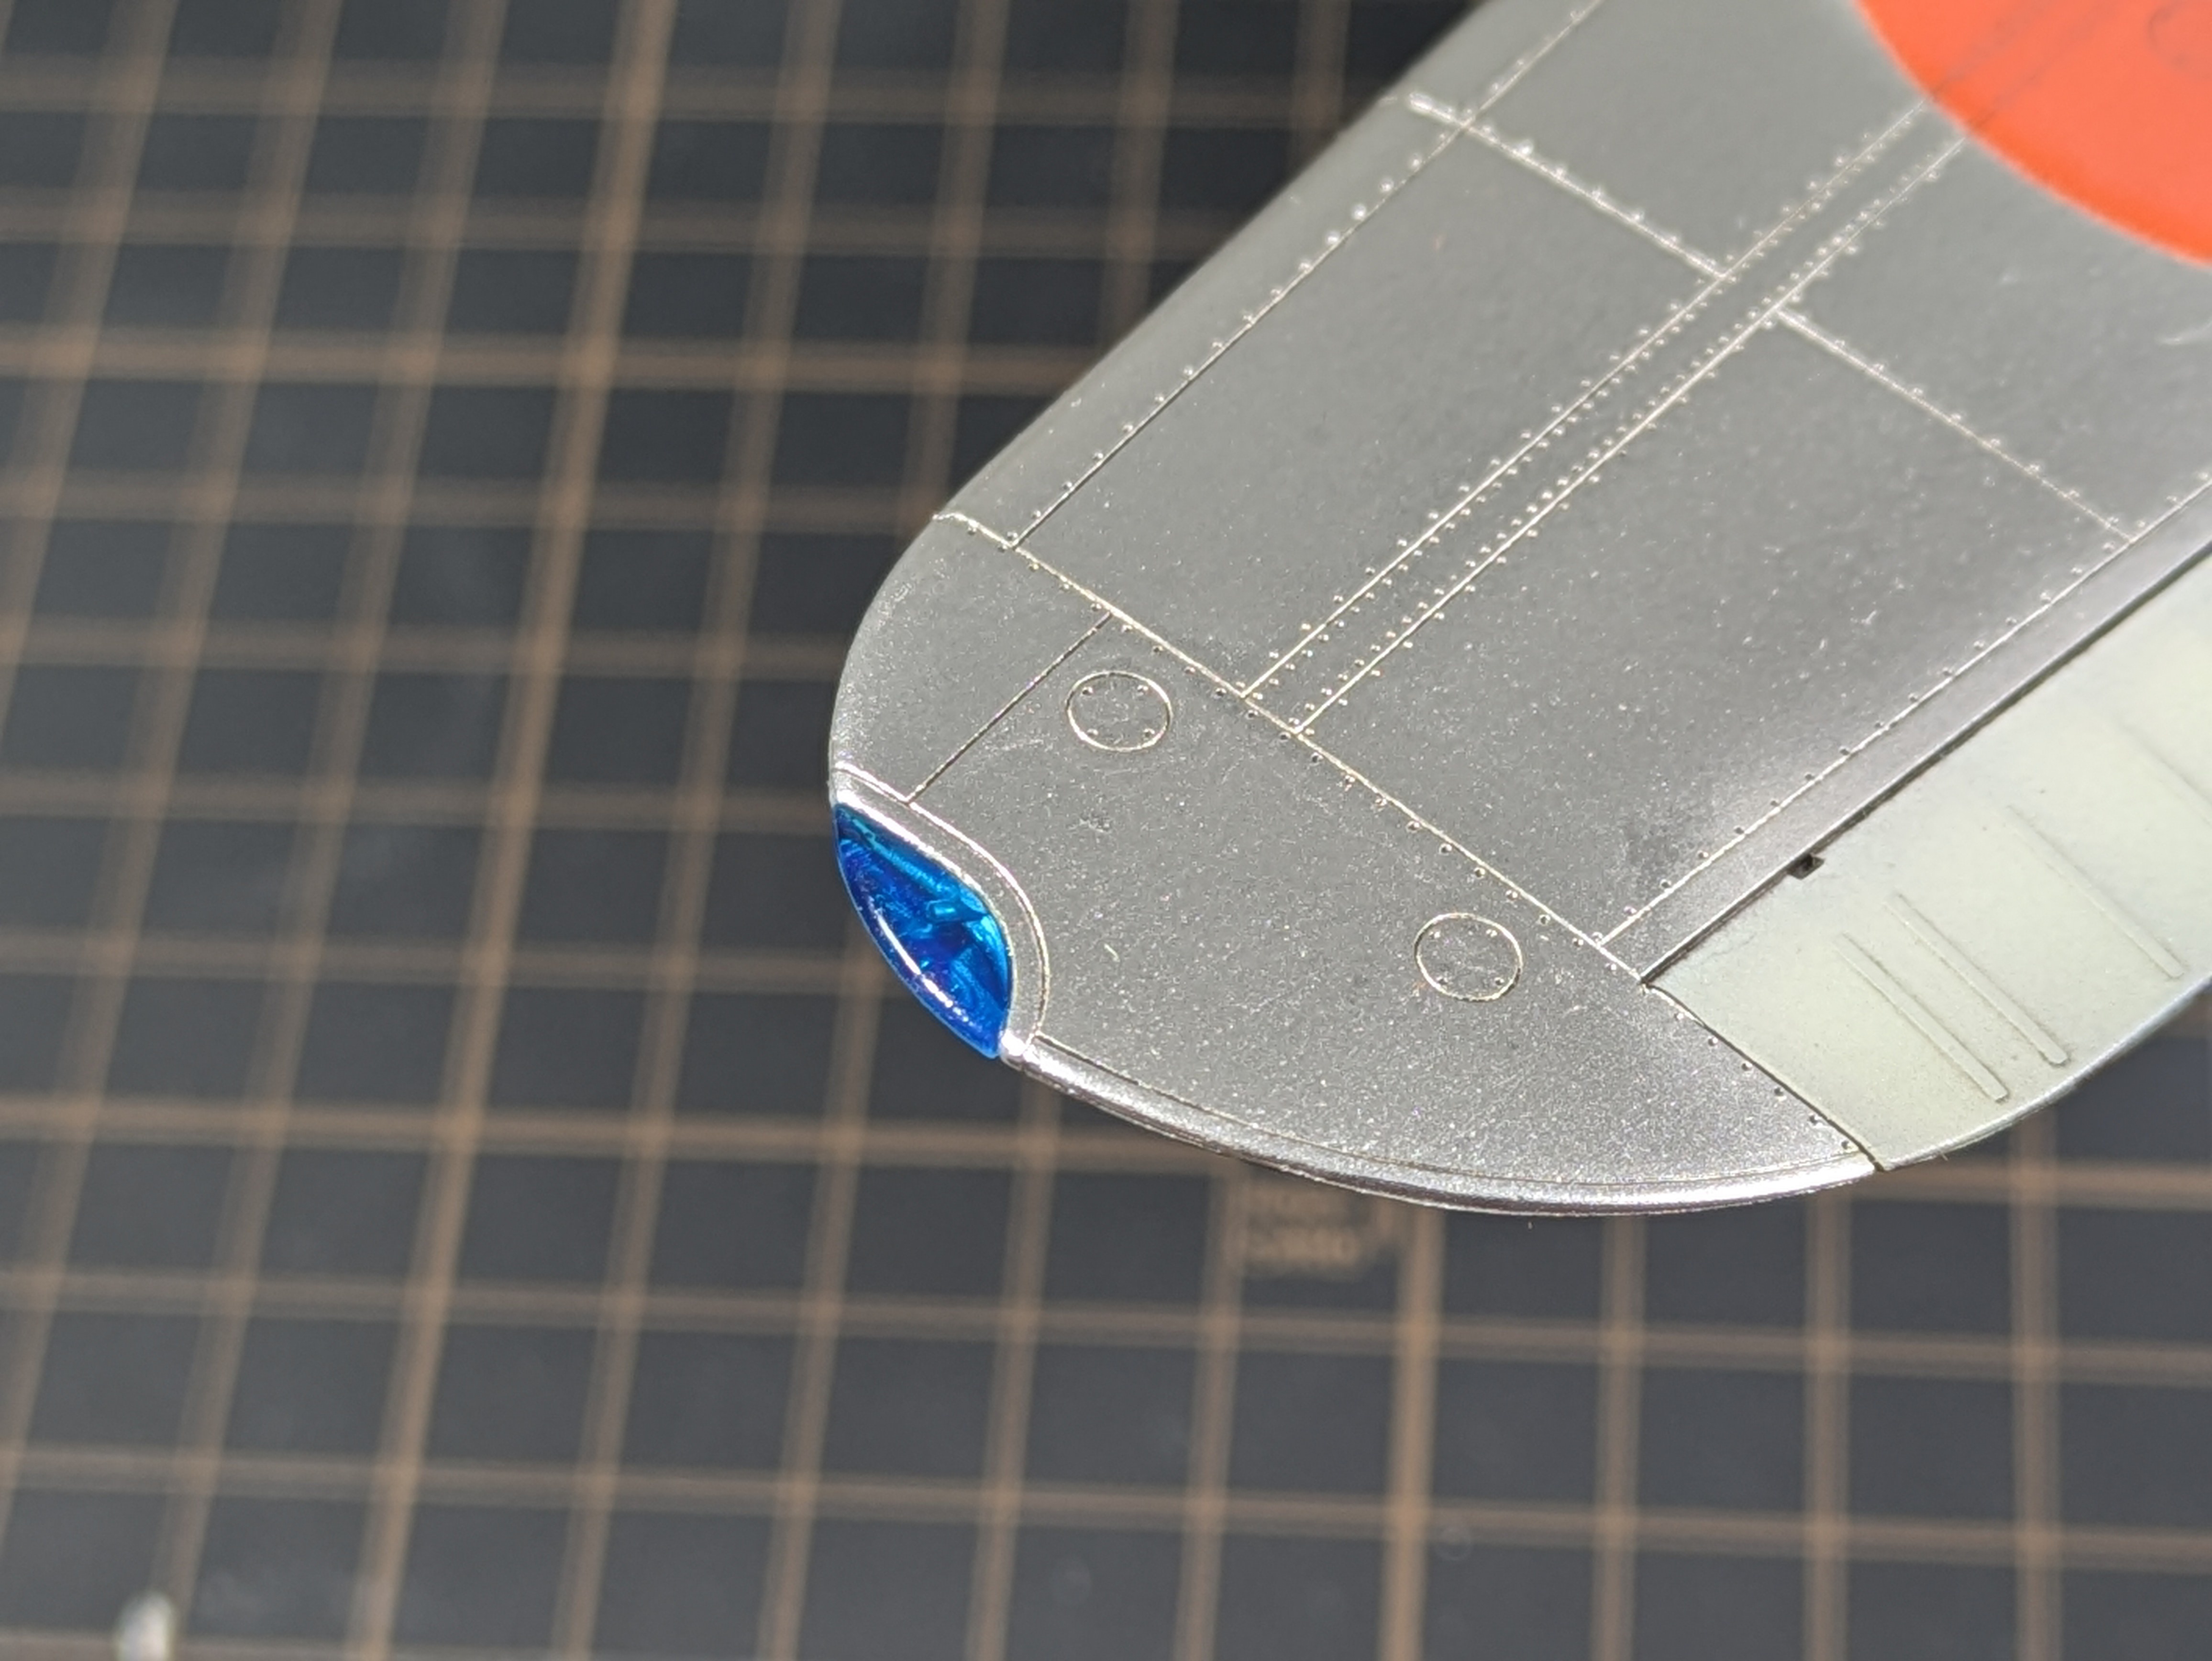
Underside blue wing tip light
All paints and supplies used in this build are in stock at Wheels and Wings Hobbies in Toronto, available online with Canada-wide shipping.
Shop Paints →Recent Posts
-

Kyle's Death Korps of Krieg Paint Guide - WW1 Krieger Build Feature
Wheels and Wings Hobbies - Miniature Paint Guide Kyle's Death Korps of Krieg - The 9th Regiment Warh …Jul 15, 2026 -

Kyle's Grey Knights Paint Guide - Garro Bladeguard Conversion Build Feature
Wheels and Wings Hobbies - Miniature Paint Guide Kyle's Grey Knights - Garro Build Feature Warhammer …Jul 09, 2026 -

Water in Your Airbrush Line? Here's How to Catch It
Wheels & Wings Hobbies · Counter Notes Why There's Water in Your Airbrush Line (And How to Catch It …Jul 08, 2026