
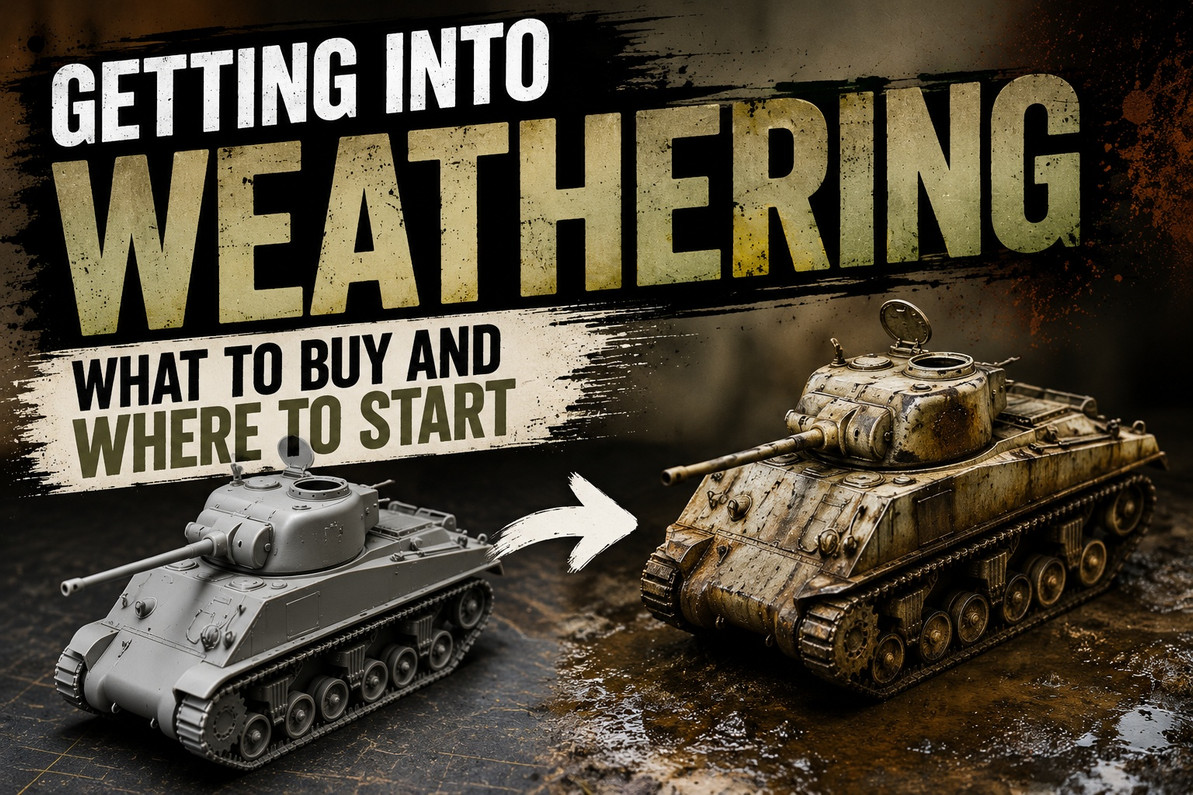
Getting Into Weathering: What to Buy and Where to Start
"I Want to Get Into Weathering, What Do I Buy?"
Weekly column · Lessons from the paint counter at WWH · August 2026
This is one of the most common questions we get at the counter, and it is one of the hardest to answer cleanly. "I want to get into weathering, what do I buy?" There is no single bottle we can hand you, because weathering is not a product. It is a plan you execute, and the products only make sense once the plan exists.
Part of the confusion starts with language. A lot of people arrive using "weathering" and "panel line wash" as if they were the same thing. They are not, but they are related, and that relationship is the key to the whole subject. A wash flowed into panel lines is a shading technique; the exact same wash pulled across a surface is a weathering technique. Same bottle, different intent. Once you see that a single product can do two jobs depending on what you are trying to convey, the shelf stops looking like a wall of competing brands and starts looking like a toolbox.
Before you look at a single product, a few questions need answering. Get those right and the buying decision mostly makes itself. Get them wrong and no amount of expensive product will save the result. Here is how we walk people through it at the counter.
Weathering is a plan, not a purchase. Answer four questions before you buy: where does the model live, what material are you depicting, what look are you after, and what scale are you working in. Getting the scale wrong is the single biggest mistake we see. Then products sort into jobs: a tonal wash to define and dirty (the beginner entry point), additive effects that add material (mud, snow, rust, moss), reductive effects that take material away (chipping, scratches, wear), and decay effects that stain and streak (oils, grime, rain marks). Start with a wash, then the Tamiya Weathering Set C.
Start here: four questions to answer before you spend a dollar
Where it lives, what it's made of, the look you want, and the scale you're in. Everything you buy follows from these.
The best thing you can do for a weathering job is decide it before you paint, not after. Plan your scheme with weathering in mind from the start, and if your model is going on a base, treat the base and the model as one picture, pulling the base's colour palette and techniques up onto the model so the two read as belonging together. A tank sitting in red mud should be wearing red mud. That decision is free, and it does more for realism than any single product.
1. Where does the model live?
Whether you are working from historical reference or from something entirely made up, your subject exists somewhere. A desert, a European winter, a humid jungle, a rusting shipyard, an alien world. Location dictates the colour of the dirt, whether there is dust or mud or snow, whether metal rusts orange or bleeds dark streaks. Pin this down first, because it decides the entire palette of everything that follows.
2. What material are you trying to convey?
Painted steel weathers differently from bare metal, which weathers differently from wood, canvas, rubber, or concrete. Before you can choose a product you need to know the surface you are imitating, because "worn" looks completely different on a chipped steel fender than on a sun-bleached wooden deck. Establish the material and the look you want becomes far easier to picture.
3. What look are you going for?
A factory-fresh vehicle with a light dusting is a different job from a battle-worn wreck. Decide how far down the road to ruin you want to travel before you start, because the amount and type of product changes completely between "lightly used" and "abandoned for a decade." This is also where you decide whether you are adding to the surface, taking away from it, or both. More on that below.
4. What scale are you working in? (The one everyone gets wrong)
This is the single biggest mistake we see, full stop. Weathering that is the wrong size for the scale ruins otherwise excellent work. A mud splatter that looks right on a 1/16 tank is a grotesque blob on a 1/72 one; a chip that reads perfectly at 1/35 vanishes at 1/144. Everything (the size of your chips, the coarseness of your pigment, the width of a streak) has to be scaled down to match the model. When in doubt, make the effect smaller and more subtle than instinct tells you. Under-scaled weathering reads as realism; over-scaled weathering reads as a mistake from across the room.
The add-or-subtract decision: once the first three are settled, sort the actual effects into two buckets. Some weathering adds material to the model: mud, snow, ice, moss, dust, rust build-up. Some weathering removes it: chipping, scratches, worn edges, physical damage. Most convincing models use a little of both, but knowing which bucket an effect belongs to tells you exactly which family of product you need. That is the bridge from planning to buying.
The four jobs weathering products do
Washes to define and dirty, additive effects to build up, reductive effects to wear down, decay effects to stain and streak. Almost every product on the shelf is one of these four.
One thing to hold in mind before the examples: none of these products are locked to a single job. The items named under each type are just a good place to start, not a rule about where a product has to stay. A pigment sold for dust can build up rust, a wash can streak as readily as it shades, and a chipping colour can be stippled on as grime. Use them freely across the categories. Once you know what an effect needs, reach for whatever gets you there, wherever it happens to sit on the shelf.
The wash: your entry point (and where "panel line wash" fits)
This is where we send almost every beginner. A wash is thinned, flowing pigment that settles into recesses and low areas. Directed into panel lines and around raised detail, it is a shading tool, the "panel line wash" people ask for. Pulled more broadly across a surface, the same product becomes general "dirtying," knocking back a too-clean finish and adding tonal variety. We usually recommend starting with a wash a shade darker or lighter than your base colour, so you learn to control a non-paint product that does both jobs. A ready-mixed acrylic like the Vallejo Model Wash range (the brown and dark brown are workhorses) is a low-stakes, high-learning first purchase.
Additive weathering: building material onto the model
When the effect adds to the surface (mud, snow, ice, moss, grass, caked dust, heavy rust), your options are almost always pastes, texture products, and pigments. The major players we carry are Vallejo, AK Interactive, Tamiya, and Warhammer's Citadel range, with a few others alongside them. For mud, a thick paste like Citadel Stirland Mud gives real three-dimensional texture; the Tamiya Weathering Stick is a beginner-friendly pen-type version. For snow, Tamiya's Snow Effect texture paste, the AK Interactive terrains snow paste, and Citadel Valhallan Blizzard all do the job. For dust and rust build-up, Vallejo pigments (and the Old Rust tone in particular) build up genuine grit. One caveat worth the counter time: loose pigments usually need a pigment fixer or a matte sealer to stay put, or the first handling wipes your work away.
Reductive weathering: taking material away
Chipping, scratches, worn edges, and physical damage all remove from the model, and they ask for more confidence than any other kind of weathering, because you are deliberately breaking up a finish you just spent time laying down. The gentlest route is a fluid method: paint the surface, coat it with a chipping medium such as Vallejo Chipping Medium, Tamiya Chipping Liquid, or AK's Heavy Chipping fluid, then paint your top colour and reactivate the layer with water to flake it away in controlled chips. Beyond chipping, effects like deep scratches and battle damage largely come down to creativity and a steady hand (a fine brush, a chipping sponge or rubber block, sometimes a knife tip), because you are physically taking paint or plastic off the base model. If you want a starting kit, the Vallejo Rust & Chipping Effects set bundles the colours for the job.
Decay weathering: stains, streaks, and surface variability
For streaking, oil stains, rain marks, and the general blotchy variability that makes a flat colour look lived-in, washes are the dominant tool, but they are not the only one. The AK weathering pencils let you place each individual mark and streak by hand, which is a wonderfully controllable way in for anyone nervous about flooding a surface with solvent. Purpose-made products like Vallejo's Streaking Grime, the AK Streaking Grime enamels, and the oil-stain tone in the Tamiya Weathering Set D handle the wetter, greasier end. Honestly, the best decay work usually combines the two, pencils for the precise marks and washes for the broad tonal grime, to git-r-done, as a certain cable guy would say.
The thread that runs through all of it
Understanding what each product is for, and having a plan for the scale you are working in, is the whole game. A wash defines and dirties. Additive products build material up. Reductive products wear it down. Decay products stain and streak. None of them can rescue a job that was never planned, and all of them shine when the plan came first. Decide where the model lives, what it is made of, how worn it should look, and how big the effects need to be, and the right products almost pick themselves.
The same principle as always at this counter: knowing what a technique is for beats memorising which bottle to grab.
If you want to start weathering this week
You do not need much, and you should not start with the exotic stuff. A simple, forgiving first setup:
- One tonal wash a touch darker or lighter than your base colour: your do-everything first product, for both panel lines and general dirtying
- The Tamiya Weathering Set C: three tones (orange rust, gun metal, and silver) that cover rust plus metallic scratches and wear on any painted surface, applied dry with the included applicator
- A matte varnish or pigment fixer to seal your work so it survives handling
Where to start: pick a model you have already finished (or an old one you don't mind risking) and do one effect. A brown wash pulled into the recesses. A little rust on the exhaust with Set C. Resist the urge to do everything at once.
Method: build in thin, gradual layers and assess between each, because weathering is far easier to add than to remove. Keep the effect scaled to the model, err on the side of subtle, and seal it when you are happy. When you want to grow, add a chipping fluid for reductive work and a weathering pencil for decay work.
The goal of the first session is not a masterpiece. It is learning what a single controlled effect does to a finished model, and learning to stop before you overdo it. That restraint is the technique.
Quick reference: weathering products we stock, by job
| Product | Job | What it actually does |
|---|---|---|
| Vallejo Model Wash (range) | Wash: define & dirty | Store pick for beginners: ready-mixed acrylic wash. Panel-line shading and general dirtying, depending on how you apply it. |
| Tamiya Weathering Set C | Additive / decay: dry pastel | Store pick for a first "real" set: orange rust, gun metal, silver. Dry-applied pastels for rust, scratches, and metallic wear. |
| Citadel Stirland Mud | Additive: mud | Thick textured paste for three-dimensional mud and caked earth. Build up in the recesses and around running gear. |
| Tamiya Snow Effect / Valhallan Blizzard | Additive: snow | Textured white pastes that build convincing snow and ice. Layer sparingly for fresh dusting, heavier for drifts. |
| Vallejo Pigments (range) | Additive: dust & rust | Fine earth and rust powders for dust, grime, and rust build-up. Needs a fixer or matte seal to stay put. |
| Vallejo Chipping Medium / Tamiya Chipping Liquid | Reductive: chipping | A layer between colours that reactivates with water, so you flake the top coat away in controlled chips and scratches. |
| God Hand Chipping Brush | Reductive: physical wear | A specialized brush used to pull paint off of your model after applying chipping medium/solution. |
| AK Weathering Pencils (range) | Decay: precise marks | Water-based pencils for placing individual streaks, chips, and stains by hand. The controllable way into decay work. |
| Vallejo Streaking Grime / AK Streaking Grime | Decay: streaks & oils | Pre-mixed streaking effects for grime runs, oil stains, and rain marks. Apply, then drag downward and blend. |
Frequently Asked Questions
Not quite, but they overlap, which is where the confusion comes from. A panel line wash is a shading technique: you flow a thinned pigment into recesses to make detail pop. Weathering is the broader job of making a model look used or aged. The same bottle of wash can do either: directed into panel lines it shades, pulled across a surface it dirties. So a wash is often a modeller's first weathering product, even though "panel lining" and "weathering" are different intentions.
A wash, a shade or two off your base colour. It is cheap, forgiving, and teaches the core skill (controlling a thin, non-paint product) while doing double duty as both panel-line shading and general dirtying. Once you are comfortable with it, the Tamiya Weathering Set C is our usual second recommendation: dry-applied pastels for rust and metallic wear, with nothing to thin and very little that can go wrong.
Nine times out of ten it is scale. Effects sized for a larger model (chips too big, mud too chunky, streaks too wide) read as fake on a smaller one. Everything has to scale down with the model. The fix is almost always to make the effect smaller, thinner, and more subtle than feels right, and to build it up gradually rather than committing to a bold effect in one pass.
Additive weathering adds material to the surface (mud, snow, dust, rust build-up, moss) and mostly uses pastes, texture products, and pigments. Reductive weathering removes material (chipping, scratches, worn edges) and uses chipping fluids, sponges, and abrasive tools, because you are physically breaking up the finish. Knowing which bucket an effect belongs to tells you exactly which family of product you need. Most convincing models use a bit of both.
Loose pigments, yes, almost always. Powders sit on the surface and the first handling will wipe your work away unless you lock them down with a pigment fixer or a matte varnish. Washes, pencils, and pastes are more durable but still benefit from a final matte coat to unify the finish and protect it. As a rule, seal anything you would be upset to smudge, and test your varnish on a scrap first, since a gloss coat can change how pigments read.
Yes, and most experienced modellers do. The thing to respect is not the brand but the chemistry: acrylics, enamels, and oils layer over each other well when each is sealed before the next, but a fresh solvent-based product can lift or reactivate an unsealed layer underneath. The safe order is generally acrylic first, then enamel or oil effects on top, with a varnish between stages if you are unsure. Test on a spare part before committing on the model.
Product characteristics drawn from manufacturer descriptions (Tamiya, Vallejo, AK Interactive, Mr Hobby/GSI Creos, Citadel) and common modelling-community practice. Weathering set contents confirmed against current WWH stock listings. Counter Notes publishes weekly, drawing on what we see and hear at the paint counter in Toronto.
All recommended weathering products are stocked at Wheels & Wings Hobbies in Toronto and available online with Canada-wide shipping.
Recent Posts
-

John's Starcraft Zerg Queen Paint Guide - Build Feature
Wheels and Wings Hobbies - Miniature Paint Guide John's Starcraft Zerg Queen Archon Studio - Starcra …Sep 24, 2026 -

Vlad's Tomb King on Necrolith Bone Dragon Paint Guide - Build Feature
Wheels and Wings Hobbies - Miniature Paint Guide Vlad's Tomb King on Necrolith Bone Dragon Warhammer …Sep 10, 2026 -

Kyle Paints Azrael, Supreme Grand Master of the Dark Angels - Build Feature
Wheels and Wings Hobbies - Miniature Paint Guide Kyle Paints Azrael, Supreme Grand Master of the Dar …Sep 09, 2026