
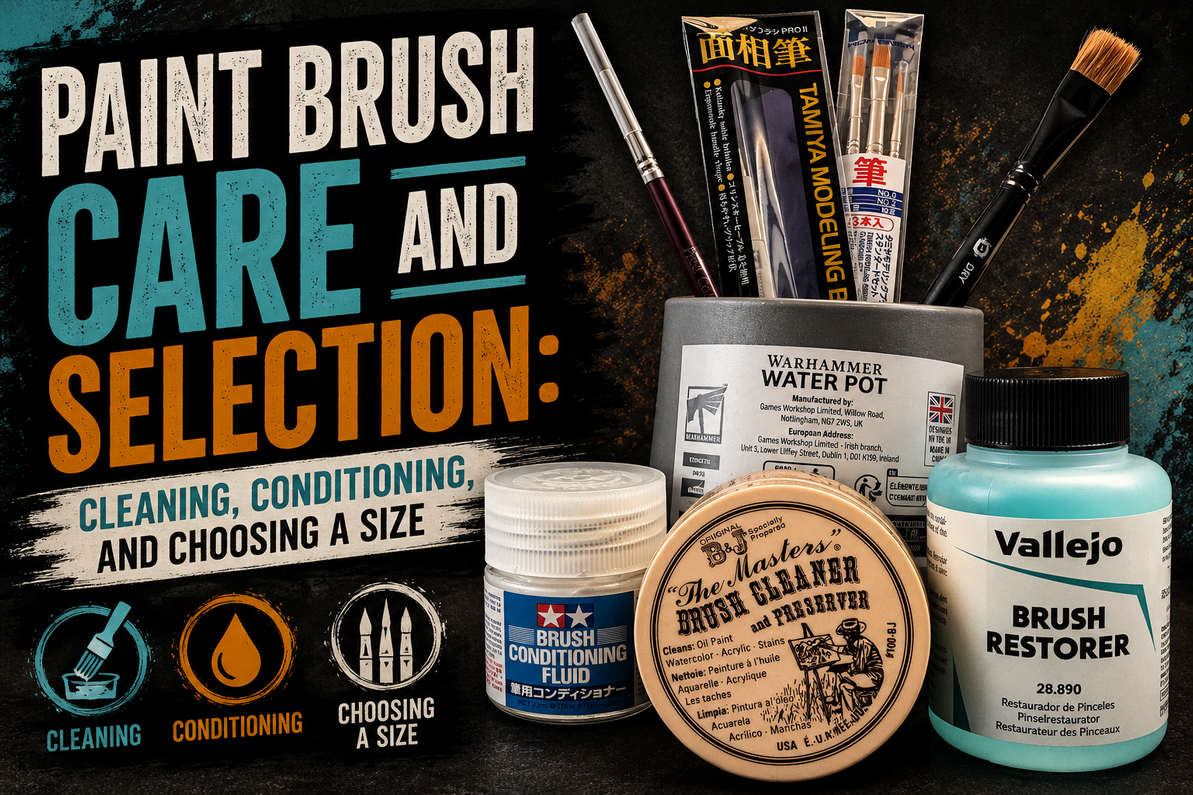
Paint Brush Care and Selection: Cleaning, Conditioning, and Choosing a Size
How to Take Care of Your Paint Brushes (And How to Pick the Right One)
Weekly column · Lessons from the paint counter at WWH · August 2026
New brush painters arrive at the counter from all sorts of directions. Some come over from another hobby where the skills half translate, some have always had a thing for art and finally found a subject, and plenty have never held a brush with intent before in their lives. What almost all of them share is the same opening question: where do I actually start?
Here is the concept that makes everything else fall into place. A paint brush is a tool. That is it. It is not a consumable you use up and throw away, and it is not a magic wand that paints better because it cost more. It is a tool, and like any other tool it works as well as you maintain it. A dull chisel and a splayed brush fail for exactly the same reason.
That framing gives you two jobs: keep the tool in good shape, and pick the right tool for the job in front of you. Get those two right and brush painting becomes a pleasure. Get them wrong and you will fight the brush every session, blame yourself for the results, and eventually lose the motivation to keep going. We see that second version at the counter more often than we would like, and it is almost always fixable with two products and a handful of habits.
A brush is a tool and needs maintaining like one. At a minimum, own a brush soap and a brush conditioner and use them every session: The Masters Brush Cleaner and Preserver plus Tamiya Brush Conditioning Fluid. Then four habits: rinse while you paint, keep paint out of the ferrule, respect the grain of the bristles, and maintain the shape of the head as you work. For selection, remember that brush sizes are not standardised between brands. Big flat for large surfaces, finest point you can find for detail, and a size 1 round for almost everything else.
The two products every brush painter should own
A soap to get the paint out, and a conditioner to put the shape back. Without both, you are not really maintaining the tool.
Water alone does not clean a brush. It rinses the loose paint off the outside of the bristles and leaves the rest, which slowly builds up toward the base of the head, stiffens, and pushes the bristles apart from the inside. That is the mechanism behind most dead brushes we see across the counter, and it happens quietly over weeks rather than all at once, which is why people rarely connect the cause to the result.
Brush soap: our pick is The Masters Brush Cleaner and Preserver
The Masters Brush Cleaner and Preserver is a favourite of the hobby generally and of Wheels & Wings Hobbies specifically. It is the product we hand to everybody who is starting out, and in our experience people try it once and simply stay with it. It works on acrylics, oils, and watercolours, which matters more than it sounds like it does, because most modellers end up using more than one of those within a year. Wet the brush, swirl it on the cake of soap, work the lather gently into the bristles with your fingers, rinse, and repeat until the lather comes back white instead of coloured.
Two special cases worth knowing about. If you are painting with alcohol based paints such as Vallejo Liquid Gold, ordinary soap will struggle, and Vallejo Brush Cleaner is formulated for exactly that job. And if a brush has already gone stiff on you, Vallejo Brush Restorer softens and restores fine sable that soap alone will not rescue. It is a last resort rather than a routine product, but it has saved brushes we thought were finished.
Brush conditioner: our pick is Tamiya Brush Conditioning Fluid
Soap gets the paint out. Conditioner puts the brush back together. Tamiya Brush Conditioning Fluid is a way to reshape and set your brushes so they feel as close to new as possible every time you reach for them. You work a little into the clean, damp head, draw the bristles back to a point, and let them dry that way. The next session you rinse it out and paint. The difference after a few weeks of doing this is not subtle, especially on natural hair brushes that have started to lose their point.
The honest summary: these two items are the active products you should be using every brush painting session, or some variation of them. Without them you are not optimally taking care of your brushes, which means they will lose shape and eventually stop being usable. Two products, roughly the price of one decent brush, protecting every brush you own.
Four habits that keep any brush ready for the job
These matter no matter what your brush cost. An expensive brush treated badly dies just as fast as a cheap one, it just costs more when it does.
1. Rinse actively, not just at the end
Rinse your brush every so often while you are painting rather than leaving it until the session is over. Paint starts drying in the head the moment it is loaded, and an hour of steady work with no rinsing means an hour of drying time for whatever crept up toward the base. A quick rinse between colours, or every few minutes on a long stretch of one colour, costs you nothing and removes the paint while it is still soft enough to come out.
2. Do not let paint into the ferrule
The ferrule is the metal band that joins the handle to the bristles. If paint gets up in there and dries, the brush may be cooked, unless you manage to get the paint completely out, which is very difficult. Dried paint inside the ferrule acts like a wedge: it forces the bristles outward at the root, and no amount of conditioner will pull a splayed head back to a point once that has happened. Load paint on the lower two thirds of the head, not right up to the metal, and rinse before the paint has a chance to migrate.
3. Maintain the grain of the bristles
Bristles have a direction, and every stroke you make either respects it or fights it. When you dry a brush on paper towel, pull it toward you with very little pressure, in the direction the hairs naturally lie. Do not scrub it side to side or push it against the grain, which splays the head and breaks individual bristles. Same principle when you load paint: draw the brush through the paint rather than stabbing at it.
4. Keep the shape of the head during the session, not after it
Watch the head as you work and keep bringing it back to shape as you go. A brush that has been allowed to splay for an hour is an uphill battle to reshape afterward, and each time you win that battle you lose a little of the brush. Reshaping is easy when the head is still mostly right and hard when it is not, so the cheapest possible maintenance is simply paying attention while you paint.
A note on drybrushing
Drybrushing breaks every rule above on purpose. You are scrubbing an almost dry brush against the grain, into the surface, with pressure, which is precisely the treatment that splays a head permanently. It is a legitimate and very useful technique, and we recommended it as one route into zenithal highlighting not long ago, but do it with a brush you have retired for the purpose rather than your good one. Old brushes that have lost their point make excellent drybrushes, which is a nice second life for a tool you would otherwise bin. If you would rather use something built for it, the Citadel Dry range and the Army Painter Wargamer drybrushes both use stiff bristles and a flat profile that stand up to the abuse.
One more thing worth saying out loud: never leave a brush standing on its head in a water pot. It is the fastest way to bend the bristles permanently and to soak the ferrule. Lay it flat, or use a stand. Something as ordinary as a cup or mug removes the temptation entirely.
Choosing the right brush: sizes, shapes, and the brush belly
The single most useful thing to know before you buy: brush sizes are not an industry standard.
Every company sets its own sizes and its own designations. A Tamiya size 1 may not be the same size as a Vallejo size 1, and neither is guaranteed to match an AK or an Ammo size 1. There is no governing body, no standard, no conversion chart that actually holds. This trips up more beginners than almost anything else on the shelf, because they buy a second brush in the same number expecting a match and get something noticeably different. Buy by eye where you can, and when you are ordering online, treat the number as a rough guide within one brand rather than an absolute measurement across brands.
Doing large surface work?
Pick the biggest flat head brush you think is ideal for the project. Flats lay colour evenly across broad panels and armour plate with far fewer strokes, and fewer strokes means fewer visible edges where one pass overlaps another. Something like a Tamiya HGII Flat Medium or the Army Painter Wargamer Vehicle and Terrain Brush covers this comfortably, and for genuinely big subjects the Vallejo Size 8 effects brush is sized for anything large especially terrain. If you are basecoating a large flat surface and finding it streaky, the brush is usually as much to blame as the paint.
Doing small detail work?
Pick the finest tip you can find, but the thing that actually matters on a detail brush is the brush belly: the body of the head that holds paint. A brush with a decent belly holds more paint, which means less reloading, and less reloading means less paint sitting on the brush drying while you work. A tiny brush with no belly runs dry after two strokes and forces you back to the palette constantly, which is where a lot of the frustration on fine work actually comes from. Options here range from a Tamiya HGII Pointed Ultra Fine through to a Citadel Artificer Layer Brush in sable, and for the very smallest marks, eye dots, lenses, tiny insignia, the Army Painter Wargamer Insane Detail Brush is named about right.
Looking for one general purpose brush?
We usually recommend a size 1 round for most use cases, flat surfaces excepted. At that size you get a genuinely useful brush belly and still get a nice point, which is a combination that covers a surprising amount of ground: basecoating small areas, layering, shading, most detail short of the very finest. If somebody is buying exactly one brush, this is the one we point them at. The Army Painter Wargamer Regiment Brush, the Citadel Medium Layer Brush, and the Tamiya HGII Pointed Fine all sit in this bracket, whatever number each brand happens to print on the handle.
Why this matters more than it seems: not maintaining your brush, or picking the wrong brush for the job, leads straight to frustration and a lack of motivation to continue. That is the real cost, not the brush. And once you move up to higher end brushes, protecting the investment stops being a nice idea and starts being the reason you can justify owning them at all.
The thread that runs through all of it
Treat the brush as a tool and both halves of this column become obvious. Tools get cleaned and maintained after use, so you own a soap and a conditioner and you use them. Tools get chosen for the task in front of them, so you reach for a flat on a broad surface and a fine point with a good belly on detail work. Neither half is expensive and neither half is complicated. What they buy you is a brush that behaves the same way every time you pick it up, which is the thing that actually makes painting enjoyable.
The same principle as always at this counter: knowing what a tool is for, and what it needs from you, beats memorising which product to grab.
If you are setting up your first brush kit this week
You need less than you think. A complete, sensible starting setup:
- The Masters Brush Cleaner and Preserver: the soap, and the one we start everybody on
- Tamiya Brush Conditioning Fluid: the conditioner, for reshaping and setting the head
- A size 1 round as your everyday brush, for example the Army Painter Wargamer Regiment Brush
- A flat in whatever size suits your subject, such as a Tamiya HGII Flat Medium for larger panels
- A fine detail round once you know you need one, like the Tamiya HGII Pointed Ultra Fine
- A wet palette, which keeps paint workable and cuts down how fast it dries in the brush
Where to start: buy the soap and the conditioner before you buy a third brush. Painters routinely own five brushes and no way to look after any of them, and every one of those five is quietly on its way out.
Method: rinse as you go, keep paint off the ferrule, dry toward you with light pressure, reshape as you work, and give the brush a proper soap and condition at the end of every session. It adds maybe three minutes to a paint session. Also worth knowing: thin your paint properly, because thick paint is one of the main things that forces its way into the ferrule in the first place, and we covered that in how to thin acrylic paint for miniatures and scale models.
The goal of the first month is not a perfect model. It is arriving at your next session with a brush that still points the way it did when you bought it. That habit is worth more than any upgrade.
Quick reference: brush care and brush types we stock
| Product | Job | What it actually does |
|---|---|---|
| The Masters Brush Cleaner & Preserver (1oz) | Brush soap | Store pick, and what we start everyone on: lifts paint out of the body of the head, not just off the outside. Works with acrylics, oils, and watercolours. |
| Tamiya Brush Conditioning Fluid | Brush conditioner | Store pick for conditioning: reshapes and sets the head so the brush feels close to new every time you pick it up. Use on a clean, damp brush. |
| Vallejo Brush Restorer (85ml) | Rescue product | Softens and restores fine sable that has already stiffened up. A last resort rather than routine care, but it does save brushes. |
| Vallejo Brush Cleaner (85ml) | Specialist cleaner | For brushes used with alcohol based paints such as Liquid Gold, and for brushes that have sat unused with residue in them. |
| Army Painter Regiment / Citadel M Layer / Tamiya HGII Pointed Fine | General purpose | Our default recommendation: the size 1 round balances a useful paint belly against a fine enough point to cover most jobs except flat surfaces. |
| Tamiya HGII Flat Medium / Army Painter Vehicle & Terrain | Large surfaces | Lays even colour across panels and plate in fewer strokes, which is what keeps a basecoat from looking streaky. |
| Tamiya HGII Pointed Ultra Fine / Citadel Artificer Layer / Army Painter Insane Detail | Fine detail | Fine points for eyes, edges, and small markings. Judge these on the belly as much as the tip, since a brush that runs dry instantly is no help. |
| Citadel M Dry / Army Painter Wargamer Drybrush | Drybrushing | Stiff bristles and a flat profile built to survive a technique that would wreck a good round. Use these rather than sacrificing a detail brush. |
| Tamiya HGII Rounded Flat Soft Medium | Blending | Rounded flat head for blurring and fusing colours into smooth transitions. Useful once you start blending and glazing. |
| The Army Painter Wet Palette | Supporting kit | Keeps paint workable on the palette instead of drying in your brush. Indirect brush care, and a real one. |
Frequently Asked Questions
Not properly. Water rinses paint off the outside of the bristles and leaves what has worked its way into the body of the head. That residue builds up, stiffens, and pushes the bristles apart from the inside, which is how most brushes actually die. A brush soap such as The Masters Brush Cleaner and Preserver lifts that residue out. Water is for rinsing during the session, soap is for cleaning at the end of it.
A size 1 round. It has enough of a paint belly to hold a workable amount of paint and still comes to a decent point, so it handles basecoating small areas, layering, shading, and most detail. The exception is large flat surfaces, where a flat brush will always do a cleaner job. Remember that sizes are not standardised between brands, so a size 1 from one company will not exactly match a size 1 from another.
No, and this catches out a lot of people. There is no industry standard for brush sizing. Every company decides its own dimensions and its own designations, so a Tamiya size 1 may be noticeably different from a Vallejo size 1, and neither has to match an AK or an Ammo. Treat the number as a guide within a single brand and compare brushes by eye when you can.
The belly is the body of the brush head, the part that actually holds paint. A brush with a good belly carries more paint per load, so you reload less often, and less reloading means less paint sitting on the brush drying out while you work. On detail brushes especially, people fixate on the tip and ignore the belly, then wonder why the brush runs dry after two strokes. Both matter.
Sometimes, but it is very difficult, and once dried paint has wedged the bristles apart at the root the brush is usually cooked. It is worth trying a long soak and a patient session with brush soap, working the lather in gently and repeatedly, before you give up on an expensive brush. The real answer is prevention: load paint on the lower part of the head, thin your paint properly, and rinse regularly during the session so it never has the chance to travel up and dry.
Soap cleans, conditioner reshapes. You can get by on soap alone for a while, but a conditioner such as Tamiya Brush Conditioning Fluid holds the head in shape while it dries, which is what keeps a point sharp over months rather than weeks. On natural hair brushes in particular it makes a visible difference. If you own brushes you would be annoyed to replace, you want both.
That is a bigger subject than we can do justice to here, and it is the topic of a future column. The short version for now: both are good, both are used by excellent painters, and neither will perform if you do not maintain it. Get your care routine sorted on affordable synthetics first, then move up to natural hair knowing you can look after it.
Product characteristics drawn from manufacturer descriptions (General Pencil Co., Tamiya, Vallejo, Citadel, The Army Painter) and everyday counter experience. Brush hair and material types are covered in a future column. Counter Notes publishes weekly, drawing on what we see and hear at the paint counter in Toronto.
All recommended brushes and brush care products are stocked at Wheels & Wings Hobbies in Toronto and available online with Canada-wide shipping.
Recent Posts
-

What Glue Should I Use? A Scale Modelling Adhesive Guide
Wheels & Wings Hobbies · Counter Notes What Glue Should I Use? Lessons from the paint counter at W …Oct 16, 2026 -

John's Starcraft Zerg Queen Paint Guide - Build Feature
Wheels and Wings Hobbies - Miniature Paint Guide John's Starcraft Zerg Queen Archon Studio - Starcra …Sep 24, 2026 -

Vlad's Tomb King on Necrolith Bone Dragon Paint Guide - Build Feature
Wheels and Wings Hobbies - Miniature Paint Guide Vlad's Tomb King on Necrolith Bone Dragon Warhammer …Sep 10, 2026