
Beginner Airbrush Guides
The Beginner’s Guide to Airbrushing — What Actually Matters Before You Start
From a Toronto hobby retailer since 1986 · Airbrush setup, PSI, thinning, and maintenance · Updated May 2026
Getting into airbrushing is one of the best upgrades you can make to your modelling or miniature painting workflow — but it comes with a learning curve that trips up a lot of beginners in the same ways. Poor spray results, clogged nozzles, bent needles, and baffling pressure problems are almost always caused by a small number of fixable fundamentals.
This guide covers what we actually talk through with customers in store: how an airbrush works, how to manage pressure, how to thin paint correctly, and how to keep your equipment running without over-maintaining it. If you have questions about specific Iwata models or which compressor suits your setup, browse our airbrush range or come in to the shop — we stock the full Iwata line and can walk you through it.
An airbrush is a precision tool, not a paint sprayer — treat it that way. Never force components. PSI and thinning work together; adjusting one without the other rarely fixes anything. Thin paint to a milk-like consistency using a thinner that matches your paint chemistry. Clean after every session, but don’t disassemble unnecessarily. The most common failure we see in store is a bent needle from being pulled out the front — always remove it from the back.
1. Knowing Your Airbrush
The key components and what they do
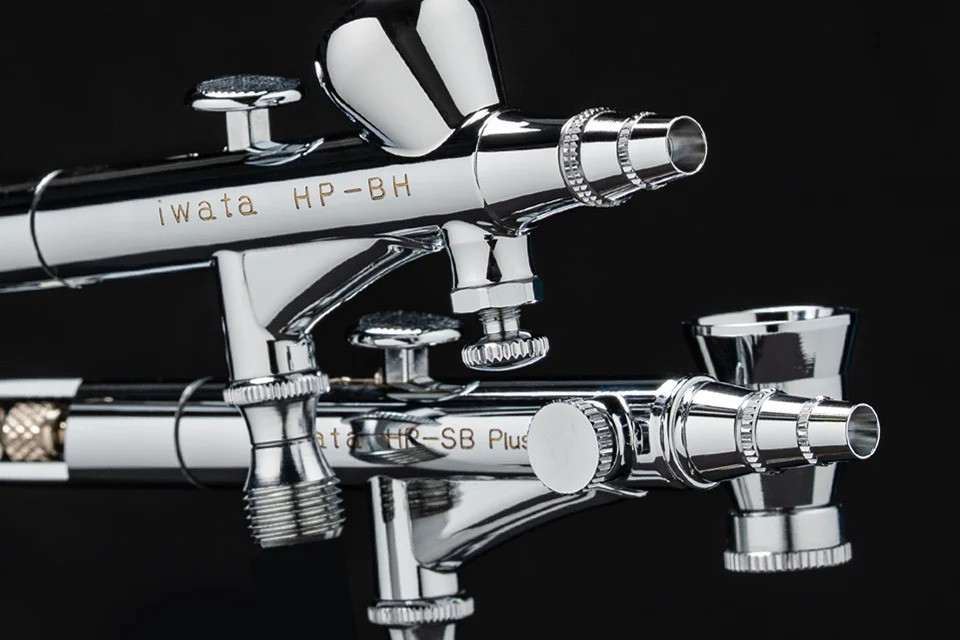
Most Iwata hobby airbrushes — the Neo, Eclipse, HP-CS, and others — share the same core layout. Understanding what each part does will tell you immediately where a problem is coming from when something goes wrong.
| Part | Function |
|---|---|
| Needle | Controls paint flow and atomization. Its position relative to the nozzle determines how much paint exits. This is the most delicate part of the airbrush. |
| Nozzle | The very tip where paint is atomized into a fine spray. Extremely delicate — even a minor impact can crack it. Replace it rather than attempting repairs. |
| Nozzle Cap / Air Cap | Sits over the nozzle and shapes the airflow around it. The pattern and focus of your spray is directly influenced by how this is seated. |
| Trigger | On a double-action airbrush: press down to open the air valve, pull back to open the paint flow. The two axes are independent, giving you full control mid-stroke. |
| Needle Chuck & Spring | Holds the needle in position and returns it forward when the trigger is released. A worn spring leads to inconsistent paint shutoff. |
| Paint Cup | Gravity-feed cups sit on top; siphon-feed bottles attach below. Gravity feed is preferred by most modellers — it requires less pressure and handles thinner mixes better. |
Beginner Rule #1: Never force anything. If a component doesn’t move easily, stop. Airbrush tolerances are tight by design. Forcing a stuck nozzle, over-tightening threads, or pushing a bent needle through will turn a minor issue into an expensive one.
Double-action vs. single-action — which do you have?
This matters more than most beginners realise. A single-action airbrush (like the Iwata Neo TRN1) opens air and paint simultaneously when you press the trigger — paint flow is preset by a dial, not the trigger pull. These are simpler and good for base coating and priming, but offer less in-the-moment control.
A double-action airbrush (like the Eclipse HP-CS) separates air and paint into two trigger axes. You press down for air, then pull back for paint — and you can vary both continuously during a stroke. This is what gives experienced painters the ability to fade, feather, and transition without stopping. Most modellers quickly outgrow single-action; if you’re buying your first serious airbrush, start with double-action.
The #1 beginner mistake: bending the needle
Bent needles are the most common airbrush failure we see in store. The needle is very fine at the tip and will bend with almost no lateral force. A bent needle causes a consistently off-centre or broken spray pattern that no amount of cleaning or pressure adjustment will fix.
How needles get bent:
- Pulling the needle out through the front of the airbrush instead of the back
- Dropping the airbrush tip-down onto a hard surface
- Over-tightening the nozzle, which distorts the channel the needle seats into
- Wiping the needle tip sideways rather than rotating it against a cloth
- Reinserting the needle at an angle rather than straight
The correct way to remove the needle: loosen the needle chuck at the back of the body, then slide the needle straight out the back. Never push it out through the nozzle end. Replacement needles are inexpensive, but the habit of removing them correctly means you rarely need to replace them at all.
Use genuine replacement parts
Iwata manufactures to very tight tolerances. Aftermarket needles and nozzles are machined to looser specs and consistently cause problems: uneven spray patterns, constant tip dry, or a trigger feel that doesn’t return cleanly. The cost saving is not worth it. Stick with OEM Iwata parts — browse needles and nozzles in our store.
2. Understanding Compressor PSI
One of the most common beginner misconceptions is that higher PSI produces better results. In practice, the opposite is usually true. Lower pressure gives you more control — finer atomization, less overspray, better feathering — but only if your paint is thinned to the right consistency. PSI and thinning are interdependent. Adjusting one without the other almost never fixes a spray problem.
Running too high a PSI is a crutch for underthinned paint: the pressure blasts the paint through regardless, but the results are rough, grainy, and difficult to control. Running too low a PSI with paint that’s also underthinned will stall the airbrush entirely. Find the combination that gives you clean, consistent atomization — then dial back the PSI until it’s the lowest you can go while maintaining that quality.
Starting point PSI by technique
These are starting points, not rules. Your specific paint, thinner, nozzle size, and airbrush model will all influence where you end up.
| Technique | PSI Range | Notes |
|---|---|---|
| Fine lines & detail work | 10–15 PSI | Paint must be well-thinned. Move closer to the surface and reduce trigger pull. |
| General base coating | 15–20 PSI | The everyday range for hobby acrylics and lacquers. |
| Primers | 20–30 PSI | Primers are thicker by nature — thin them well and start at the lower end. |
| Metallics & thicker paints | 20–25 PSI | Metallics have larger pigment particles — slightly higher pressure helps keep them suspended. |
| Pre-shading & zenithal work | 12–18 PSI | Low pressure with a heavily thinned mix gives you the soft gradients pre-shading relies on. |
Troubleshooting logic:
- Grainy, rough surface? Paint is too thick, or pressure is too high, or you’re holding the airbrush too far away.
- Splattering or spitting? Paint is too thick, or there’s dried paint partially blocking the nozzle.
- Struggling to spray / weak flow? Thin the paint first, then increase PSI incrementally.
- Overspray and bleed? Pressure too high for the distance you’re working at. Move closer or reduce PSI.
- Off-centre spray pattern? Check for a bent needle or debris on the nozzle tip.
What to look for in a compressor
A cheap tankless compressor will produce pressure pulses that create a stuttering spray — even if your paint and technique are correct. A good hobbyist compressor needs:
- Air tank — absorbs pulses and smooths the pressure output. Also reduces overall noise because the motor cycles off once the tank is charged rather than running continuously.
- Regulator with gauge — essential for dialling in and repeating your PSI settings.
- Moisture trap — water in the airline causes spitting. A moisture trap between the compressor and airbrush is not optional if you’re working in a humid environment(Toronto Summer Included).
- Quiet operation — this matters more than you expect if you’re working at home, especially in the evenings or living in an apartment/condo.
Popular beginner-friendly Iwata options we stock: Iwata Ninja Jet (compact, portable, no tank — a capable starter), Iwata Silver Jet (adds a small tank), and the Iwata Power Jet Pro (dual airbrush capable, larger tank — the step up for serious use). Browse the full compressor range here.
3. Thinning Paint for the Airbrush
Thinning is the skill that separates a frustrating airbrushing experience from a satisfying one. Even an excellent airbrush and compressor will underperform if the paint isn’t prepared correctly. Most spray problems — tip dry, spattering, orange peel texture, clogs — trace back to paint that is too thick or thinned with the wrong product.
Why you shouldn’t use water
Water is the default thinning instinct for anyone working with water-based acrylics — and it’s understandable. But water has high surface tension, which causes problems at the atomization level. Even combined with flow improver, water-thinned paint tends to bead on the surface rather than laying flat, spray inconsistently, and reduce adhesion and durability.
Dedicated airbrush thinners are formulated specifically to lower surface tension, maintain the paint’s binder chemistry, and improve flow through fine nozzles. They are not interchangeable with water, and the difference in results is noticeable.
Match your thinner to your paint chemistry
This is the most important rule in airbrushing. The wrong thinner can curdle your paint, damage your airbrush seals, or produce completely unpredictable spray behaviour. Before thinning anything, know what type of paint you’re working with:
| Paint Type | Examples | Use This Thinner |
|---|---|---|
| Standard acrylic (water-based) | Vallejo, AK Real Colors water series, Citadel | Dedicated acrylic airbrush thinner; flow improver as supplement |
| Hybrid acrylic (alcohol-based) | Tamiya X/XF acrylics, Mr Hobby Aqueous series | Lacquer thinner with retarder (recommended), IPA, or water. Tamiya 87194 or Mr Leveling Thinner give the best results. |
| Lacquer | Tamiya LP, Mr Color, AK Real Colors lacquer series | Lacquer thinner from the same brand or a compatible hobby lacquer thinner |
| Enamel | Tamiya enamel X/XF series, Humbrol | Enamel thinner or mineral spirit-based thinner from the same manufacturer |
A note on hybrid acrylics: Tamiya’s X and XF acrylics and Mr Hobby Aqueous paints are commonly described as “acrylics” but are alcohol-based rather than water-based. This makes them behave more like a mild solvent paint, and it’s why they respond so well to lacquer thinners. They are especially popular for airbrushing precisely because of this. However, because they are solvent-based, brush painting with them requires care — a second coat can reactivate and lift the first if applied before it is fully dry.
Canadian modellers:
Tamiya X-20A acrylic thinner is currently unavailable in Canada due to Health Canada regulations. For thinning Tamiya acrylics, we recommend Tamiya Lacquer Thinner with Retarder (87194) or Mr. Hobby Leveling Thinner — both are in stock. Mr. Hobby Aqueous Color Thinner is also compatible. Ask us in store if you’re unsure.
Aim for milk consistency, not a specific ratio
There is no universal thinning ratio. The right amount depends on the paint brand, the batch, the specific colour (some pigments are inherently denser), your nozzle size, your PSI, and what you’re trying to achieve. Published ratios like “1:1” or “2:1” are starting points, not targets — and a ratio that works perfectly for one Vallejo colour may be completely wrong for another.
Instead, aim for a consistency that looks and behaves like semi-skimmed milk: smooth and fluid, not syrupy or watery. When you lift a stir stick out of the cup, the paint should flow off in a clean, thin sheet. If it runs off in clumps or drops, it’s too thick. If it looks completely transparent, you’ve gone too far — though overthinned paint is generally easier to recover from than underthinned.
How to thin correctly
Mixing outside the cup (recommended for beginners):
- Start with a small amount of paint in a mixing vessel
- Add thinner a few drops at a time — it’s easier to thin further than to fix an overthinned mix
- Mix thoroughly and check consistency against the milk benchmark
- For water-based acrylics, add one drop of flow improver at a time if needed to help with atomization and levelling
- Test spray on scrap card before applying to your model
- Adjust and repeat as needed
Mixing directly in the cup:
- Add a small amount of thinner to the cup first
- Add paint gradually, a few drops at a time
- Mix gently and check consistency
- Test spray; adjust before committing to the model
Both approaches work. Mixing outside keeps the cup cleaner and makes it easier to dispose of mistakes without wasting airbrush cleaner.
4. Cleaning — How Much Is Enough?
Over-cleaning is a genuine problem. Many beginners, spooked by advice about clogged nozzles, disassemble their airbrush after every session and wonder why they keep damaging parts. The nozzle in particular is fragile — repeated removal and reinstallation strips threads and cracks the tip far faster than normal use would.
The goal is a clean airbrush, not a sterile one. There are three levels of cleaning, and most sessions only require the first two.
Between colours (during a session)
Use this whenever switching colours or pausing for more than a few minutes. Takes 30–60 seconds.
- Empty the paint cup
- Add a small amount of appropriate thinner or airbrush cleaner
- Back-flush gently: cover the nozzle tip with a clean finger or cloth and press the trigger lightly to push air back through the body — this agitates any paint sitting at the nozzle. Important: dump the back-flushed liquid, do not spray it
- Add more thinner and spray through until it runs clear
- Wipe the cup with a lint-free cloth or cotton swab
End of session
At the end of the day, take one extra step beyond the between-colour routine:
- Flush with thinner until the spray runs completely clear
- Loosen the needle chuck, pull the needle out straight from the back
- Wipe the needle gently from chuck to tip using a lint-free cloth — rotate it while wiping rather than dragging sideways
- Reinsert the needle carefully, straight into the back, and retighten the chuck
- Spray one more pass of clean thinner and let it air out
There is no need to remove the nozzle for a standard end-of-session clean. If paint dried in the cup during a session, a small amount of the appropriate cleaner on a cotton swab will deal with it.
Full teardown (occasionally, and only when needed)
Reserve a full disassembly for genuine problems:
- The airbrush still sputters after a thorough standard clean
- The trigger feels sticky or unresponsive
- Paint was left to dry inside the body
- You notice a significant change in spray pattern without any other explanation
When you do a full teardown, work over a white cloth so any small parts that roll are visible, and keep track of the order components came out. Iwata includes a parts diagram with most airbrushes — it’s worth keeping that in your kit.
What cleaners to use
| Situation | What to Use |
|---|---|
| Water-based acrylics (Vallejo, Citadel, etc.) | Iwata Medea Airbrush Cleaner or a dedicated acrylic cleaner |
| Hybrid acrylics (Tamiya, Mr Hobby Aqueous) | Lacquer thinner or IPA |
| Lacquer paints | Lacquer thinner — always with proper ventilation |
| Enamel paints | Enamel thinner or mineral spirits |
Avoid: acetone (unless specifically stated as safe for your airbrush), household cleaners like Simple Green in concentrations too high, and pipe cleaners — the wire core scratches internal surfaces. Dedicated lint-free cloths, cotton swabs, and cleaning brushes designed for airbrushes are the right tools.
5. Quick Reference: What’s Going Wrong
Most airbrush problems fall into a small number of categories. Run through this before disassembling anything.
| Symptom | Most Likely Cause | Fix |
|---|---|---|
| Tip dry (paint drying at the nozzle tip) | Paint too thick or pressure too high | Thin paint further; reduce PSI; wipe nozzle tip regularly during use |
| Spattering | Partial clog, paint too thick, or dried paint on nozzle | Clean nozzle tip; thin paint; back-flush and flush through |
| Orange peel texture | Paint drying too fast before it levels; pressure too high; distance too far | Add retarder; reduce PSI; work closer to the surface |
| Off-centre / split spray pattern | Bent needle, debris on nozzle, or damaged nozzle tip | Clean nozzle tip; inspect needle for bends; replace needle or nozzle if needed |
| Air but no paint | Nozzle clogged; needle seated too far forward; paint cup empty | Check cup; back-flush; soak nozzle; check needle seating |
| Paint but weak or no air | Compressor issue; loose hose connection; moisture trap blocked | Check all connections; drain moisture trap; check PSI at regulator |
Wheels & Wings Hobbies has operated as a specialty hobby retailer in Toronto since 1986. We are the only Iwata Gold Dealer in Eastern Canada and stock the full Iwata airbrush and compressor range alongside parts, thinners, and cleaning products. The guidance in this article reflects what we walk customers through in store and is based on general practice with Iwata airbrushes and common hobby paint ranges.
Shop the full Iwata airbrush and compressor range in store at 1880 Danforth Ave, Toronto, or browse online. We carry OEM Iwata parts, compatible thinners and cleaners, and can help you choose the right setup for your work.
Recent Posts
-

What Glue Should I Use? A Scale Modelling Adhesive Guide
Wheels & Wings Hobbies · Counter Notes What Glue Should I Use? Lessons from the paint counter at W …Oct 16, 2026 -

John's Starcraft Zerg Queen Paint Guide - Build Feature
Wheels and Wings Hobbies - Miniature Paint Guide John's Starcraft Zerg Queen Archon Studio - Starcra …Sep 24, 2026 -

Vlad's Tomb King on Necrolith Bone Dragon Paint Guide - Build Feature
Wheels and Wings Hobbies - Miniature Paint Guide Vlad's Tomb King on Necrolith Bone Dragon Warhammer …Sep 10, 2026