
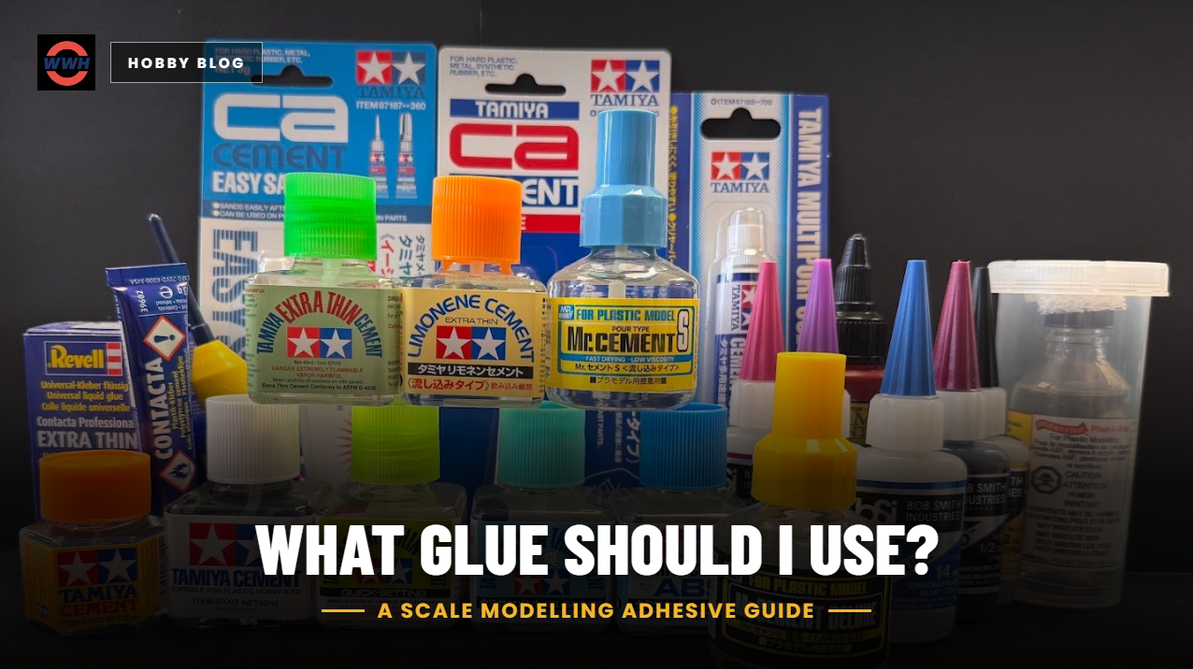
What Glue Should I Use? A Scale Modelling Adhesive Guide
What Glue Should I Use?
Lessons from the paint counter at WWH · October 2026
It is one of the most common questions we get asked, and on its own it has no answer. The only honest response is a question back: what are you gluing?
That can sound like deflection, and it is not. Adhesives in this hobby are not general-purpose products that vary by strength or price. They work by genuinely different chemistry, and each one depends on the material it is being asked to bond. Get the material right and the shelf sorts itself out in about ten seconds. Skip the question and you will buy the wrong bottle, watch the joint fail, and quietly conclude that you are bad at this.
So this column is organised the way we actually walk people through it at the counter: identify what is in your hands first, then let the adhesive follow from it.
Identify the material first, because the adhesive follows from it automatically. Then understand the one real threshold: polystyrene gets welded, everything else gets stuck. Solvent cement is not glue, it dissolves styrene and fuses the parts into one piece, and it only works on styrene (plus ABS, which needs its own dedicated cement). Resin, brass, photoetch, PLA, and PETG all get CA (super glue), as thin as the joint allows. Clear parts get water-based glue only, never CA and never solvent. Diorama materials get PVA. Big, heavy, or scratch-built joints get epoxy. Painted surfaces get sanded back to bare material first, or they do not get glued at all.
The threshold that sorts the entire shelf: weld or stick
One family of plastic gets chemically fused. Everything else in the hobby gets bonded at the surface. Knowing which side of that line you are on is most of the decision.
Plastic cement is misnamed, and the name is responsible for a lot of confusion. It is not an adhesive in the ordinary sense. It does not sit in the joint and hold two parts together. It is a solvent that dissolves the surface of polystyrene, and when the two softened faces are pressed together they flow into each other and re-harden as a single piece of plastic. The joint is not stuck. It is welded, and at that point there is no longer a seam in any meaningful sense.
That is why it produces such clean results, and it is also why it is so narrow. The reaction only happens if the solvent can attack that specific polymer. Brush extra thin cement onto resin and it will evaporate and leave nothing. Brush it onto PLA and the same. Brush it onto brass and you have simply cleaned the brass. Nothing is wrong with the bottle. The chemistry is just not there.
Everything else in the hobby is bonded at the surface instead. CA, PVA, and epoxy all work by forming a layer that grips both faces without changing either of them. That is a genuinely different mechanism with different strengths, different failure modes, and different requirements from the surfaces you are joining.
So the diagnostic is short
Is this polystyrene? Then weld it, and you will get the best joint available in the hobby. Is it anything else? Then you are sticking it, and the question becomes which bonding product suits the material and the load. That is the whole framework. The sections below are just the specifics.
1. Polystyrene: the only thing you weld
The standard material of almost every injection-moulded kit on the wall. If your kit came on sprues in a box, this is almost certainly what you have.
Use a solvent cement, and in most cases use an extra thin one. The modern extra thin cements work by capillary action: you dry-fit the parts first, hold them together, then touch the brush to the seam and let the liquid run into the joint by itself. The solvent goes where the gap is, which is exactly where you want it, and almost nowhere else.
Extra thin, applied after the parts are together
Tamiya Extra Thin is the bottle most benches end up with, and for good reason. Extra Thin Quick Set does the same job noticeably faster, which is excellent once you are confident in your fit and frustrating while you are still adjusting parts. The AK Extra Thin and AK Quick Set pair map onto the same two speeds, and Mr. Cement S is the Mr. Hobby equivalent. For Citadel and other wargaming plastics, Citadel Plastic Glue is built around the same chemistry with a nozzle sized for miniature parts.
Thicker cement, applied before
A standard-viscosity cement like Tamiya Cement or AK Standard Plastic Cement goes on one surface before the parts meet, the way people instinctively expect glue to work. It gives you longer to position things and it bridges a sloppy fit better than extra thin will. The tradeoff is squeeze-out, which melts surface detail if you are heavy-handed.
If the smell is the problem
This comes up constantly from people building in apartments or shared spaces. There are two genuine options rather than just tolerating it. The limonene cements (Tamiya Limonene Extra Thin, Limonene Regular, or the Mr. Cement Limonene Pen) use a citrus-derived solvent and smell like oranges instead of chemicals. They work more slowly, which is the honest tradeoff. Tamiya Extra Thin Low Odor keeps conventional speed and cuts the fumes. Ventilate regardless.
The technique note that matters most: dry-fit before any solvent touches the part. Extra thin cement gives you seconds, not minutes, and it is very difficult to separate a welded joint without damaging both halves. The weld is the strongest bond available to you precisely because it is permanent.
2, 3 and 4. Resin, metal, and filament: the CA materials
Three different materials, one answer, for the same reason: none of them can be solvent-welded, so all of them get bonded at the surface.
Cyanoacrylate is the workhorse here, and the first thing to understand is that CA comes in viscosities, not just brands. Picking the right thickness matters more than picking the right label.
Super thin (BSI Insta-Cure) is water-thin and wicks into a tight joint by capillary action, the same way extra thin cement does. It needs a good fit because it cannot bridge a gap.
Medium gap filling (BSI Insta-Cure+) is the everyday default for most parts, and The Army Painter Super Glue sits in the same bracket for miniatures and basing.
Extra thick (BSI Maxi-Cure) stays where you put it on a vertical surface and fills a genuinely poor fit.
Resin (detail sets, figures, and 3D prints)
CA bonds resin well, but resin has a preparation step that styrene does not, and skipping it is the single most common cause of a resin joint failing. Cast resin parts carry mould release agent on the surface from the casting process, and resin 3D prints carry uncured printing resin. Both are slippery films sitting exactly where you need adhesion. Wash the part in warm soapy water (or isopropyl alcohol for prints), let it dry fully, and scuff the mating faces before you glue. A failed resin bond is usually a contaminated surface rather than the wrong glue.
Brass, white metal, and photoetch
Super glue, and specifically as thin as the joint will tolerate. Photoetch is a special case worth stating plainly: the parts are fractions of a millimetre thick and have almost no edge area to bond with, so every bit of glue thickness becomes a visible gap between parts that should be sitting flush. Thin CA, placed in a very small amount, is what keeps a photoetch part looking like a crisp scale detail rather than something stuck on. A fine tip applicator or an extra fine extender tip is genuinely worth owning for this, because the bottle nozzle delivers far more than a photoetch part needs. On awkward or polished metal, Tamiya Primer for CA Cement is made for surfaces that resist bonding.
Epoxy is the other option here, and we would reach for it on larger scratch-built or load-bearing metal assemblies rather than on fine detail. More on that below.
Filament prints, where the word "plastic" does the most damage
Here is the comparison that makes this whole column click, and filament is where it shows most plainly. "Alcohol" is not a substance, it is a family. Ethanol, methanol, and isopropanol are all alcohols, they all look identical in a bottle, and only one of them is safe to drink. The word on the label tells you almost nothing about what you are actually holding.
"Plastic" works exactly the same way. Polystyrene, resin, PLA, PETG, ABS, and clear acrylic are all plastic, they look and feel broadly alike, and they respond to adhesives completely differently. A bottle that fuses one of them into a seamless joint will sit on another and do nothing at all.
Which is why "filament" is a format rather than a material, and why assuming otherwise costs you here more than anywhere else. A spool can be PLA, PETG, ABS, or something else again, and they do not behave alike. PLA and PETG, the two most common, are not solvent-welded by any hobby cement on our shelf. They get CA, and medium or thick CA generally outperforms thin on printed parts because layer lines make for an irregular mating surface.
ABS is the exception that proves the whole point. It is styrene-based and it genuinely does solvent-weld, which is why Tamiya sells a separate Cement for ABS. Think about what that product being on the shelf tells you. Tamiya already makes an excellent styrene cement, and they still had to formulate a different bottle for a different plastic. If the word "plastic" meant one thing, that product would not need to exist.
5. Clear parts: water-based, and nothing else
Canopies, windscreens, lenses, and headlights. The one category where the usual answers will actively ruin the part.
This is the category to get right, because the failure is both immediate and unfixable. A canopy is often the most visible single part on an aircraft model, and there is rarely a spare in the box.
Two things go wrong. Solvent cement attacks the clear plastic the same way it attacks any styrene, except that on a transparent part the damage shows as crazing, cracking, and permanent fogging rather than an invisible weld. Super glue is worse in a sneakier way: curing CA gives off a vapour that settles on nearby clear surfaces and leaves a white haze, so you can ruin a canopy without the glue ever touching it.
The answer is to use a water-based adhesive, which has no solvent to attack the plastic and no vapour to fog it. Most of them also dry clear and slightly flexible, so any squeeze-out around the edge of a canopy disappears instead of showing as a white line.
Evergreen Canopy Glue is the purpose-made choice and what we hand people who ask.
Tamiya Multipurpose Cement (Clear) is designed for clear and plated components and is gentle on painted surfaces.
Mod Podge in matte, satin, or gloss does the same job, as will any decent PVA. Gloss is the natural pick near a canopy if any of it will remain visible.
The rule to carry out of this section: if the part is transparent and you want it to stay that way, the glue should be water-based. That is the entire decision, and it is worth more than any brand preference.
6. Paper, wood, foam, and dirt from the garden
Diorama and basing materials. Porous, absorbent, and usually cheap, which changes what the adhesive needs to do.
PVA is the answer across almost all of this. It soaks into porous material and grips mechanically as it dries, it is cheap enough to use in the quantities groundwork actually needs, it cleans up with water, and it dries clear. AK Wolverine PVA is the modelling-specific option, and Mod Podge Matte has become a staple for terrain work because it doubles as a sealer.
The dilution trick for loose material
For ballast, sand, static grass, and garden dirt, do not try to glue the material down with neat PVA. Lay the loose material dry, wet it through with water that has a drop of dish soap in it to break the surface tension, then flood diluted PVA (roughly equal parts glue and water) over it with a pipette and let it wick through. It dries hard and invisible, and it holds material that neat glue would simply sit on top of.
The foam warning
Standard CA attacks polystyrene foam and will eat a crater into it, which catches out people who reach for super glue out of habit when building terrain. Use PVA, or if you need the speed of CA, use a foam-safe formulation: BSI Super-Gold is odourless and foam safe in both thin and medium. Worth knowing before you carve a hillside rather than after.
On garden dirt specifically, since people do ask: dry it out completely before it goes anywhere near a model, and bake or sieve it if you can. Damp organic material brings moisture and mould onto a display piece that will be sitting in a case for years. The glue is the easy part.
Epoxy: when the joint has a real job to do
Two parts, mixed, with working time you control by choosing the cure speed. The strongest option on the shelf, and the one that also sculpts.
Epoxy is what you reach for when CA is not enough: heavy parts, dissimilar materials joined to each other, scratch-built structures, and anything carrying weight or leverage. It bonds almost anything to almost anything, it fills gaps while it does so, and unlike CA it is not brittle under shear.
Liquid epoxy, chosen by cure time
The cure time is the specification that matters, and it is a working-time decision rather than a patience one. BSI 5 Minute cures slightly flexible, which suits parts that will take a knock. BSI 15 Minute gives you time to position a larger assembly and is more water resistant. BSI 30 Minute has the highest strength of the three and is the right choice for reinforcing fillets on a structural joint. Longer cure, stronger bond, as a general rule.
Epoxy putty, which bonds and sculpts
Two-part putties are epoxies too, and although most people buy them for sculpting and gap filling they will bond parts perfectly well, which makes them quietly useful when you need to join two things and fill the space between them in one operation. They differ in how they cure and how they handle:
- Green Stuff cures hard but retains some flex and takes a smooth finish. It has been the miniature sculptor's default for a very long time.
- Brown Stuff cures harder and more rigid than Green Stuff, which suits crisp edges and hard-surface detail. Many sculptors mix the two to tune the balance.
- Milliput Superfine White is the one to know for scale work: it smooths with water and sands beautifully once cured, which is exactly what you want for seams and filled joints. The Standard, Medium Silver-Grey, Black, Terracotta, Turquoise, and Metallic grades cover coarser and colour-matched work.
- Tamiya Epoxy Putty Quick (also in 100g) cures in five to six hours, while Smooth Type (also in 100g) is formulated for a finer surface finish.
The honest limitation: epoxy needs mixing, it needs clamping or support while it cures, and it is messy compared to touching a brush to a seam. It is the right answer less often than people assume. Reach for it when the joint has a job, not as a general upgrade.
A warning about gluing painted surfaces
Solvent cement is off the table immediately, because it cannot reach the styrene through a layer of paint. That leaves CA or epoxy, and here is the part worth taking seriously: those will bond to the paint, not to the part. Your joint is then only as strong as the paint's grip on the plastic underneath, which is not strong at all. We would not trust that joint and neither should you.
If you have no choice, sand the mating faces back to bare material, clean them, and then glue. It is worth the extra few minutes. Better still, plan your build so that structural joints happen before paint and only genuinely final parts go on afterwards.
The thread that runs through all of it
There is no best glue, and the question has no answer until you say what the material is. Polystyrene gets welded with solvent cement, and nothing else does except ABS with its own dedicated bottle. Resin, metal, photoetch, PLA, and PETG get CA at whatever viscosity the joint calls for. Clear parts get water-based glue so they stay clear. Groundwork gets PVA. Heavy or mixed-material joints get epoxy. Painted surfaces get sanded first or left alone.
The same principle as always at this counter: knowing what a product is for beats memorising which bottle to grab. Identify the material, and the glue picks itself.
If you are stocking a bench from scratch
Three bottles cover the overwhelming majority of what comes across the counter:
- An extra thin solvent cement for every styrene kit you will ever build
- A medium CA for resin, metal, photoetch, and prints, with a thin alongside it once you start doing photoetch properly
- A canopy glue or any PVA, which covers clear parts and groundwork both
Add as you need them: epoxy when you start scratch building, a debonder the first time you glue your fingers together, and an accelerator when you are tired of holding parts still.
Method: dry-fit everything before any adhesive comes out. Use less glue than feels right, because almost every visible glue problem on a finished model is a quantity problem rather than a product problem. And test on scrap when you are working with an unfamiliar material, particularly a print, where you may not know what the spool actually was.
If you take one habit away: before you open a bottle, say out loud what material you are about to glue. That single sentence prevents most of the adhesive problems we see at the counter.
Quick reference: which adhesive for which material
| Material | Reach for | What is actually happening |
|---|---|---|
| Polystyrene (standard kit plastic) | Tamiya Extra Thin, AK Extra Thin, Mr. Cement S | Store pick for kit assembly: solvent dissolves both faces and welds them into one piece. Flows into the seam by capillary action after the parts are together. |
| ABS (some kit parts, some filament) | Tamiya Cement for ABS | Styrene-based, so it does weld, but it needs its own formulation. The existence of this bottle is the whole argument of this column. |
| Resin (detail sets, figures, prints) | Medium CA, or epoxy for large parts | Surface bond only. Wash off mould release or uncured print resin and scuff the faces first, or the joint fails regardless of glue. |
| Brass, white metal, photoetch | Thin CA plus a fine applicator | Store pick for photoetch: as thin as possible, because glue thickness becomes a visible gap on a part that should sit flush. |
| PLA and PETG prints | Medium or thick CA | No hobby cement solvent-welds these. Thicker CA copes better with the irregular surface that layer lines create. |
| Clear parts (canopies, lenses) | Evergreen Canopy Glue, Tamiya Multipurpose Clear, PVA | Store pick for canopies: water-based, so there is no solvent to craze the plastic and no CA vapour to fog it. Dries clear and flexible. |
| Paper, wood, ballast, dirt | AK Wolverine PVA, Mod Podge Matte | Soaks into porous material and grips mechanically. Dilute roughly 1:1 with water and flood it over loose material rather than gluing neat. |
| Polystyrene foam | PVA, or BSI Super-Gold foam-safe CA | Standard CA attacks foam and melts a crater in it. Super-Gold is formulated odourless and foam safe specifically to avoid this. |
| Heavy, structural, or mixed materials | BSI Two-Part Epoxy (5, 15, or 30 minute) | Bonds almost anything to anything and fills gaps while doing it. Longer cure generally means stronger bond, so pick by working time. |
| Bonding plus sculpting in one | Milliput Superfine, Green Stuff, Brown Stuff | Epoxy putties bond as well as fill. Milliput smooths with water and sands; Green Stuff keeps some flex; Brown Stuff cures harder. |
| Painted surfaces | Sand back to bare material first | Cement cannot reach the plastic through paint, and CA or epoxy bonds to the paint film rather than the part. Not a joint to trust. |
Frequently Asked Questions
They work by completely different mechanisms. Plastic cement is a solvent that dissolves the surface of polystyrene so the two parts fuse into one piece, which is a weld rather than a bond. Super glue (CA) forms a layer that grips both surfaces without changing either of them. The practical consequence is that cement only works on styrene and ABS, while CA works on almost everything but creates a surface bond that is strong in tension and more brittle under shear.
Because the print almost certainly is not polystyrene. Resin prints and PLA or PETG filament prints cannot be solvent-welded by hobby cement, so the liquid simply evaporates and leaves nothing behind. Use CA instead, medium or thick for filament prints because layer lines make an uneven mating surface. The exception is ABS filament, which is styrene-based and does weld, though it wants Tamiya's dedicated ABS cement rather than the standard bottle.
Almost certainly super glue. Curing CA releases a vapour that settles on nearby clear plastic and leaves a white haze, which means it can ruin a canopy without ever touching it directly. Solvent cement causes a different but equally permanent problem, crazing and cracking the transparent plastic. Use a water-based adhesive on anything clear: canopy glue, Tamiya Multipurpose Cement Clear, or a PVA. There is no solvent to attack the part and no vapour to fog it.
Probably surface preparation rather than glue choice. Cast resin carries mould release agent from the casting process and resin prints carry uncured resin, and both are slippery films sitting exactly where you need adhesion. Wash the part in warm soapy water, or isopropyl alcohol for a print, dry it completely, and scuff the mating faces before gluing. CA bonds resin well once the surface is actually clean.
Medium, the gap-filling viscosity. It handles the majority of resin and metal parts and tolerates an imperfect fit, which thin CA will not. Add a thin CA when you start working with photoetch seriously, because there the glue thickness becomes a visible gap between parts that should sit flush. Extra thick is worth having for vertical surfaces and genuinely poor fits, but it is the third bottle rather than the first.
You can, but we advise against it, and the reason is worth understanding. Cement cannot reach the plastic through a paint layer, so you are left with CA or epoxy, and those will bond to the paint rather than to the part. The joint is then only as strong as the paint's grip on the plastic underneath. If you have no alternative, sand the mating faces back to bare material and clean them before gluing. Better to plan the build so structural joints happen before paint.
Ventilate your space regardless of which cement you use, and if the fumes are a real constraint there are two proper options rather than just enduring it. Limonene cements use a citrus-derived solvent and smell of oranges, with slower action as the tradeoff. Tamiya's Low Odor Extra Thin keeps conventional working speed while cutting the fumes. Neither is a substitute for airflow, but both make building in a small or shared space considerably more pleasant.
Adhesive mechanisms and material compatibility drawn from manufacturer product documentation (Tamiya, Bob Smith Industries, AK Interactive, Mr. Hobby/GSI Creos, Evergreen, Milliput, Green Stuff World, Plaid) and everyday counter experience. Product availability and formulations confirmed against current Wheels & Wings Hobbies stock listings in October 2026. Related reading: our guide to decal setters, softeners and adhesives. Counter Notes publishes weekly, drawing on what we see and hear at the paint counter in Toronto.
Every adhesive named in this column is stocked at Wheels & Wings Hobbies in Toronto and available online with Canada-wide shipping.
Recent Posts
-
What Glue Should I Use? A Scale Modelling Adhesive Guide
Wheels & Wings Hobbies · Counter Notes What Glue Should I Use? Lessons from the paint counter at W …Oct 16, 2026 -

John's Starcraft Zerg Queen Paint Guide - Build Feature
Wheels and Wings Hobbies - Miniature Paint Guide John's Starcraft Zerg Queen Archon Studio - Starcra …Sep 24, 2026 -

Vlad's Tomb King on Necrolith Bone Dragon Paint Guide - Build Feature
Wheels and Wings Hobbies - Miniature Paint Guide Vlad's Tomb King on Necrolith Bone Dragon Warhammer …Sep 10, 2026