

How to Paint Word Bearers: Horus Heresy 30k Painting Guide — Updated with Discontinued Paint Alternatives
How to Paint Word Bearers: Horus Heresy 30k Painting Guide
Step-by-step miniature painting guide · Mark VI Corvus pattern Space Marine · XVII Legion · Age of Darkness · Updated with discontinued paint alternatives
Lorgar’s XVII Legion: The First Heretics of Warhammer’s Horus Heresy
This guide is based on our original Wheels & Wings TV video from 2022. Several of the Vallejo Game Color paints used in that video have since been discontinued. This updated guide identifies every discontinued colour and gives the closest available alternative so you can follow the scheme today with paints you can actually buy.
The Word Bearers are one of the most narratively rich traitor Legions in Warhammer's Horus Heresy setting, and one of the most rewarding armies to paint in 30k. Where other Legions turned to Chaos out of ambition, grievance or despair, the Word Bearers did so out of faith. Lorgar Aurelian, Primarch of the XVII Legion, was a true believer before the Emperor crushed his devotion and ordered the Legion humiliated at Monarchia. The rage and religious fervour that followed seeded the entire Heresy. The Word Bearers were the first to fall, and they brought most of the others with them.
The Word Bearers colour reflects this history. The characteristic Word Bearers red is a deep terracotta red-brown sitting somewhere between dried blood and ancient clay, darker and more earthy than the bright red of later Chaos Space Marines. These are warriors who have been fighting since before the Heresy began, and their armour should look like it.
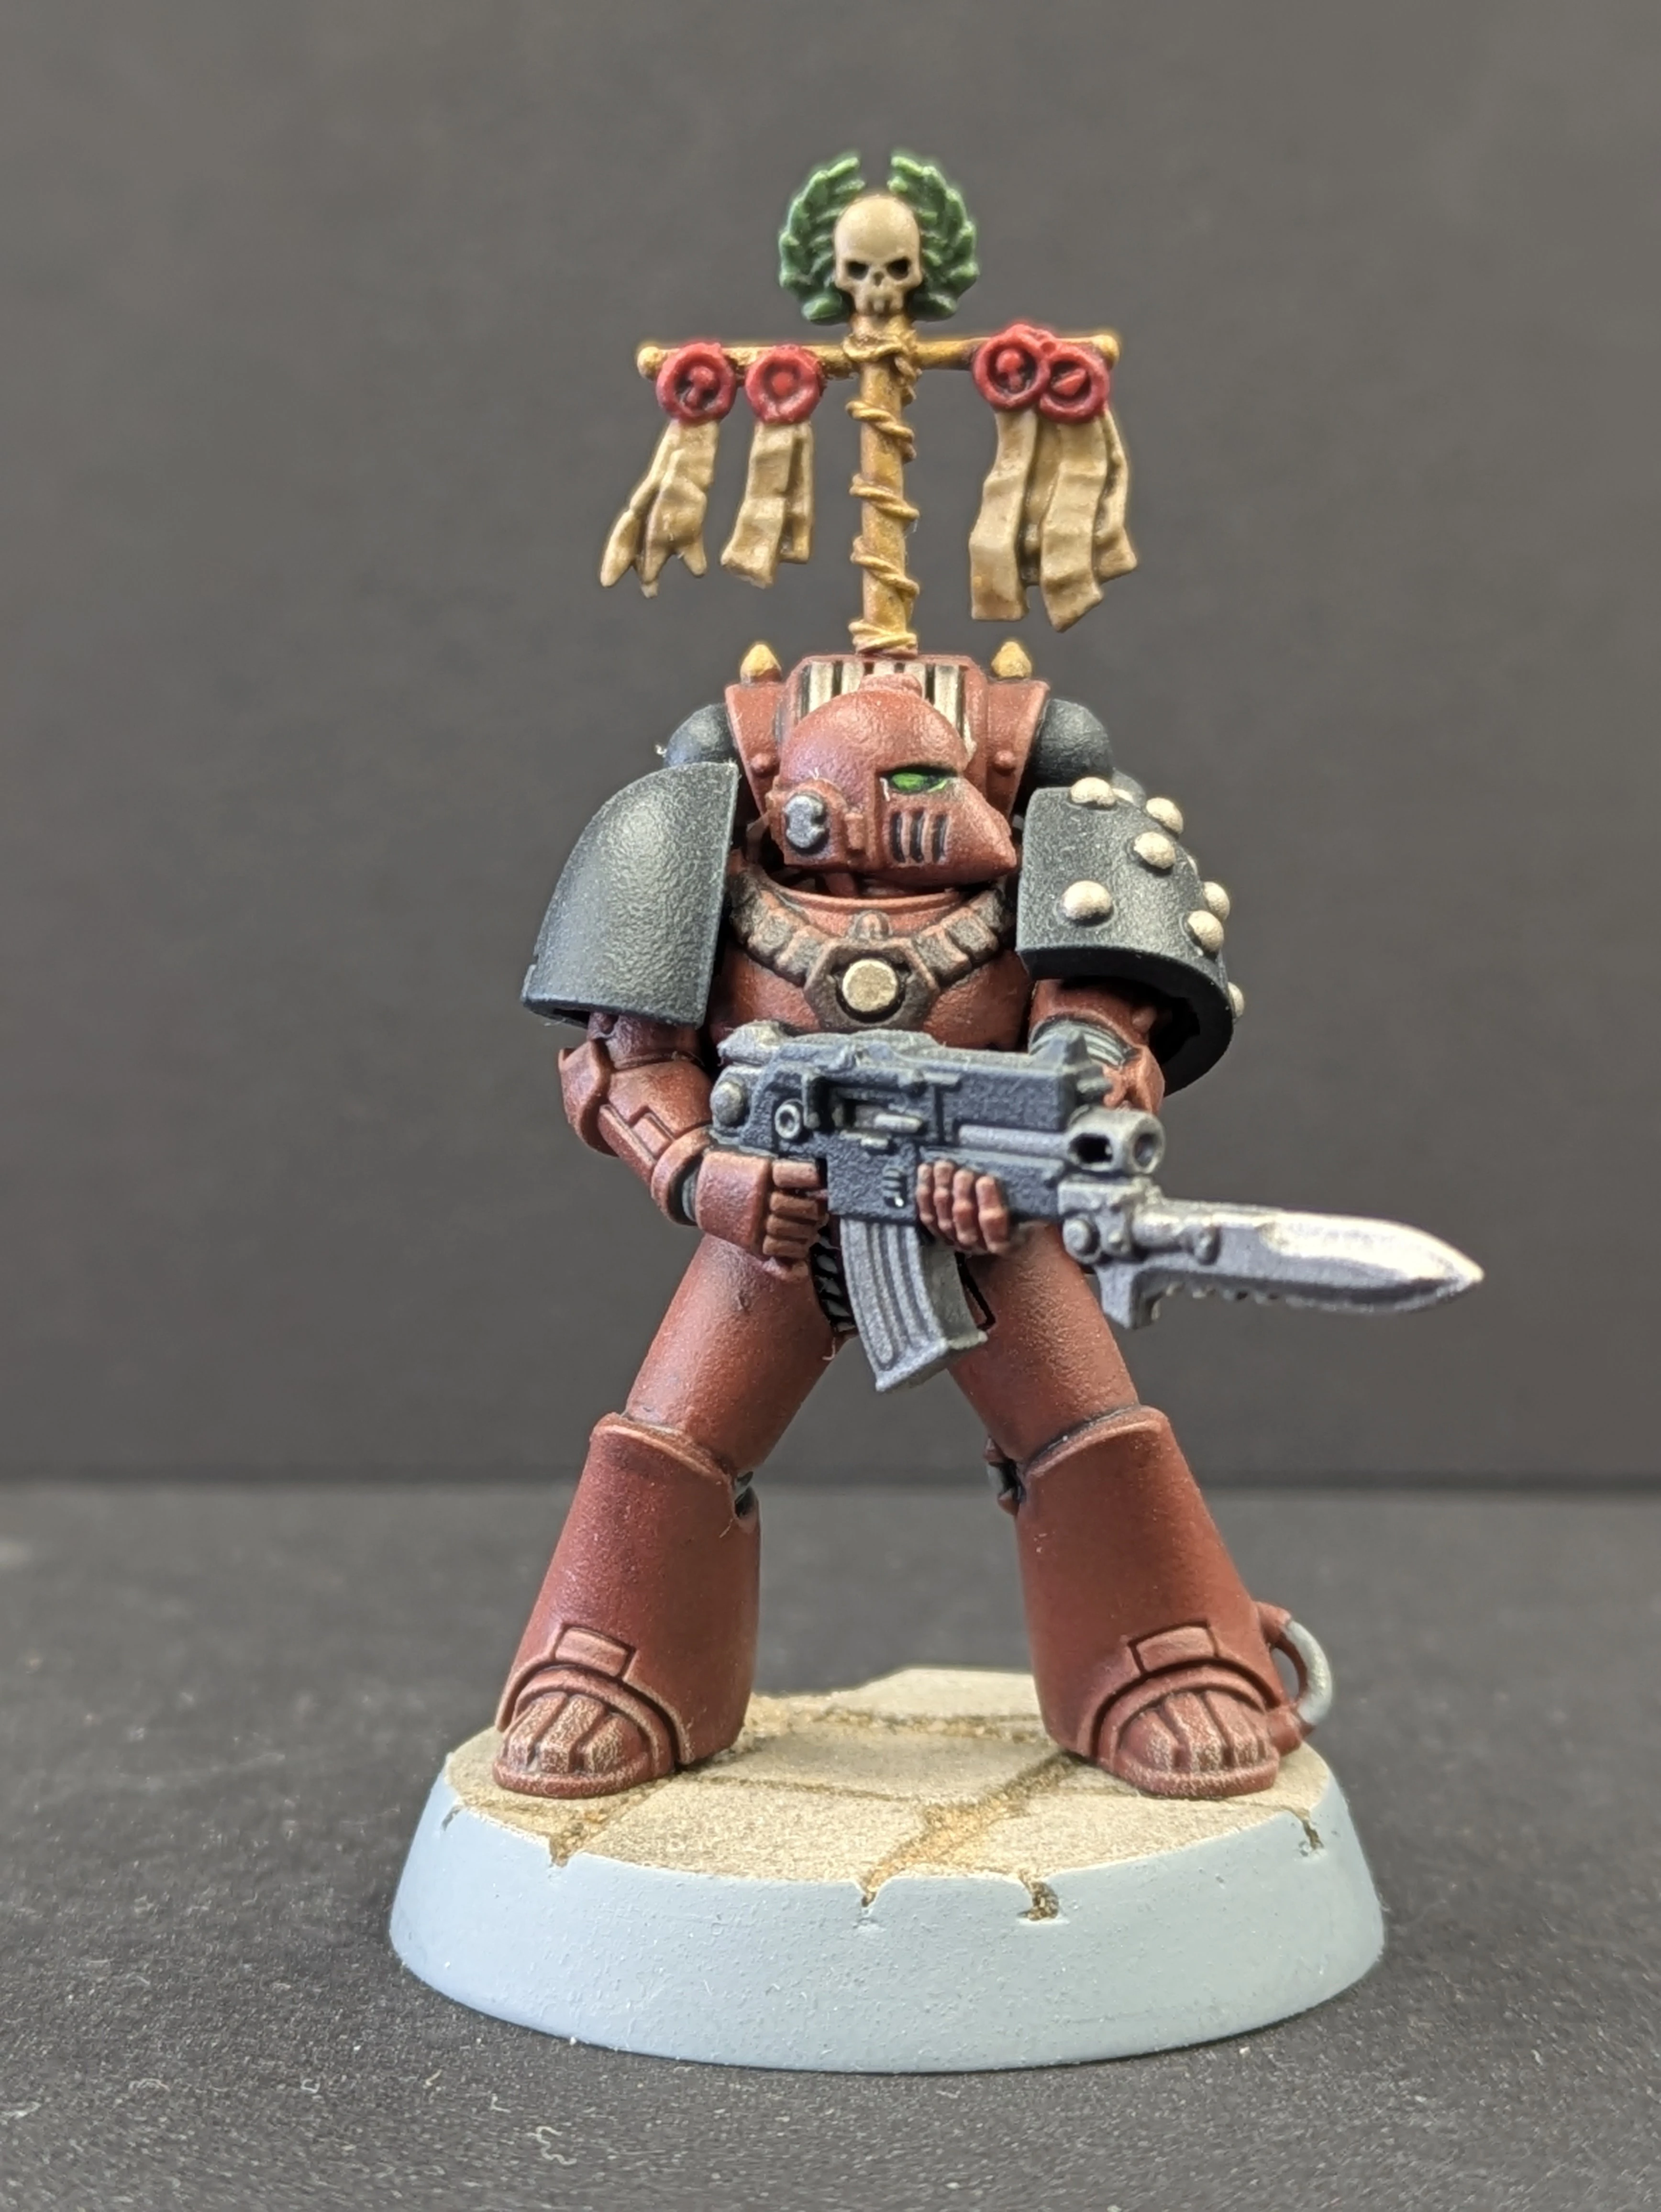
This guide follows the scheme demonstrated in the Wheels & Wings TV video above, painting one of the new Mark VI Corvus pattern Marines from the Horus Heresy: Age of Darkness box set. Watch the video to see the scheme come together in real time, then follow the step by step guide below for every paint, product and technique used.
The scheme is built around an airbrushed terracotta base coat, shaded with Citadel washes to deepen the recesses, and finished with carefully placed edge highlights. No freehand required. The result is a table-ready Word Bearer that paints up quickly once you have the method down, making it well suited to painting an entire Legion detachment to a consistent standard.
All paints used are stocked at Wheels & Wings Hobbies in Toronto and available online with Canada-wide shipping. If you do not have an airbrush, see the note at the bottom of the guide for a spray can alternative.
What you’ll need — miniature painting supplies
Vallejo Game Color
- Terracotta 72.065 discontinued
- Vallejo MC Burnt Red (70.814) — 97.4% match
- AK Interactive Violet Red (AKI11075) — 96.6% match
- Vallejo MC Hull Red (70.985) — 96.6% match
- Black
- Scorched Brown discontinued
Use: Charred Brown
- Heavy Blue Gray discontinued
Use: Sombre Grey
- Khaki
- Heavy Green discontinued
Use: Dark Green
- Livery Green discontinued
Use: Goblin Green
- Charcoal
- Black Green Ink
Vallejo Metal Color
Vallejo Mecha
Citadel
- Reikland Fleshshade shade
- Nuln Oil shade
- Seraphim Sepia shade
- Mephiston Red base
- Canoptek Alloy layer
- Liberator Gold layer
AK Interactive 3G
- Red Brown (Saddle Brown — edge highlights)
Primer (grey)
Prime
Apply grey primer to the assembled model. A grey primer lets the base colour read true in the next step — white would shift it too bright, black would muddy it. The original video used Mr. Hobby Aqueous Surfacer but that product is no longer imported into Canada. Any of the grey primers below will work well on plastic and resin miniatures.
Armour Base Coat
The original video used Vallejo Game Color Terracotta (72.065) which has since been discontinued. Burnt Red (70.814), Violet Red (AKI11075), and Hull Red (70.985) are all close alternatives available at Wheels & Wings. Apply whichever you choose by airbrush over the entire model, or brush paint in two thin coats if you do not have an airbrush. This is the foundation of the Word Bearers scheme a deep red-clay tone that reads as a dark, battle-worn red rather than a bright heraldic colour. Thin to a milky consistency (roughly 1:1 with water or airbrush thinner) and apply in multiple thin passes to build even coverage. The airbrush allows smooth, fade-free coverage across all the armour panels simultaneously. If brush painting, thin slightly more and apply two coats.
Shade the Armour
Apply Reikland Fleshshade all over the model with a large brush. This does two things at once: it darkens all the recesses between armour panels and edges, and it subtly shifts the terracotta base to a richer, deeper red-brown. The result is a model with significantly more depth and warmth before any detail colours go on. Don’t be afraid to use it generously the wash dries to a matte finish and the excess will settle naturally into recesses.
Base Colours Details
With the armour shaded, block in all the detail colours. Work through each area methodically. These colours don’t need to be perfect at this stage the subsequent washes will tie everything together. A few notes: the soft armour joints and tubes are painted Sombre Grey, which replaces the discontinued Heavy Blue Gray and provides a similar cool blue-grey tone. The laurels and grenades use Dark Green and Goblin Green respectively, replacing the discontinued Heavy Green and Livery Green.
Metallics
Metals are applied in two types a cool silver for functional weapon and mechanical parts, and a warm gold for decorative elements. An important tip for the Vallejo Metal Color range: switch from a wet palette to a simple dry palette when using these paints. The highly pigmented formula doesn’t behave well on an absorbent or wet surface. A ceramic tile or piece of greaseproof paper works well.
Shade the Details
Two shades are applied selectively over the detail colours. Apply them carefully to their respective areas only avoid getting them on the armour which was already shaded in Step 3. Seraphim Sepia goes on all the khaki and gold areas, warming and enriching the parchments and metalwork. Nuln Oil goes on all the black, grey and gunmetal areas, pulling the shadows together and giving the dark areas that characteristic deep lustre.
Edge Highlights
Edge highlights define the form and make the model readable on the tabletop. Concentrate the paint on the sharpest raised edges only armour panel edges, elbow and knee joints, the ridge of the shoulder pads, and knuckle lines. A thin, steady single stroke is better than going back over the same edge repeatedly. The highlight should be a thin line, not a broad band.
Eye Lenses
The eye lenses are painted last, using your sharpest brush and a steady hand. The two-stage approach bright base then dark wash gives a convincing glowing power armour lens effect without any complex blending. The Goblin Green creates the vivid glow and the Black Green Ink wash darkens the outer edges, creating the impression of depth and inner light in the lens.
Varnish
Seal the finished model with Vallejo Mecha Satin Varnish applied through the airbrush. The satin finish is ideal for power armour it reads as slightly worn and durable rather than the flat dullness of a full matte varnish. It also protects all the detail work and washes against tabletop handling. Apply in two thin coats from 20cm, allowing the first to fully dry before the second.
No airbrush? No problem.
For the primer, use a grey spray primer. Any of these work well on plastic and resin miniatures:
- Vallejo Grey Primer Spray — acrylic, fine grain, excellent adhesion on plastic and resin
- Army Painter Colour Primer Uniform Grey — popular wargaming primer with good coverage
- Citadel Mechanicus Standard Grey Spray — matches the Citadel paint range if you prefer that ecosystem
For the terracotta base coat, brush-apply Terracotta over the primed model in two thin coats instead of airbrushing. It takes a little longer to get even coverage but the result is the same. From Step 3 onwards everything is brush-applied and works identically. The varnish step can be done with any compatible rattlecan matte or satin varnish.
All paints in this guide are stocked at Wheels & Wings Hobbies, Toronto, and available online with Canada-wide shipping. Whether you're building a Horus Heresy 30k Word Bearers army or running them in Warhammer 40,000, the scheme works across both eras.
Shop All Paints →The Finished Models
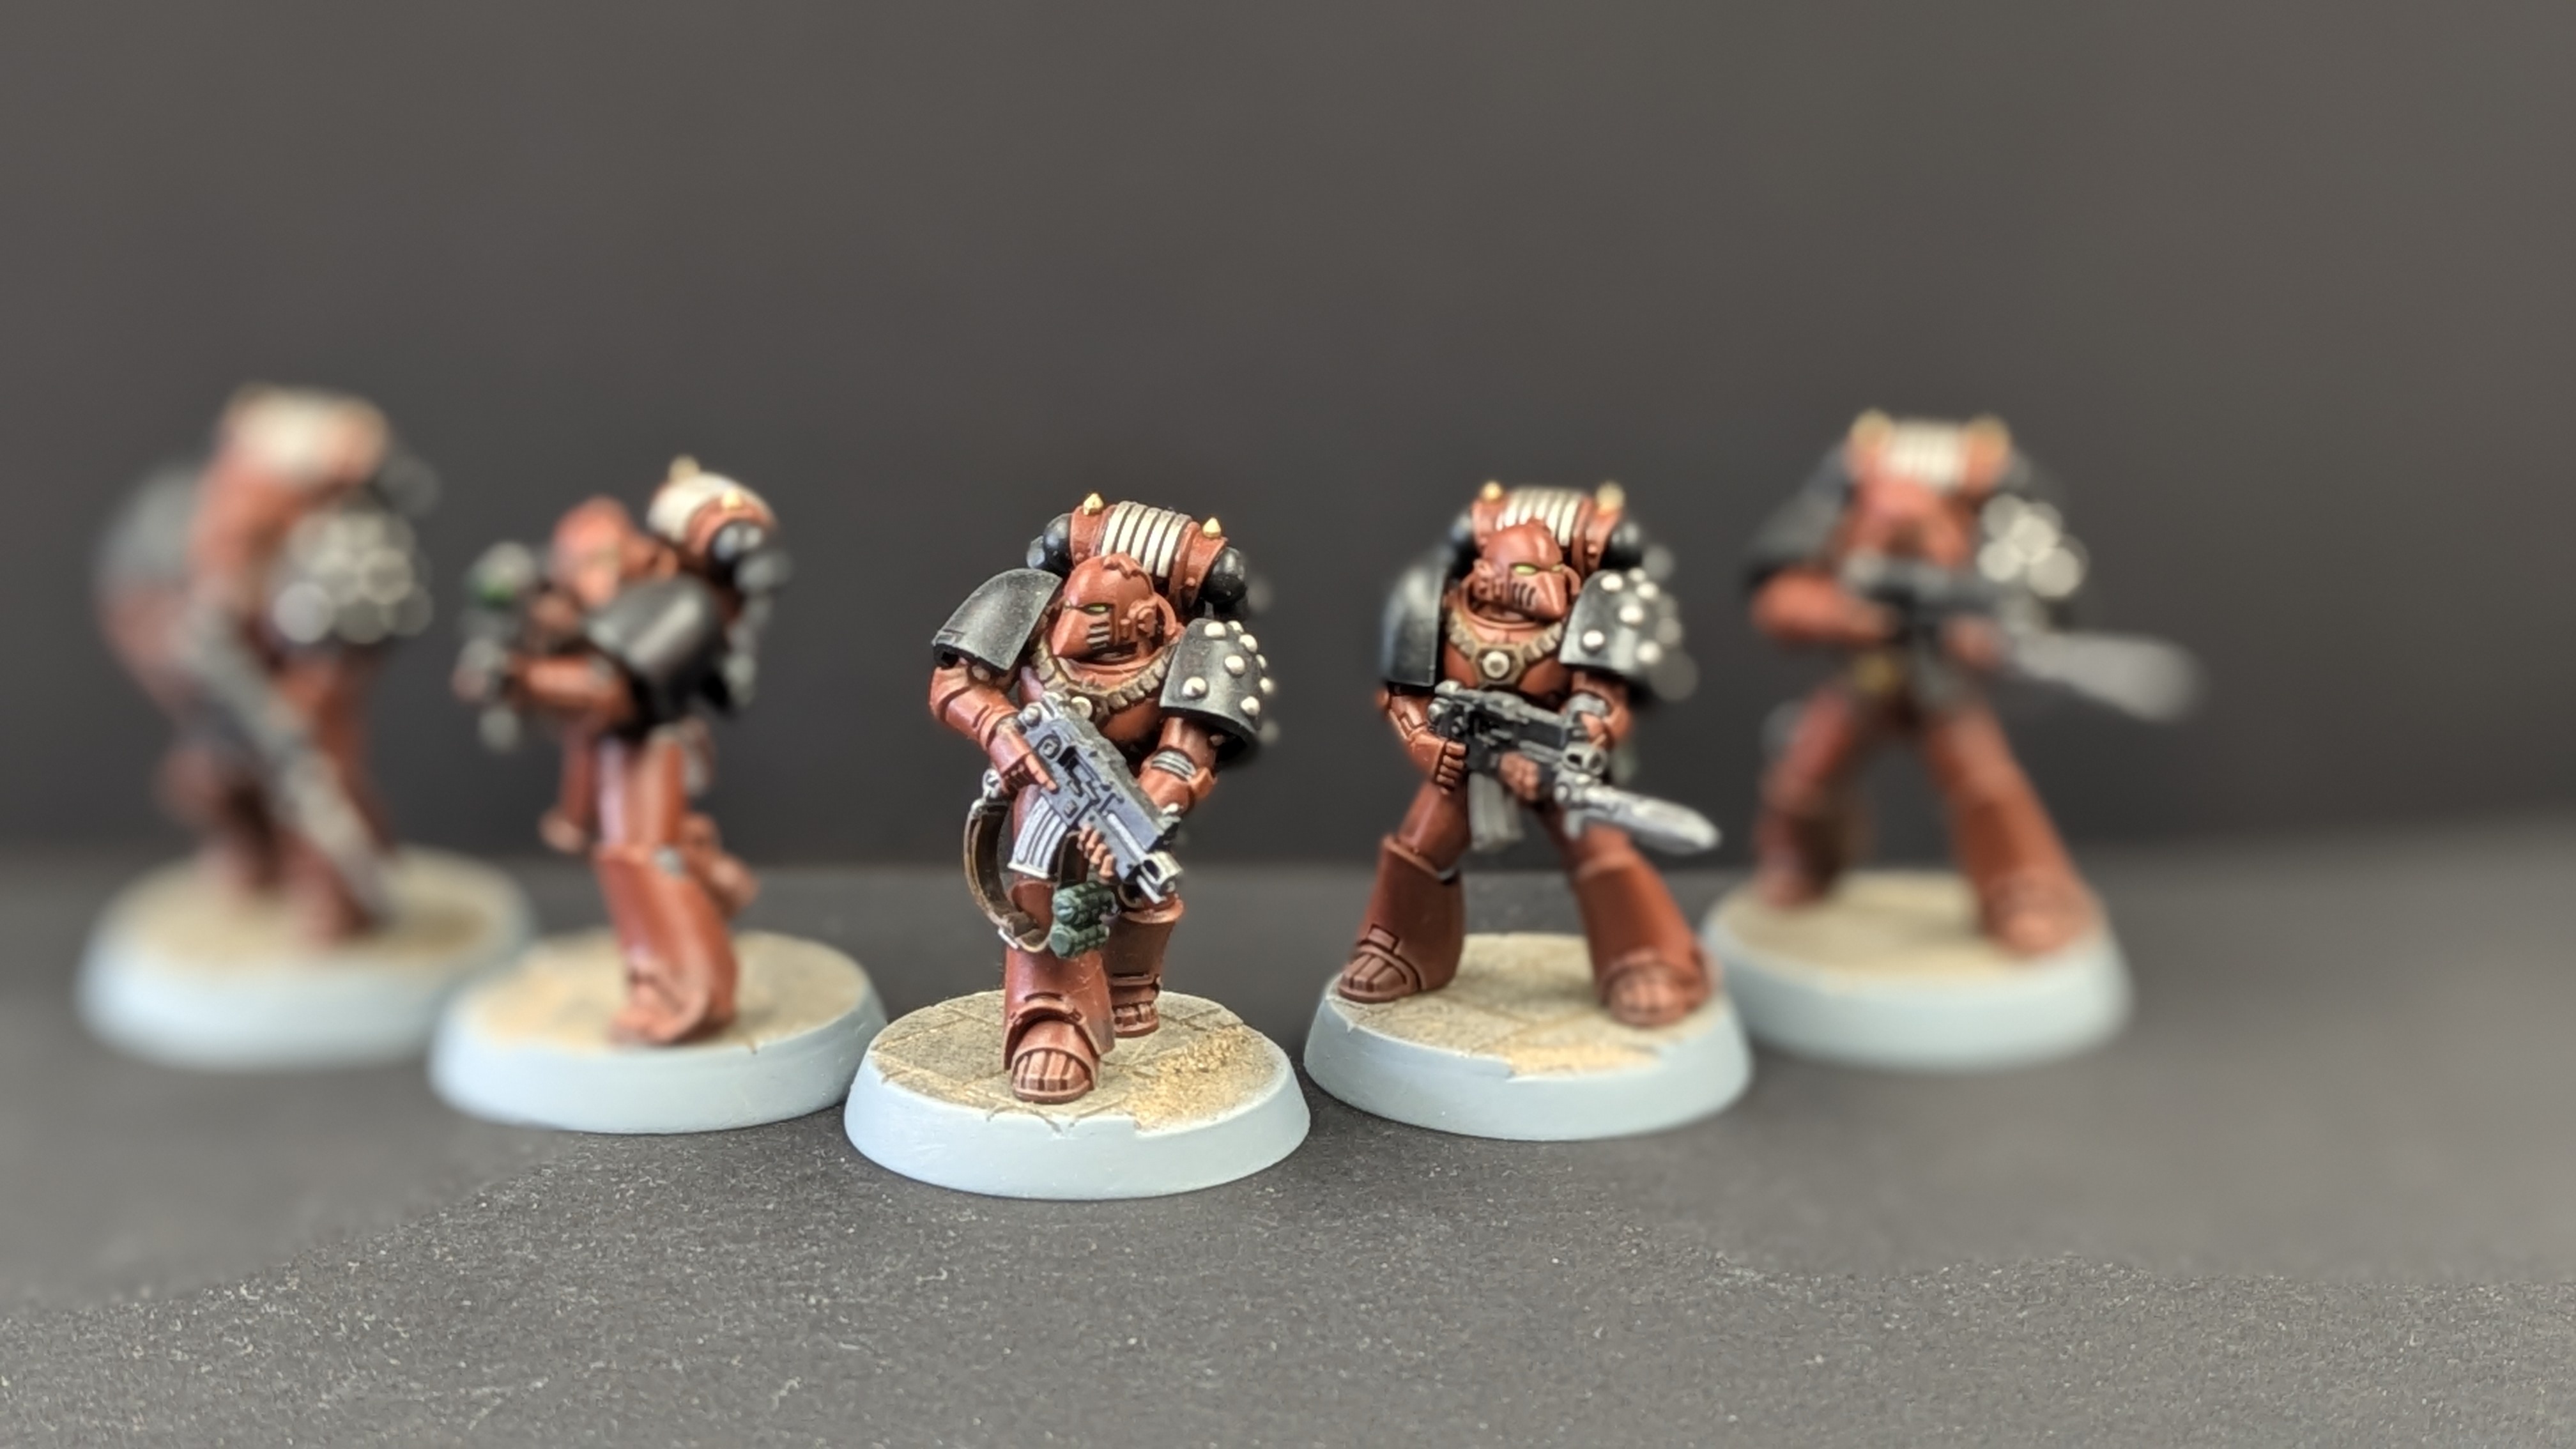
Five-man tactical squad painted using the scheme from this guide
Armour detail and eye lens close-up
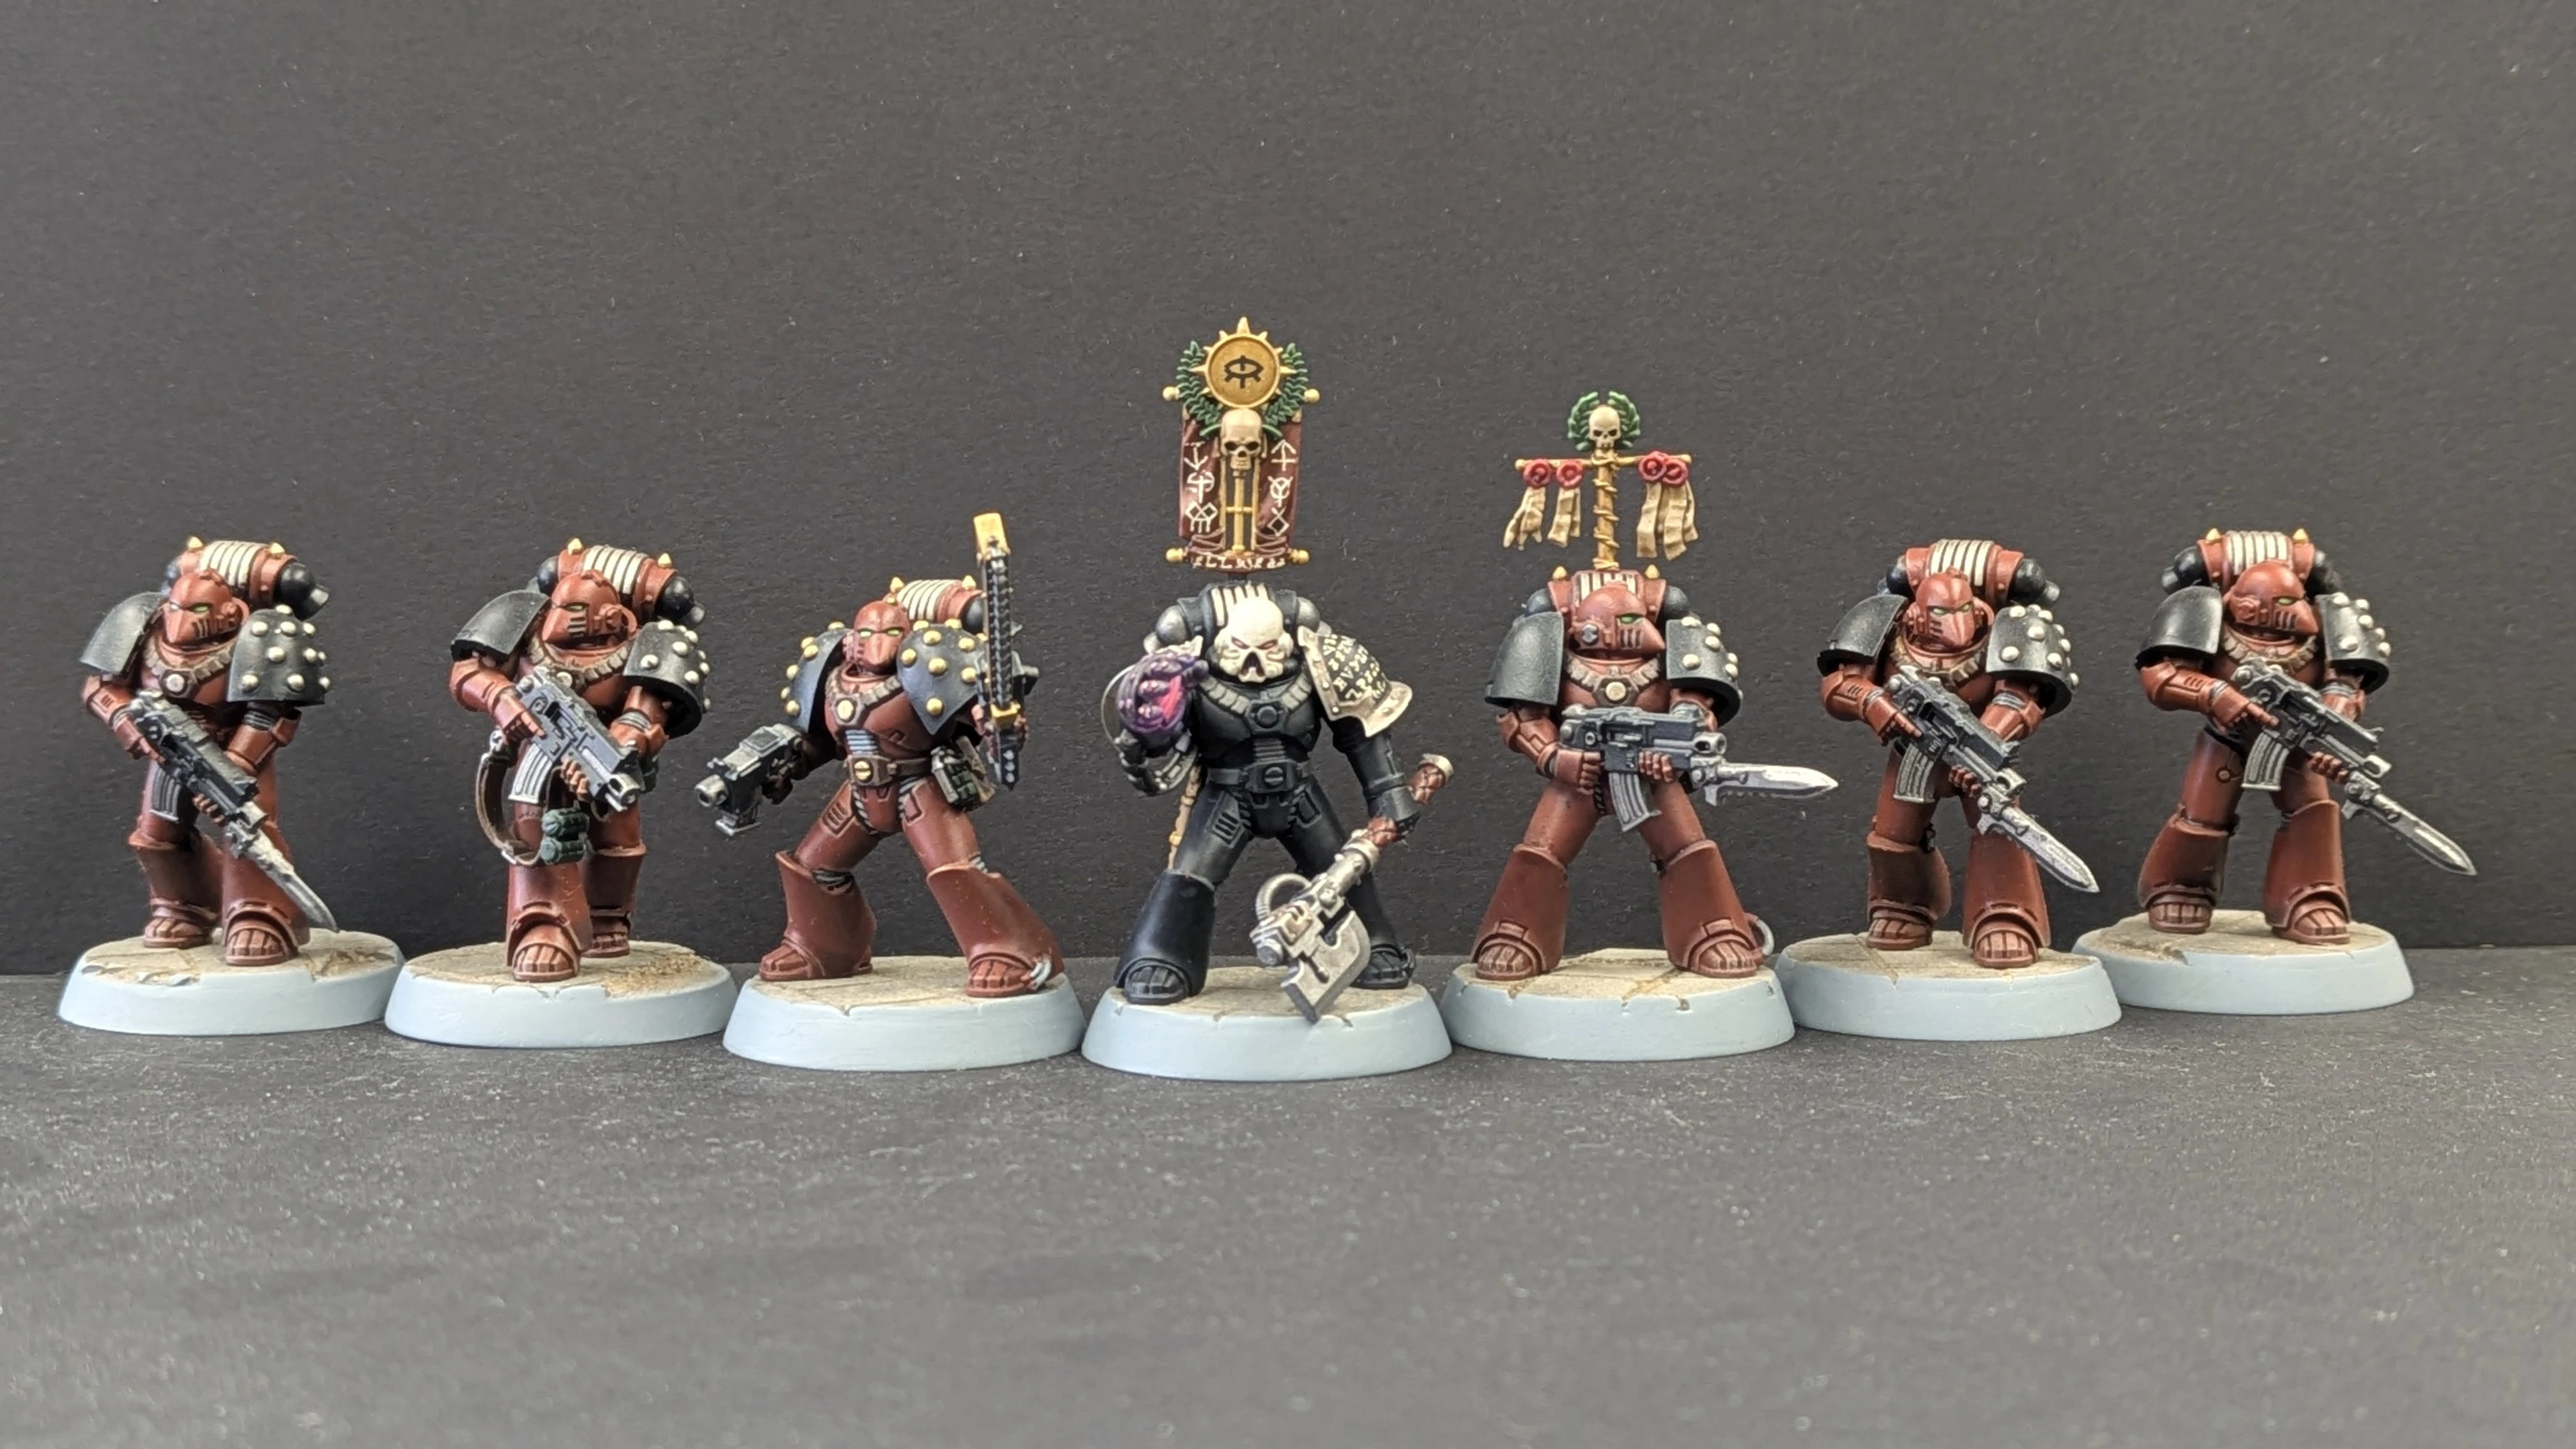
Full squad with Erebus, Dark Apostle of the XVII Legion
Erebus: Dark Apostle of the Word Bearers
Erebus was not featured in the original video but appears in our squad photos. He is one of the most significant characters in the Horus Heresy — the Dark Apostle who first corrupted Horus and set the entire betrayal in motion. Painting him as a character piece uses most of the same paints as the rank and file, with a few additions for his distinctive details and the Object Source Lighting on his glowing hand.
His armour is Abaddon Black rather than the terracotta red-brown of the tactical marines, marking him out immediately as a figure of authority and menace within the Legion.
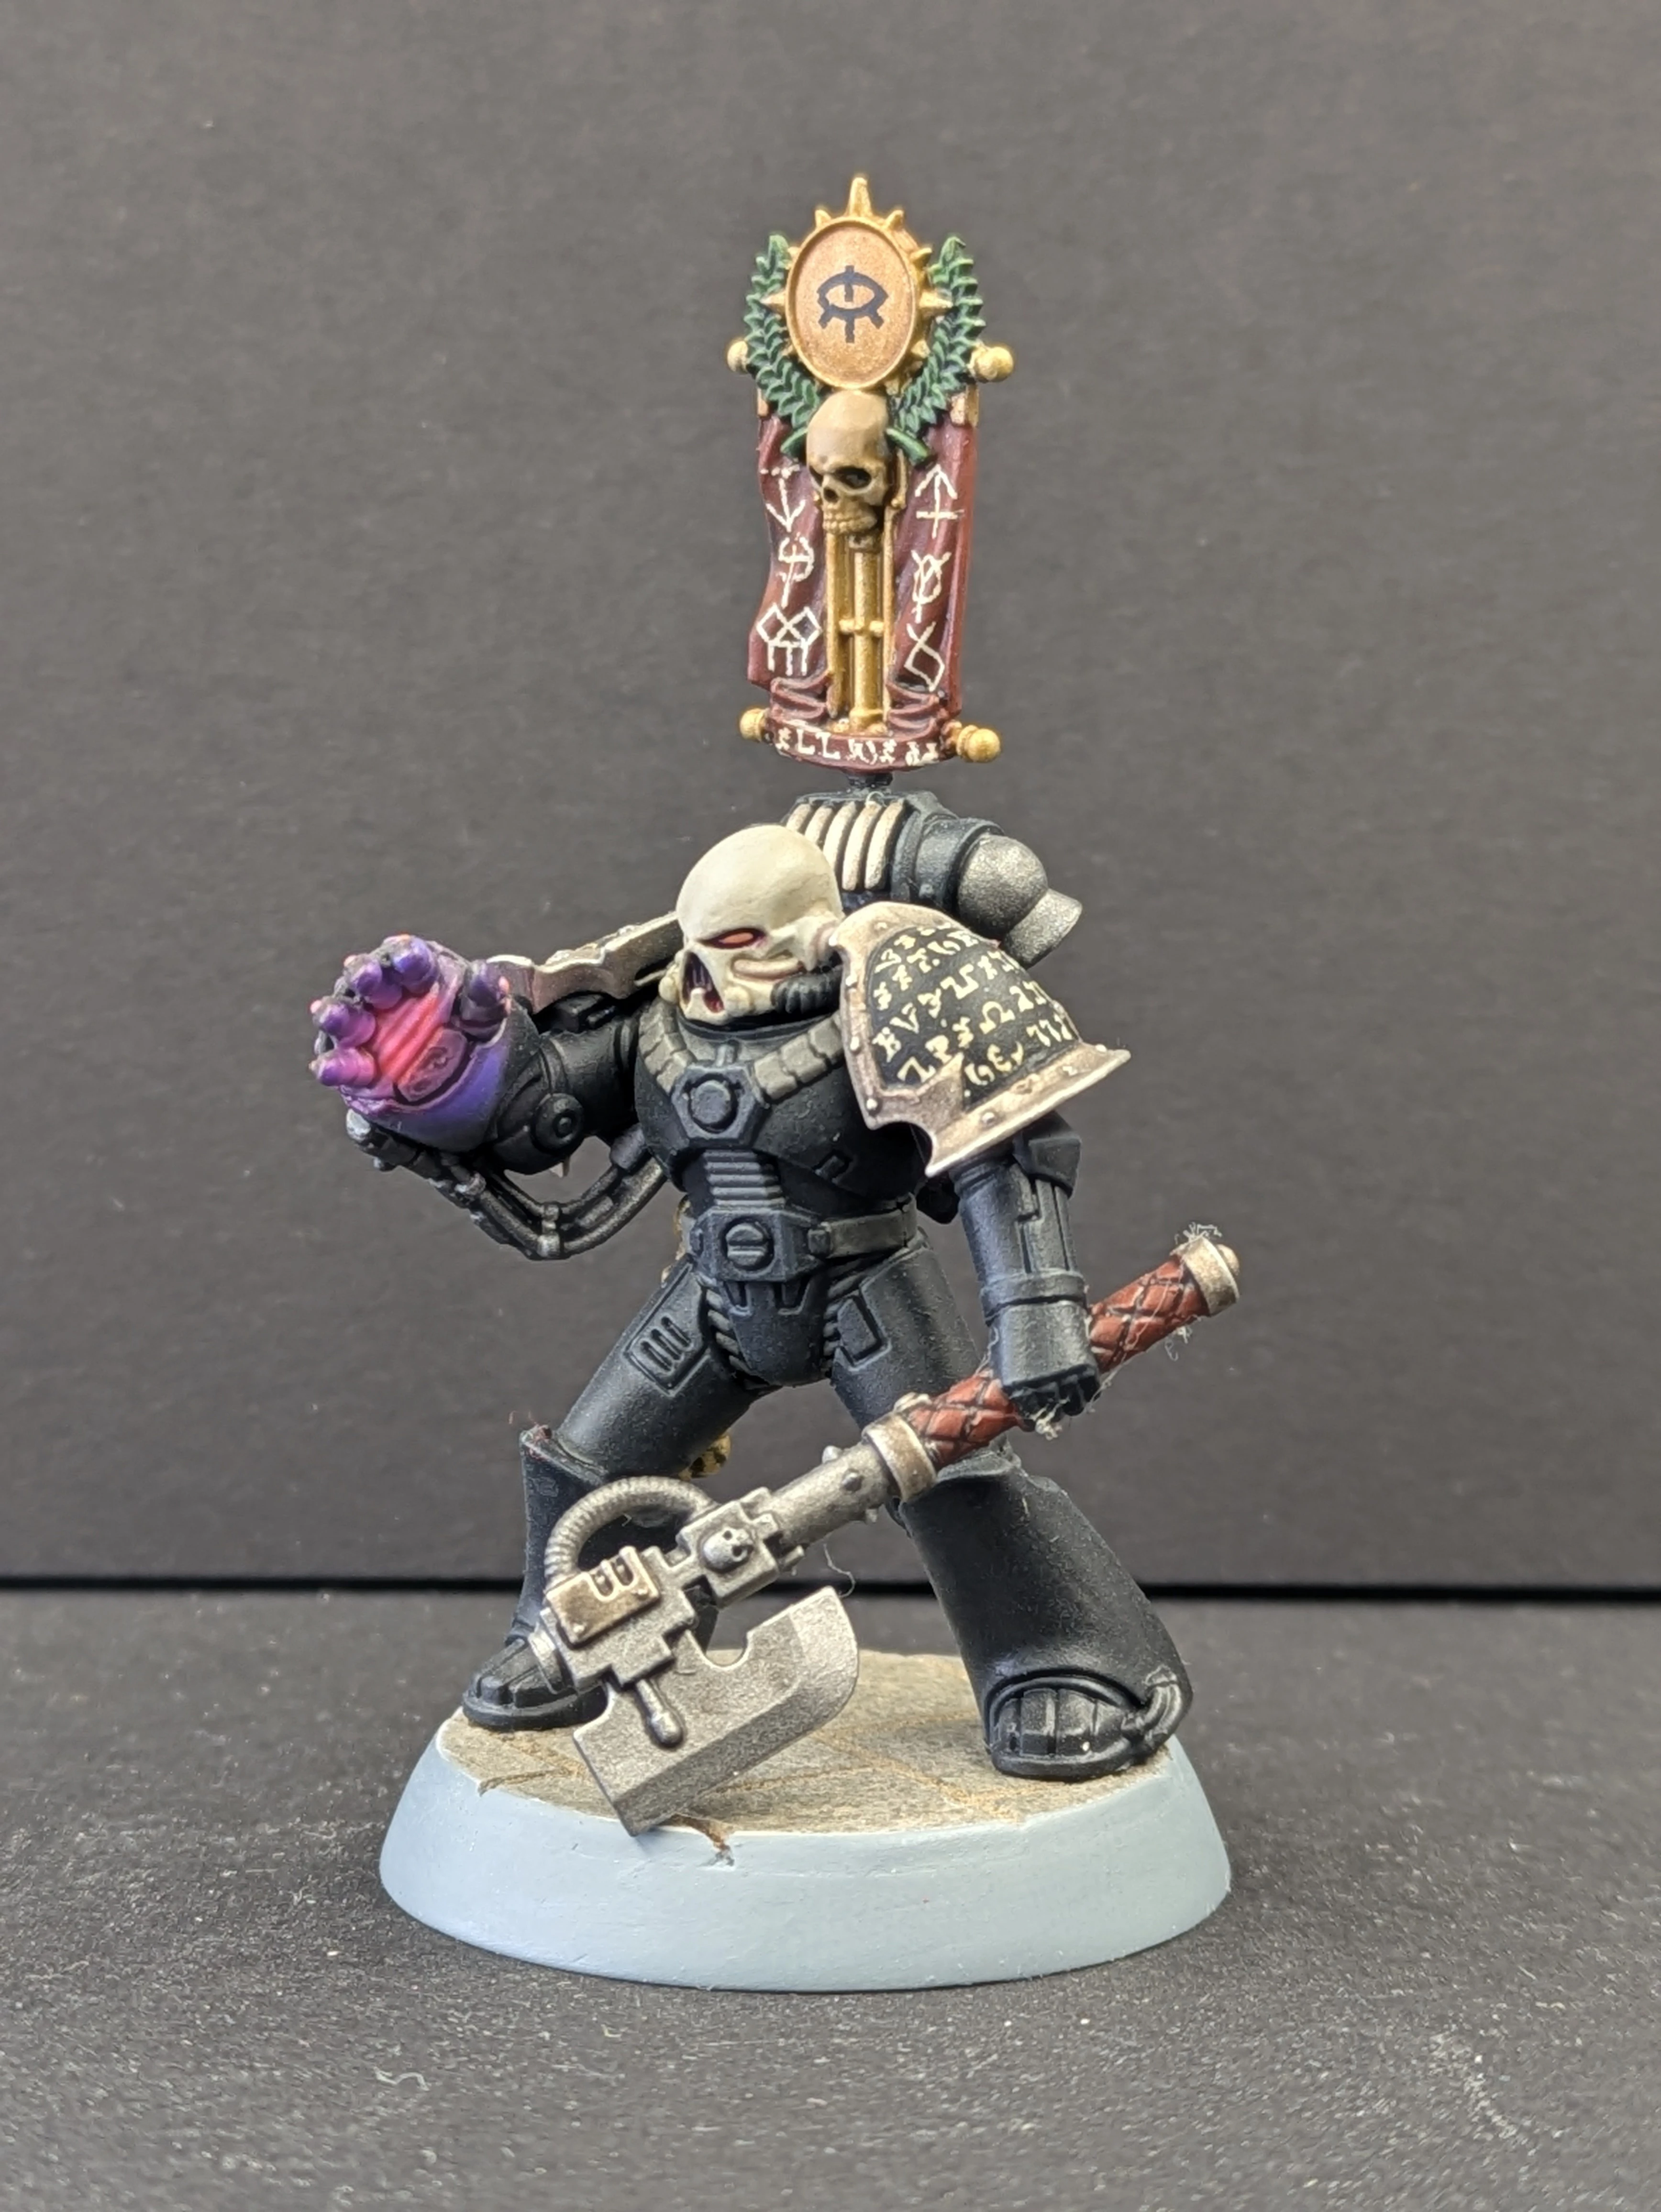
Erebus, Dark Apostle of the XVII Legion
The glowing hand is achieved through Object Source Lighting, most effectively done with an airbrush. The technique builds up colour depth by starting with a darker base ink and applying progressively lighter, more opaque colour on top to create the impression of light emanating from the hand.
No airbrush? True OSL is largely not achievable without an airbrush. The closest you can get by brush is to apply Phoenician Purple as the base, then stipple or drybrush Fluorescent Magenta (VLJ72158) concentrating the brightest colour on the palm and fading outward. The fluorescent pigment will give a glow-like quality that reads well on the tabletop even if it lacks the seamless fade of a true airbrushed OSL.
Recent Posts
-

Getting Into Weathering: What to Buy and Where to Start
Wheels & Wings Hobbies · Counter Notes "I Want to Get Into Weathering, What Do I Buy?" Weekly colum …Jul 30, 2026 -

Kyle Builds the Heller 1/72 T-28 Fennec - French Algeria Build Feature
Wheels and Wings Hobbies - Scale Model Build Feature Kyle Builds the Heller 1/72 T-28 Trojan "Fennec …Jul 30, 2026 -

John's Trench Crusade Sniper Priests Paint Guide - Build Feature
Wheels and Wings Hobbies - Miniature Paint Guide John's Trench Crusade Sniper Priests Trench Crusade …Jul 23, 2026