

Kravek Morne Paint Guide — Warhammer 40,000 Chaos Space Marine
Vlad's Kravek Morne
Full Paint Guide · Warhammer 40,000 · May 2026
Vlad's full recipe for Kravek Morne, dark aluminium armour with elaborate bronze chain and trim, black panels with a cold blue highlight ramp, hazard stripe yellow panels, and a muddy industrial base. A striking scheme built around metallic contrasts and sharp edge highlighting.
All products below are in stock at Wheels & Wings Hobbies unless otherwise noted.
Shop the Kit Here!
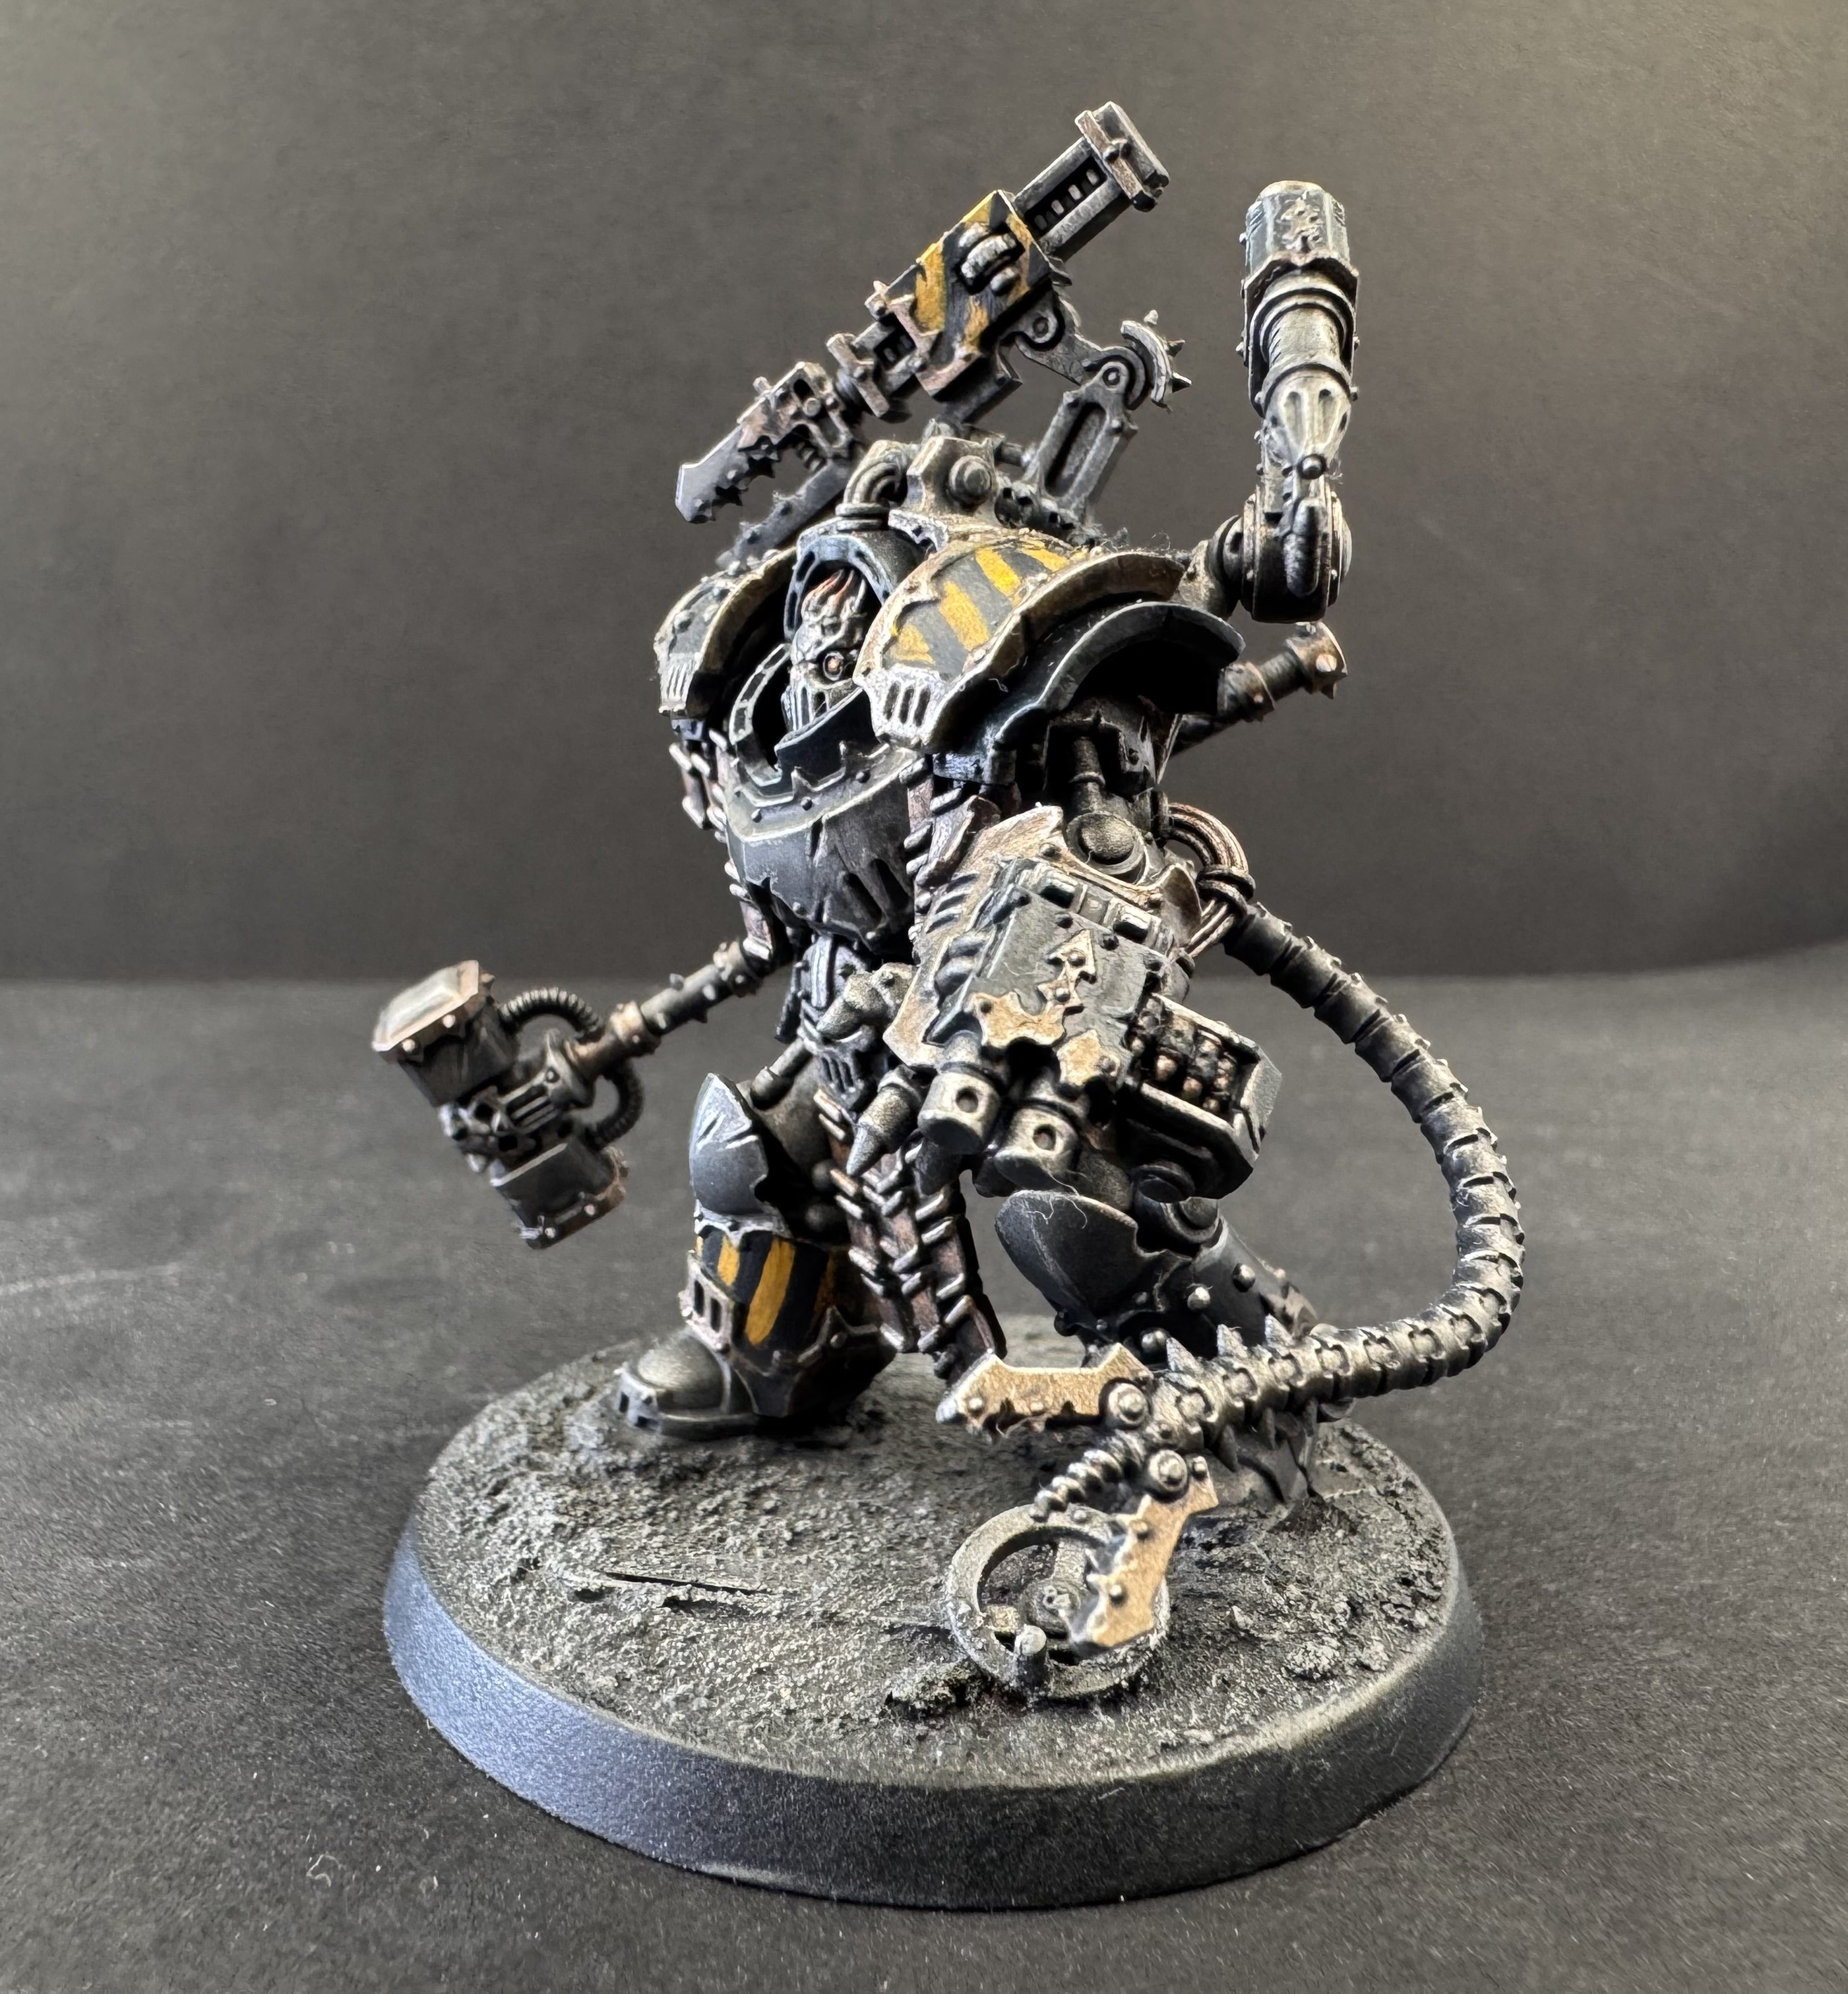
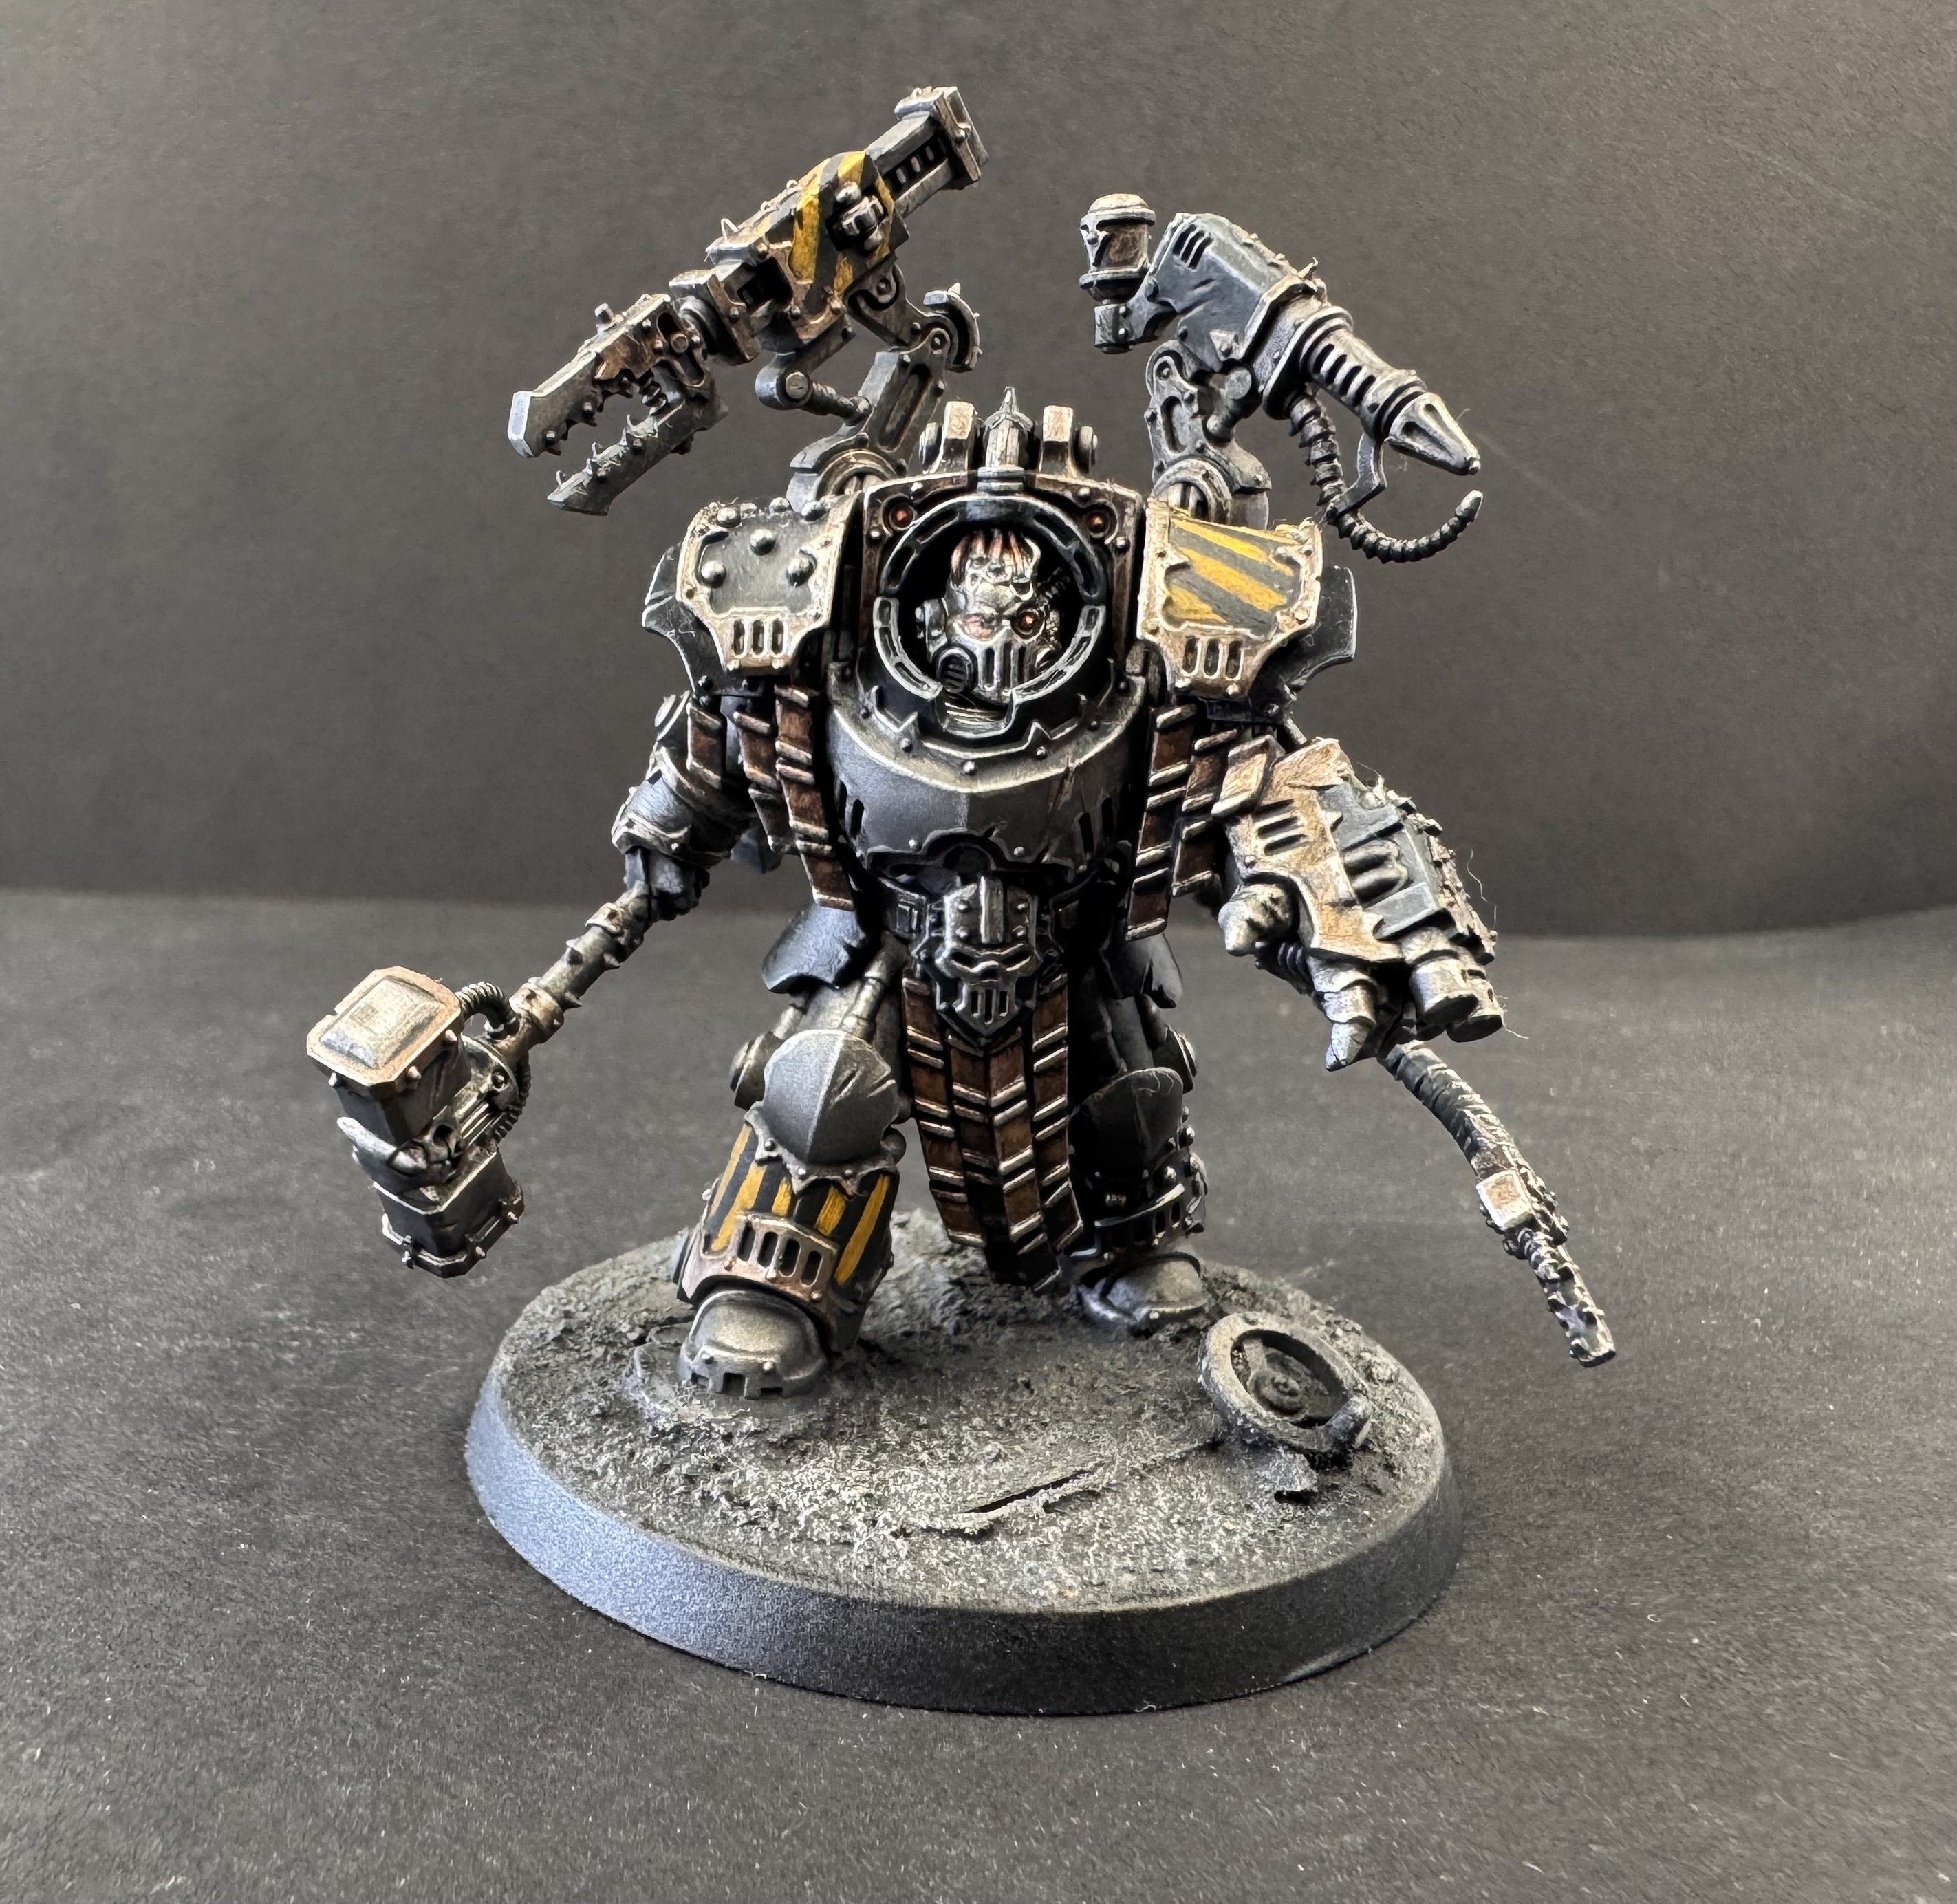
Vlad's completed Kravek Morne.
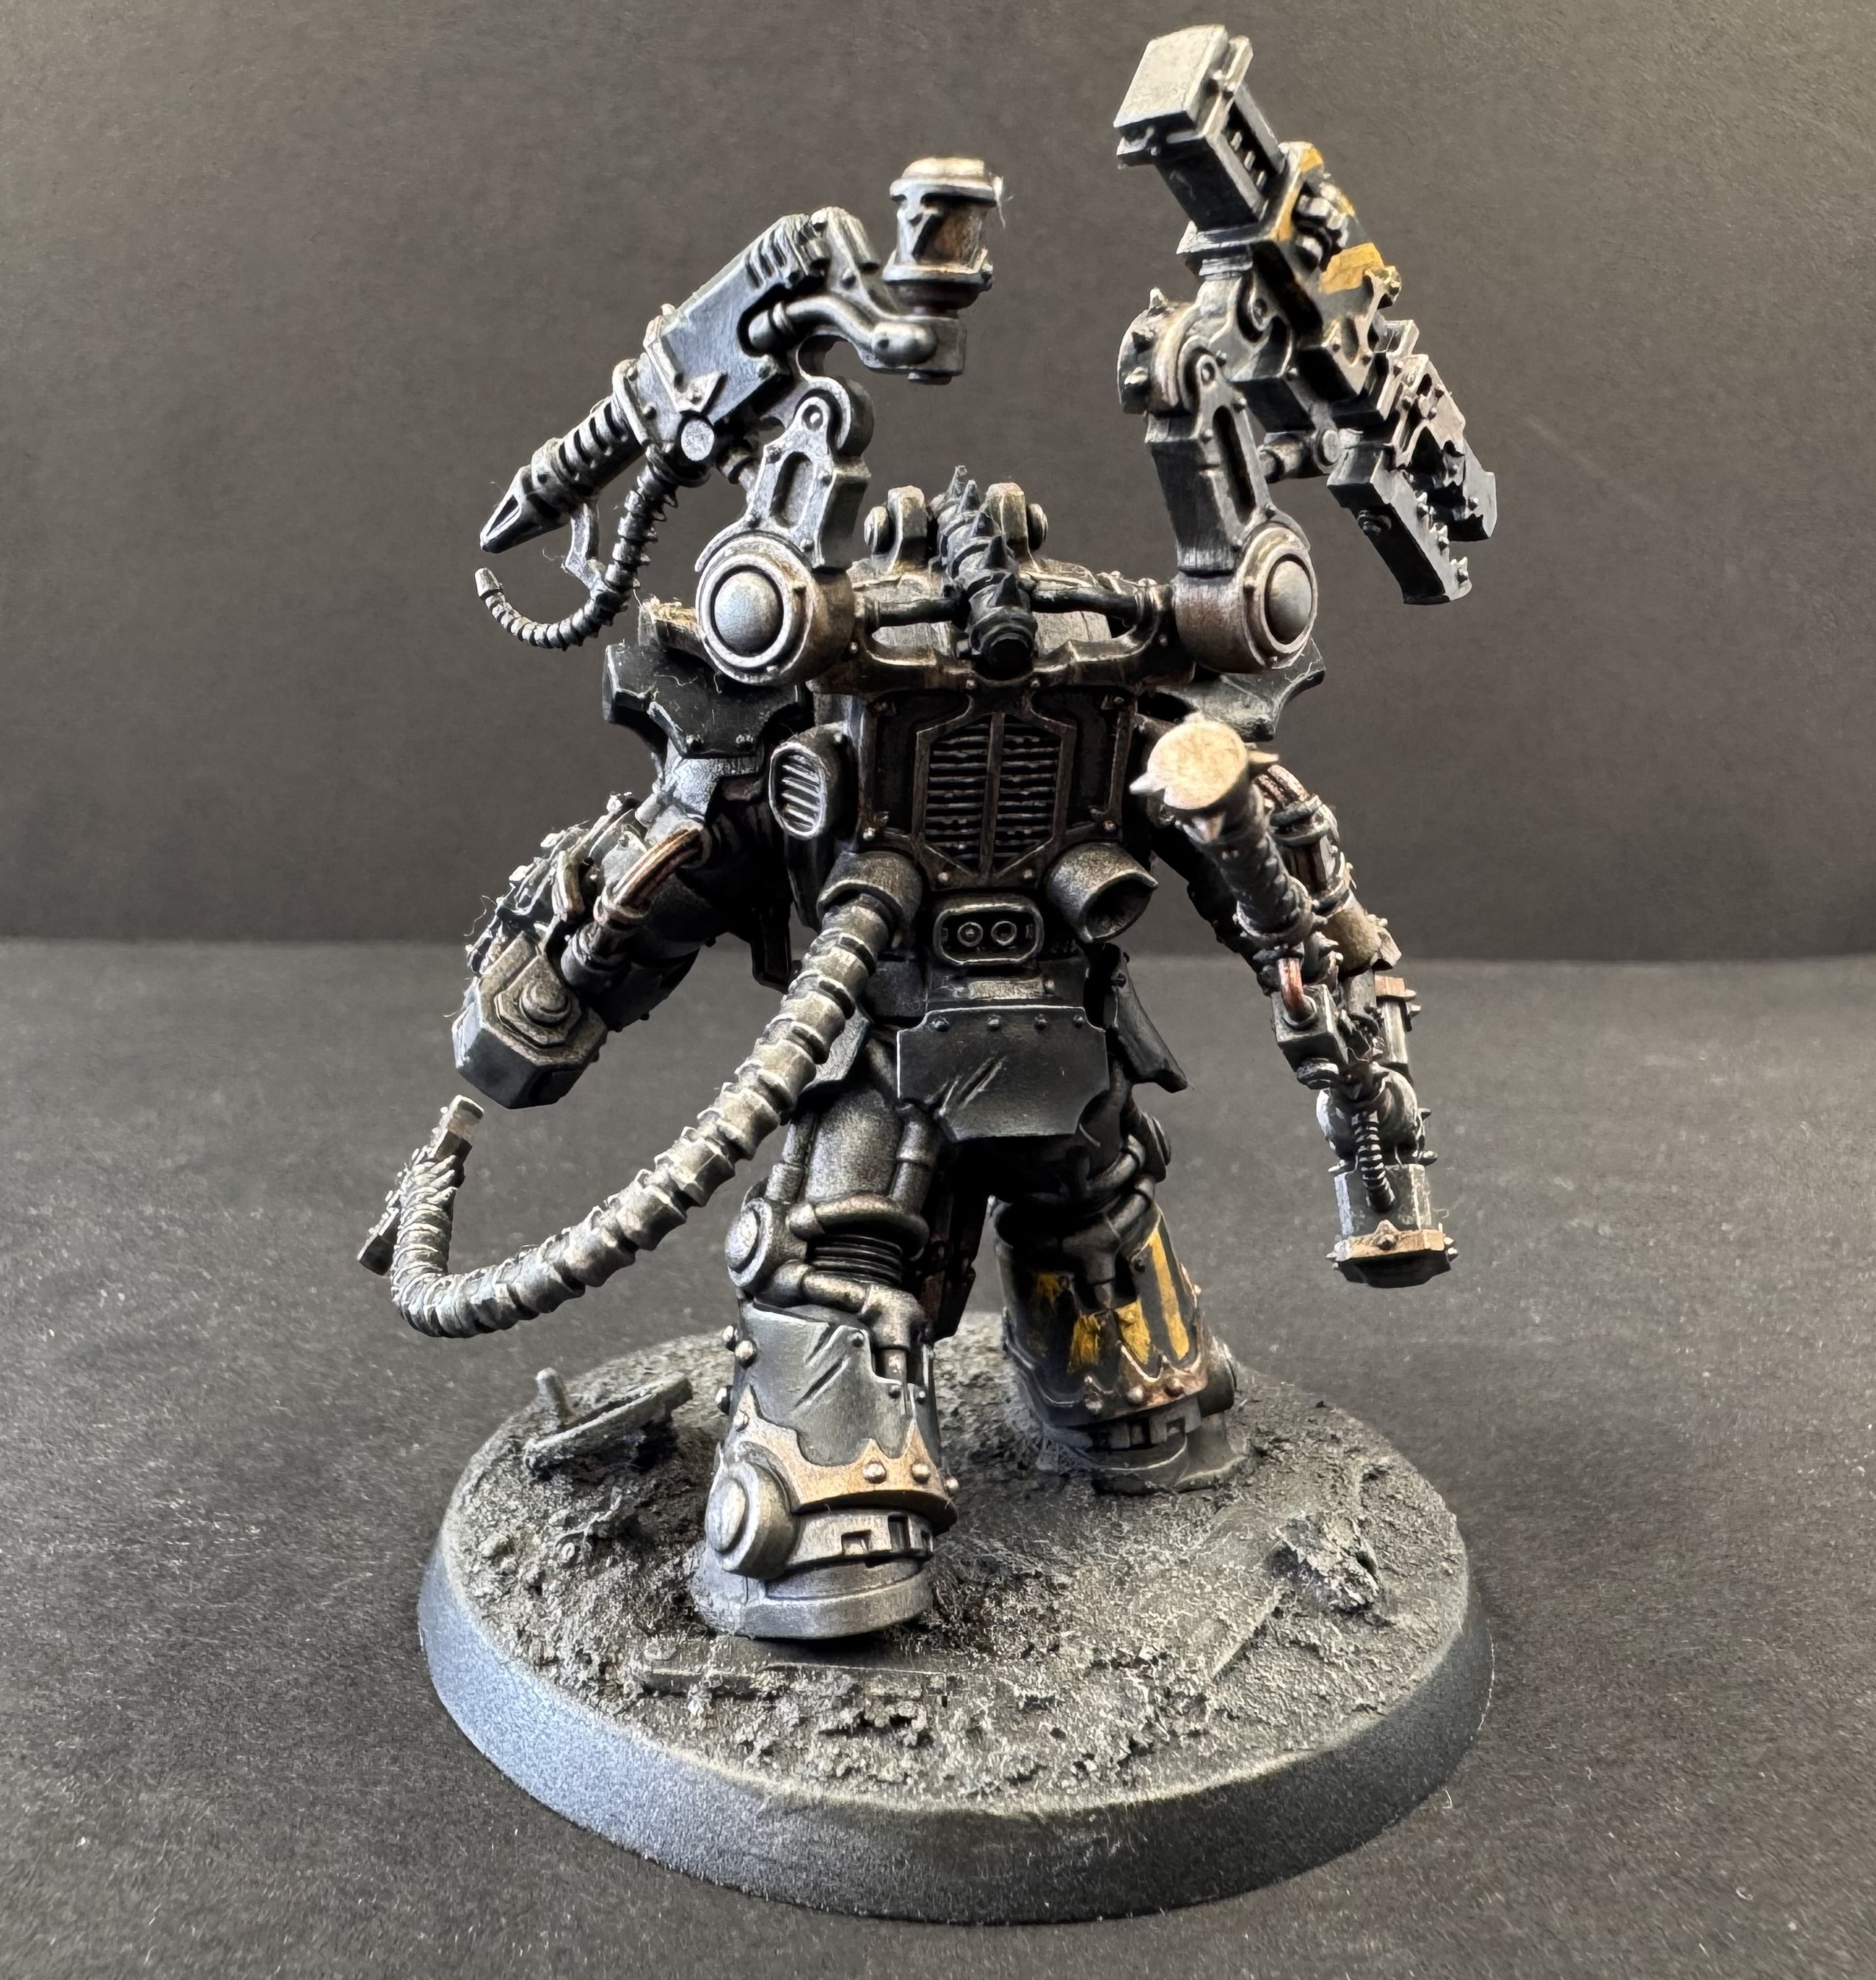
Rear View
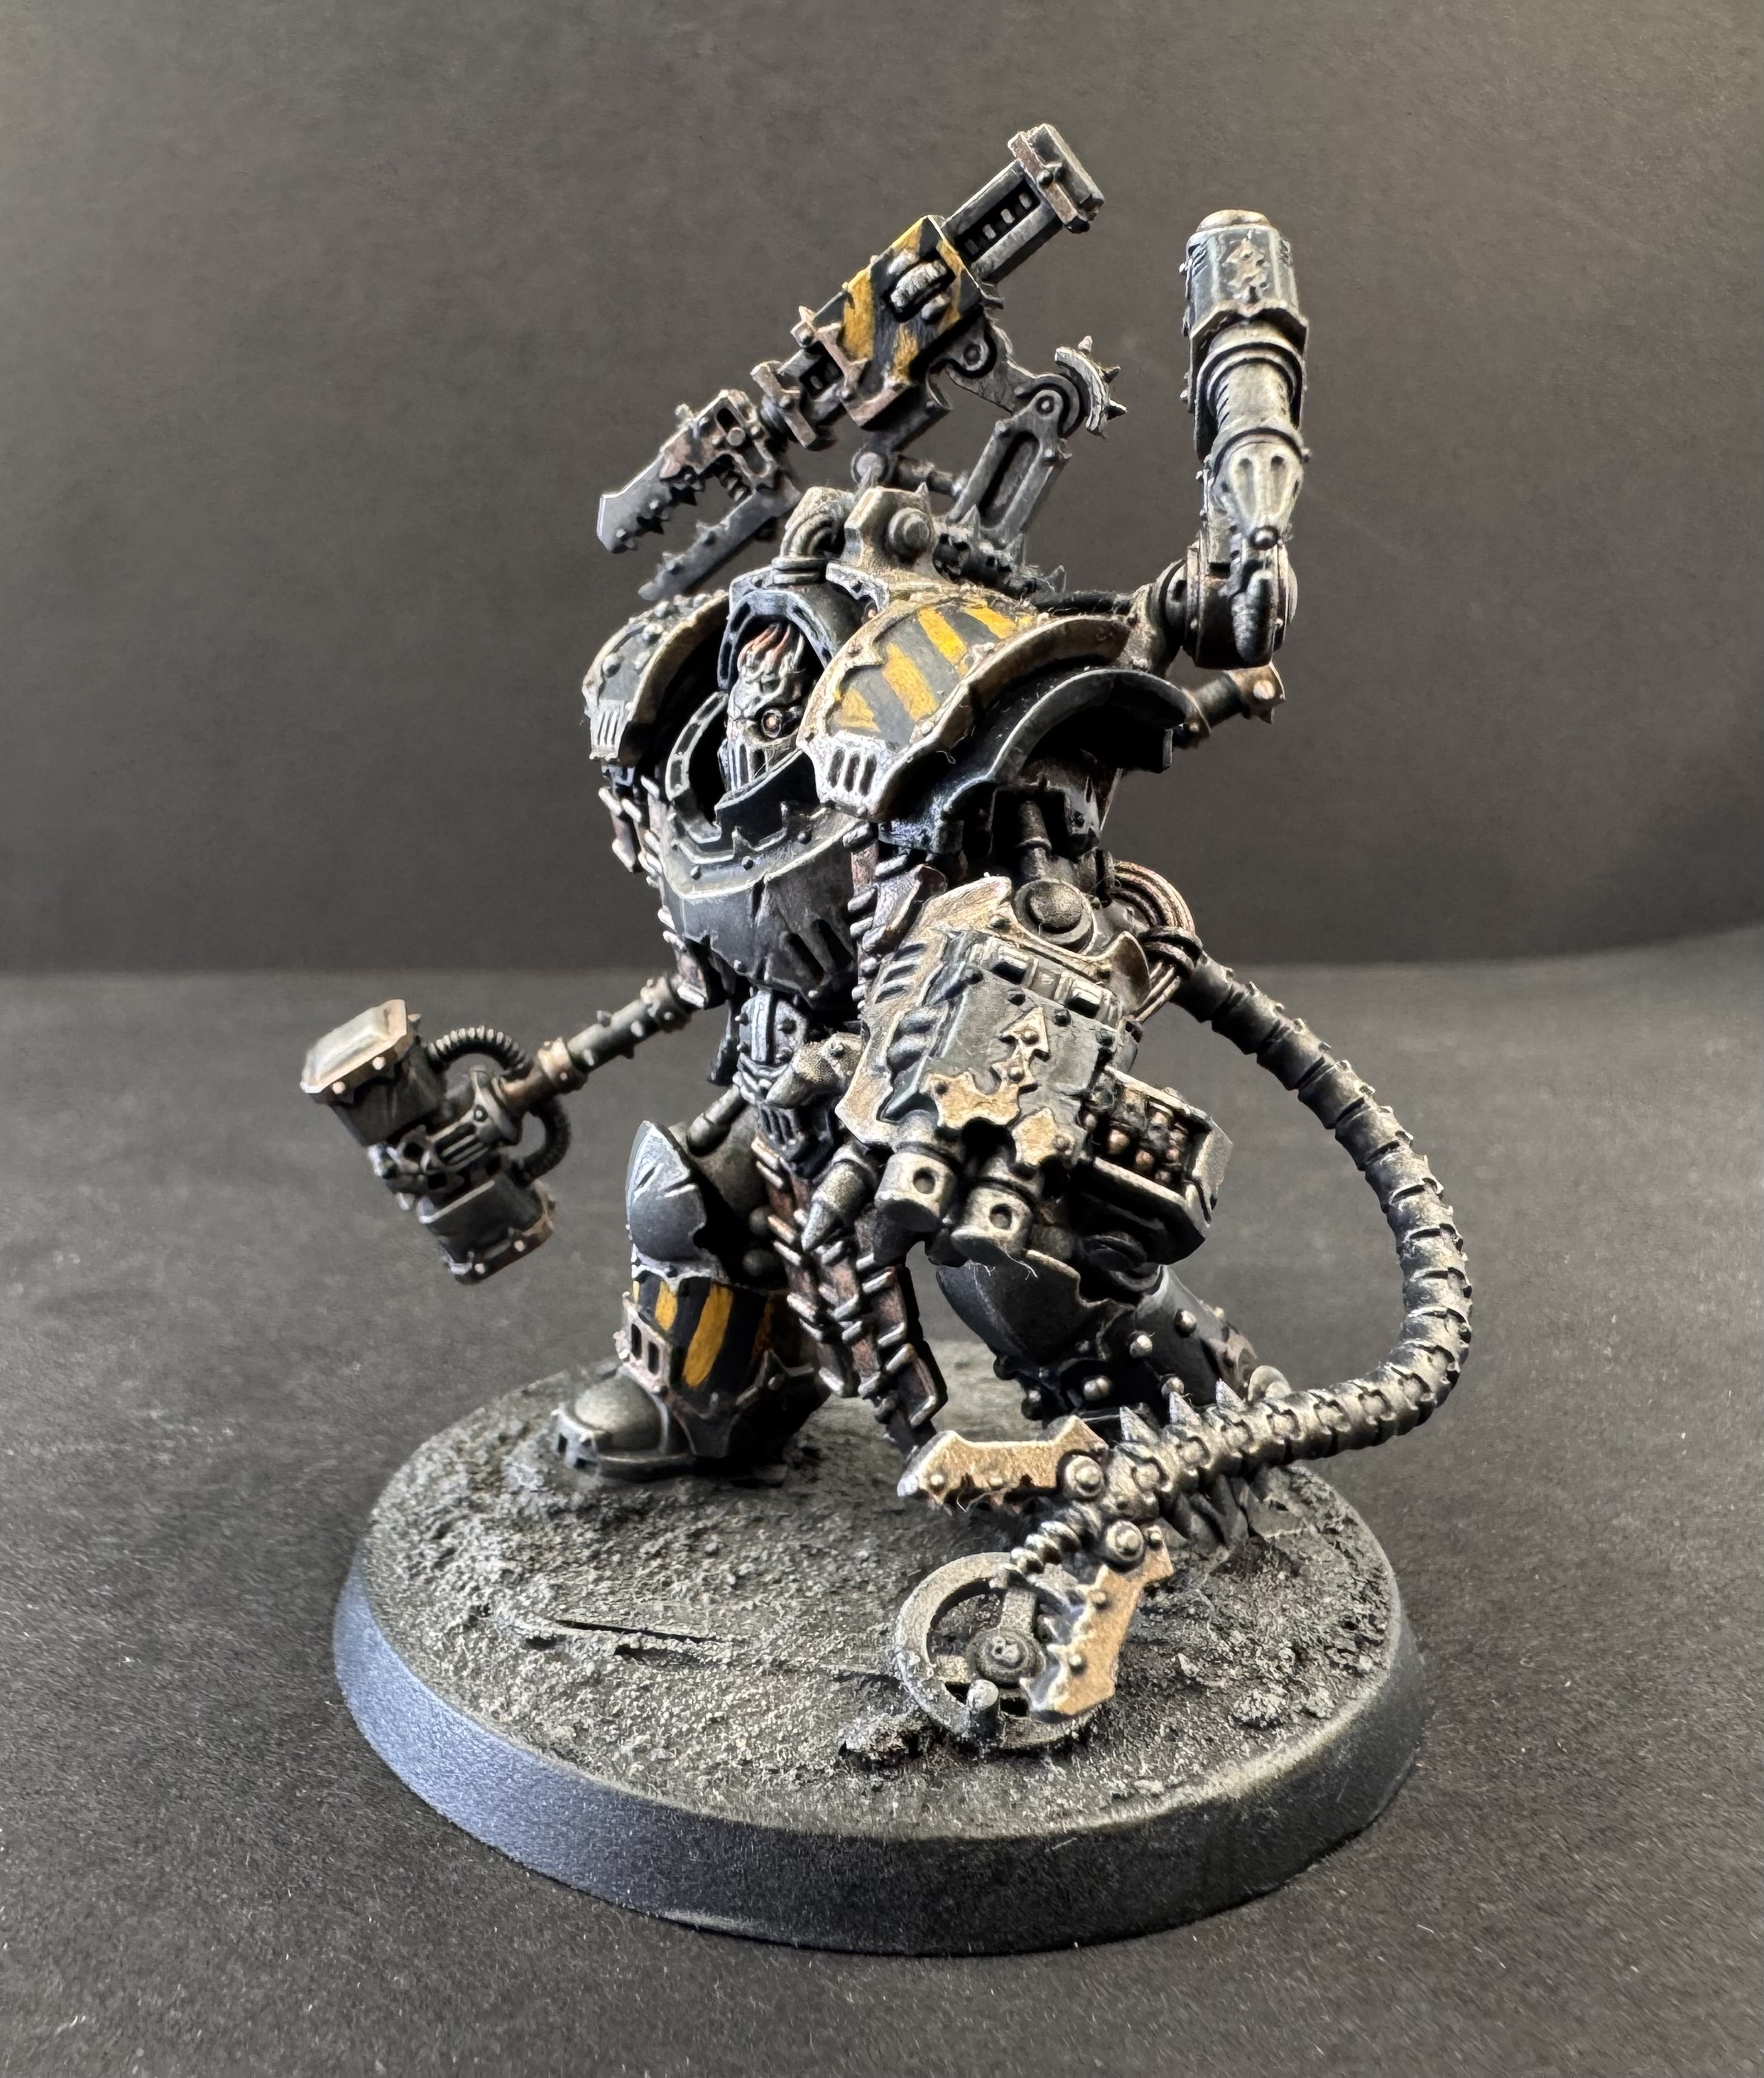
Three-quarter view
Vlad's Full Recipe
Step-by-step from primer to base. Products link directly to Wheels & Wings stock.
Prime - Black
Airbrush a black primer coat 50/50 with Vallejo Airbrush Thinner for a smooth, even base. Mr. Hobby Mr. Finishing Surfacer 1500 Black is no longer reliably importable into Canada - Vallejo Mecha Black Primer is the recommended in-stock alternative and performs excellently through an airbrush at the same ratio.
Base Coat - Dark Aluminium
Airbrush the entire model with Vallejo Metal Color Dark Aluminum. This establishes the core metallic body colour over the black primer. The black primer showing through recesses at this stage is intentional - it provides natural shadow depth without additional work.
Bronze Chain Links
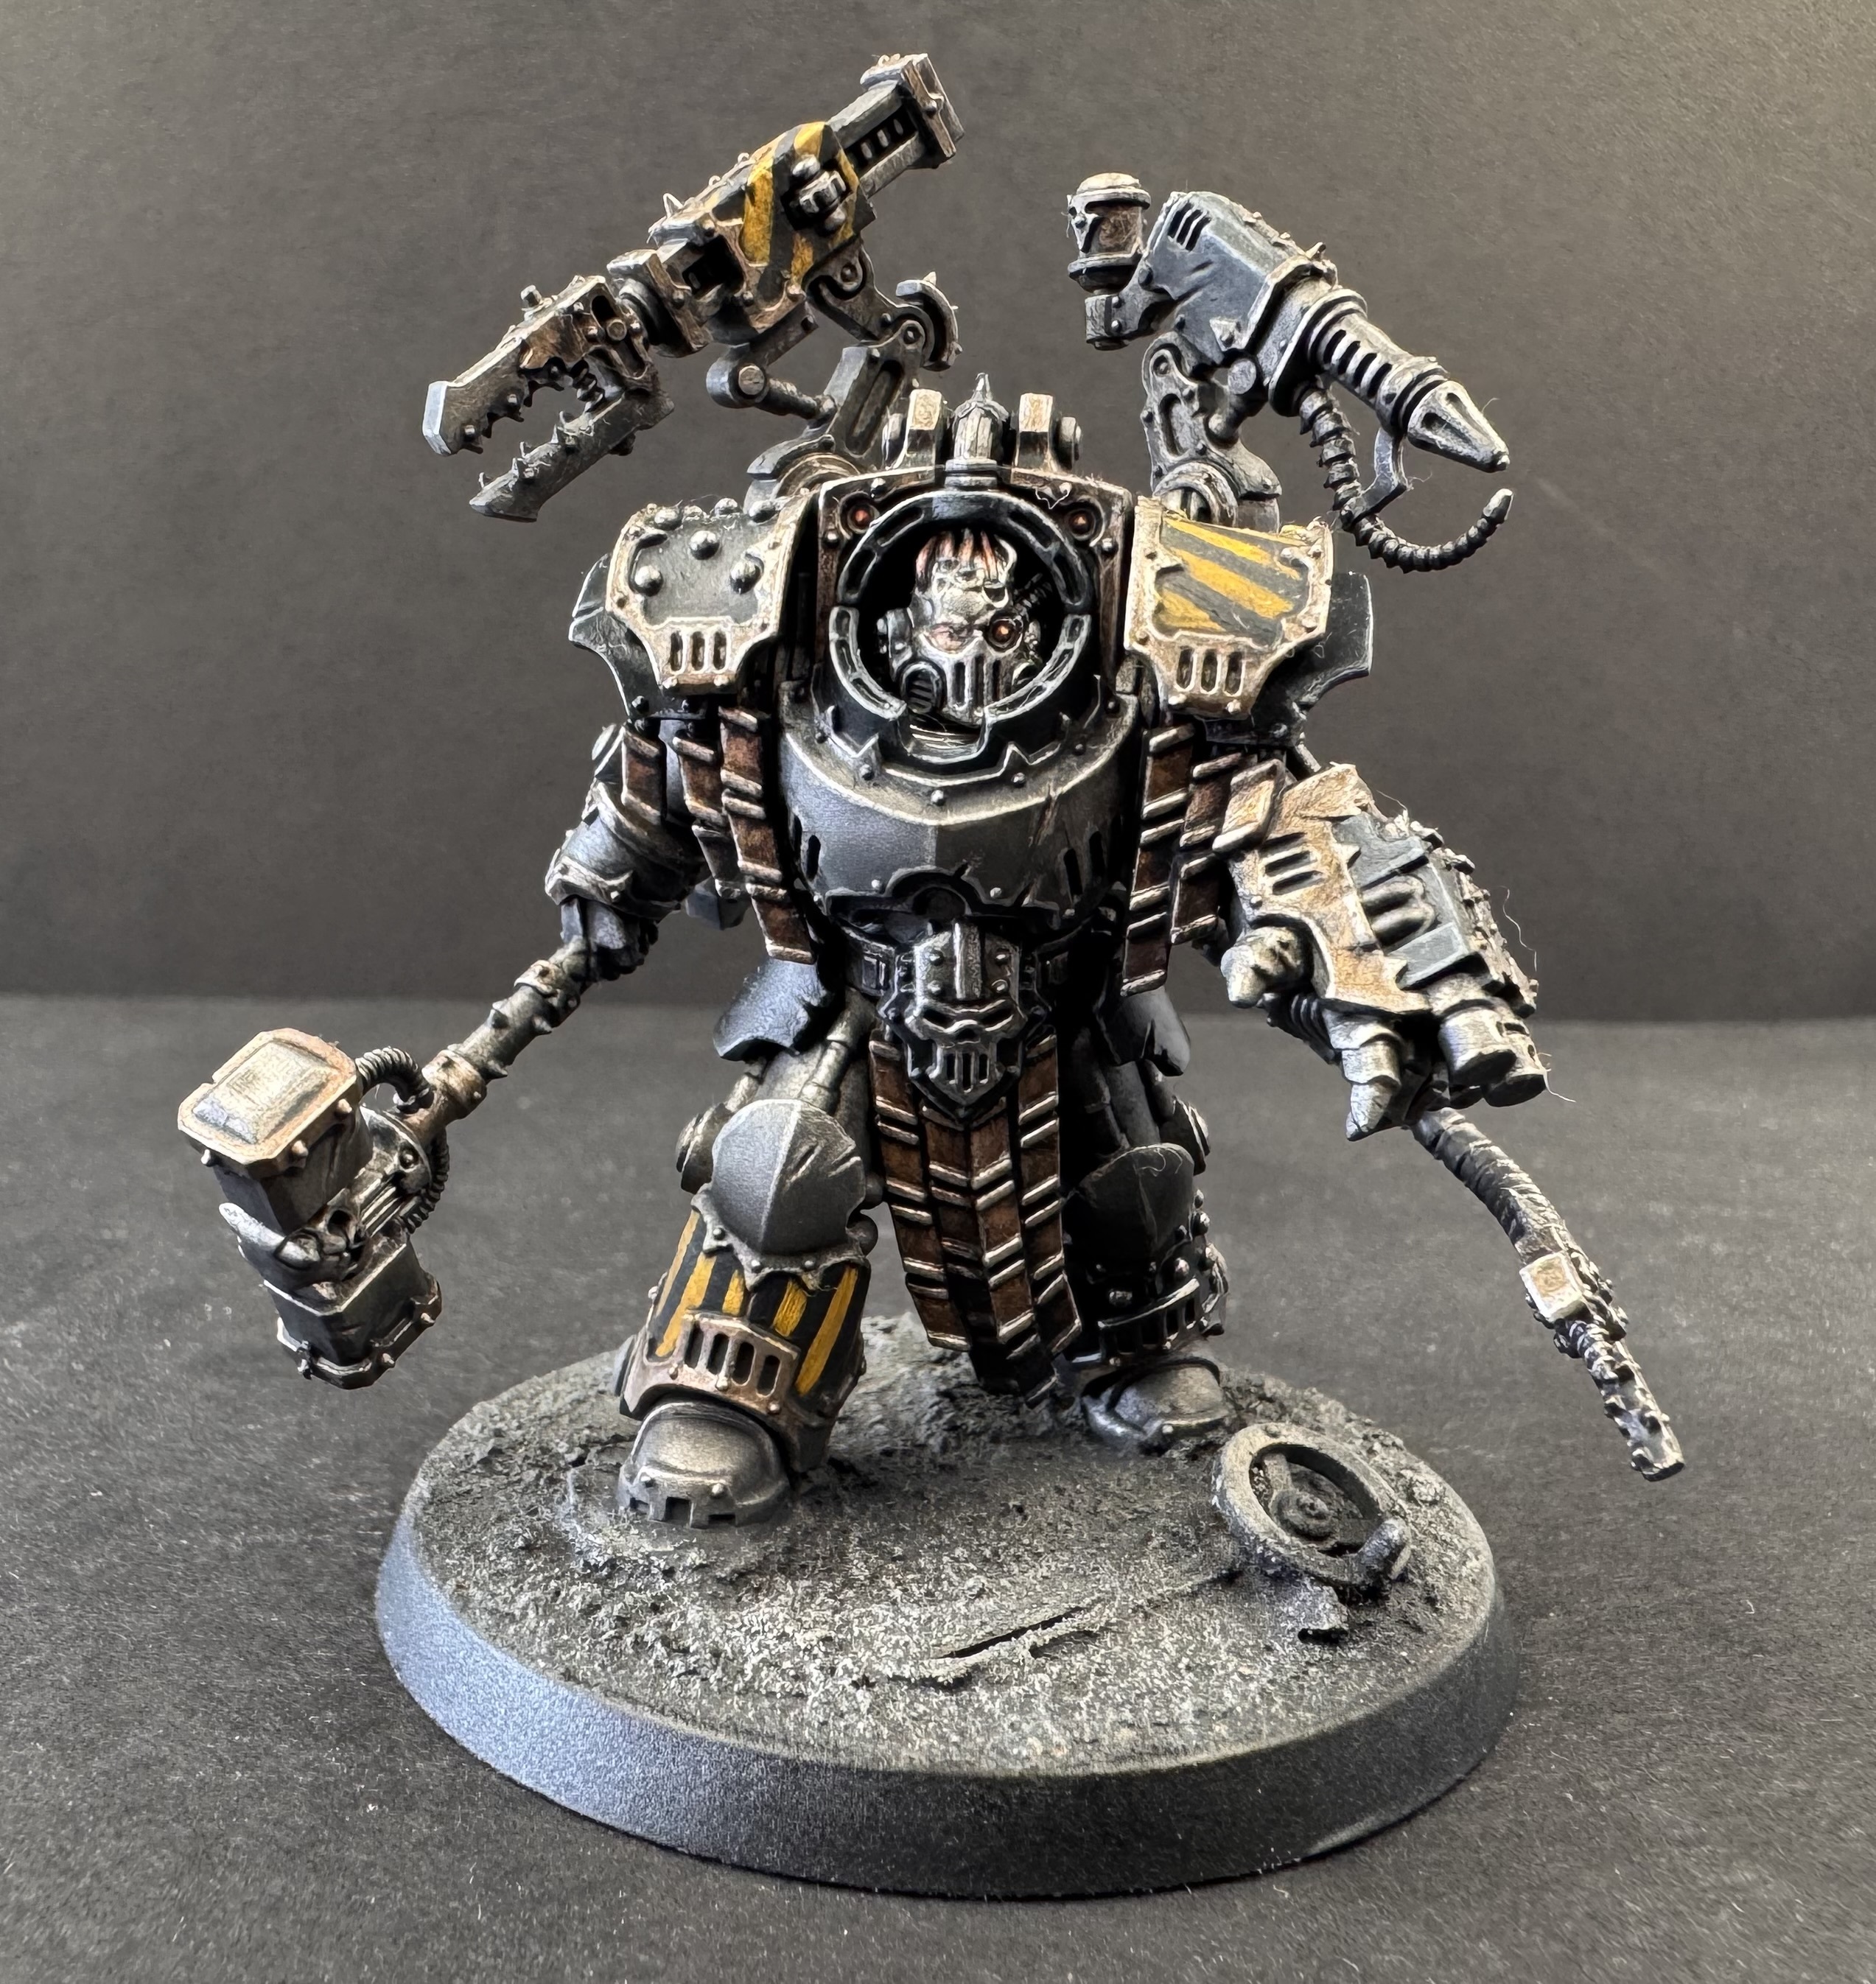
The chain links receive a full five-stage bronze treatment: a mixed base coat, recessed shadows, chunky highlights on the raised link bodies, then two progressive edge highlight passes stepping up through silver to create a worn, polished-metal look.
Chain link detail - five-stage bronze
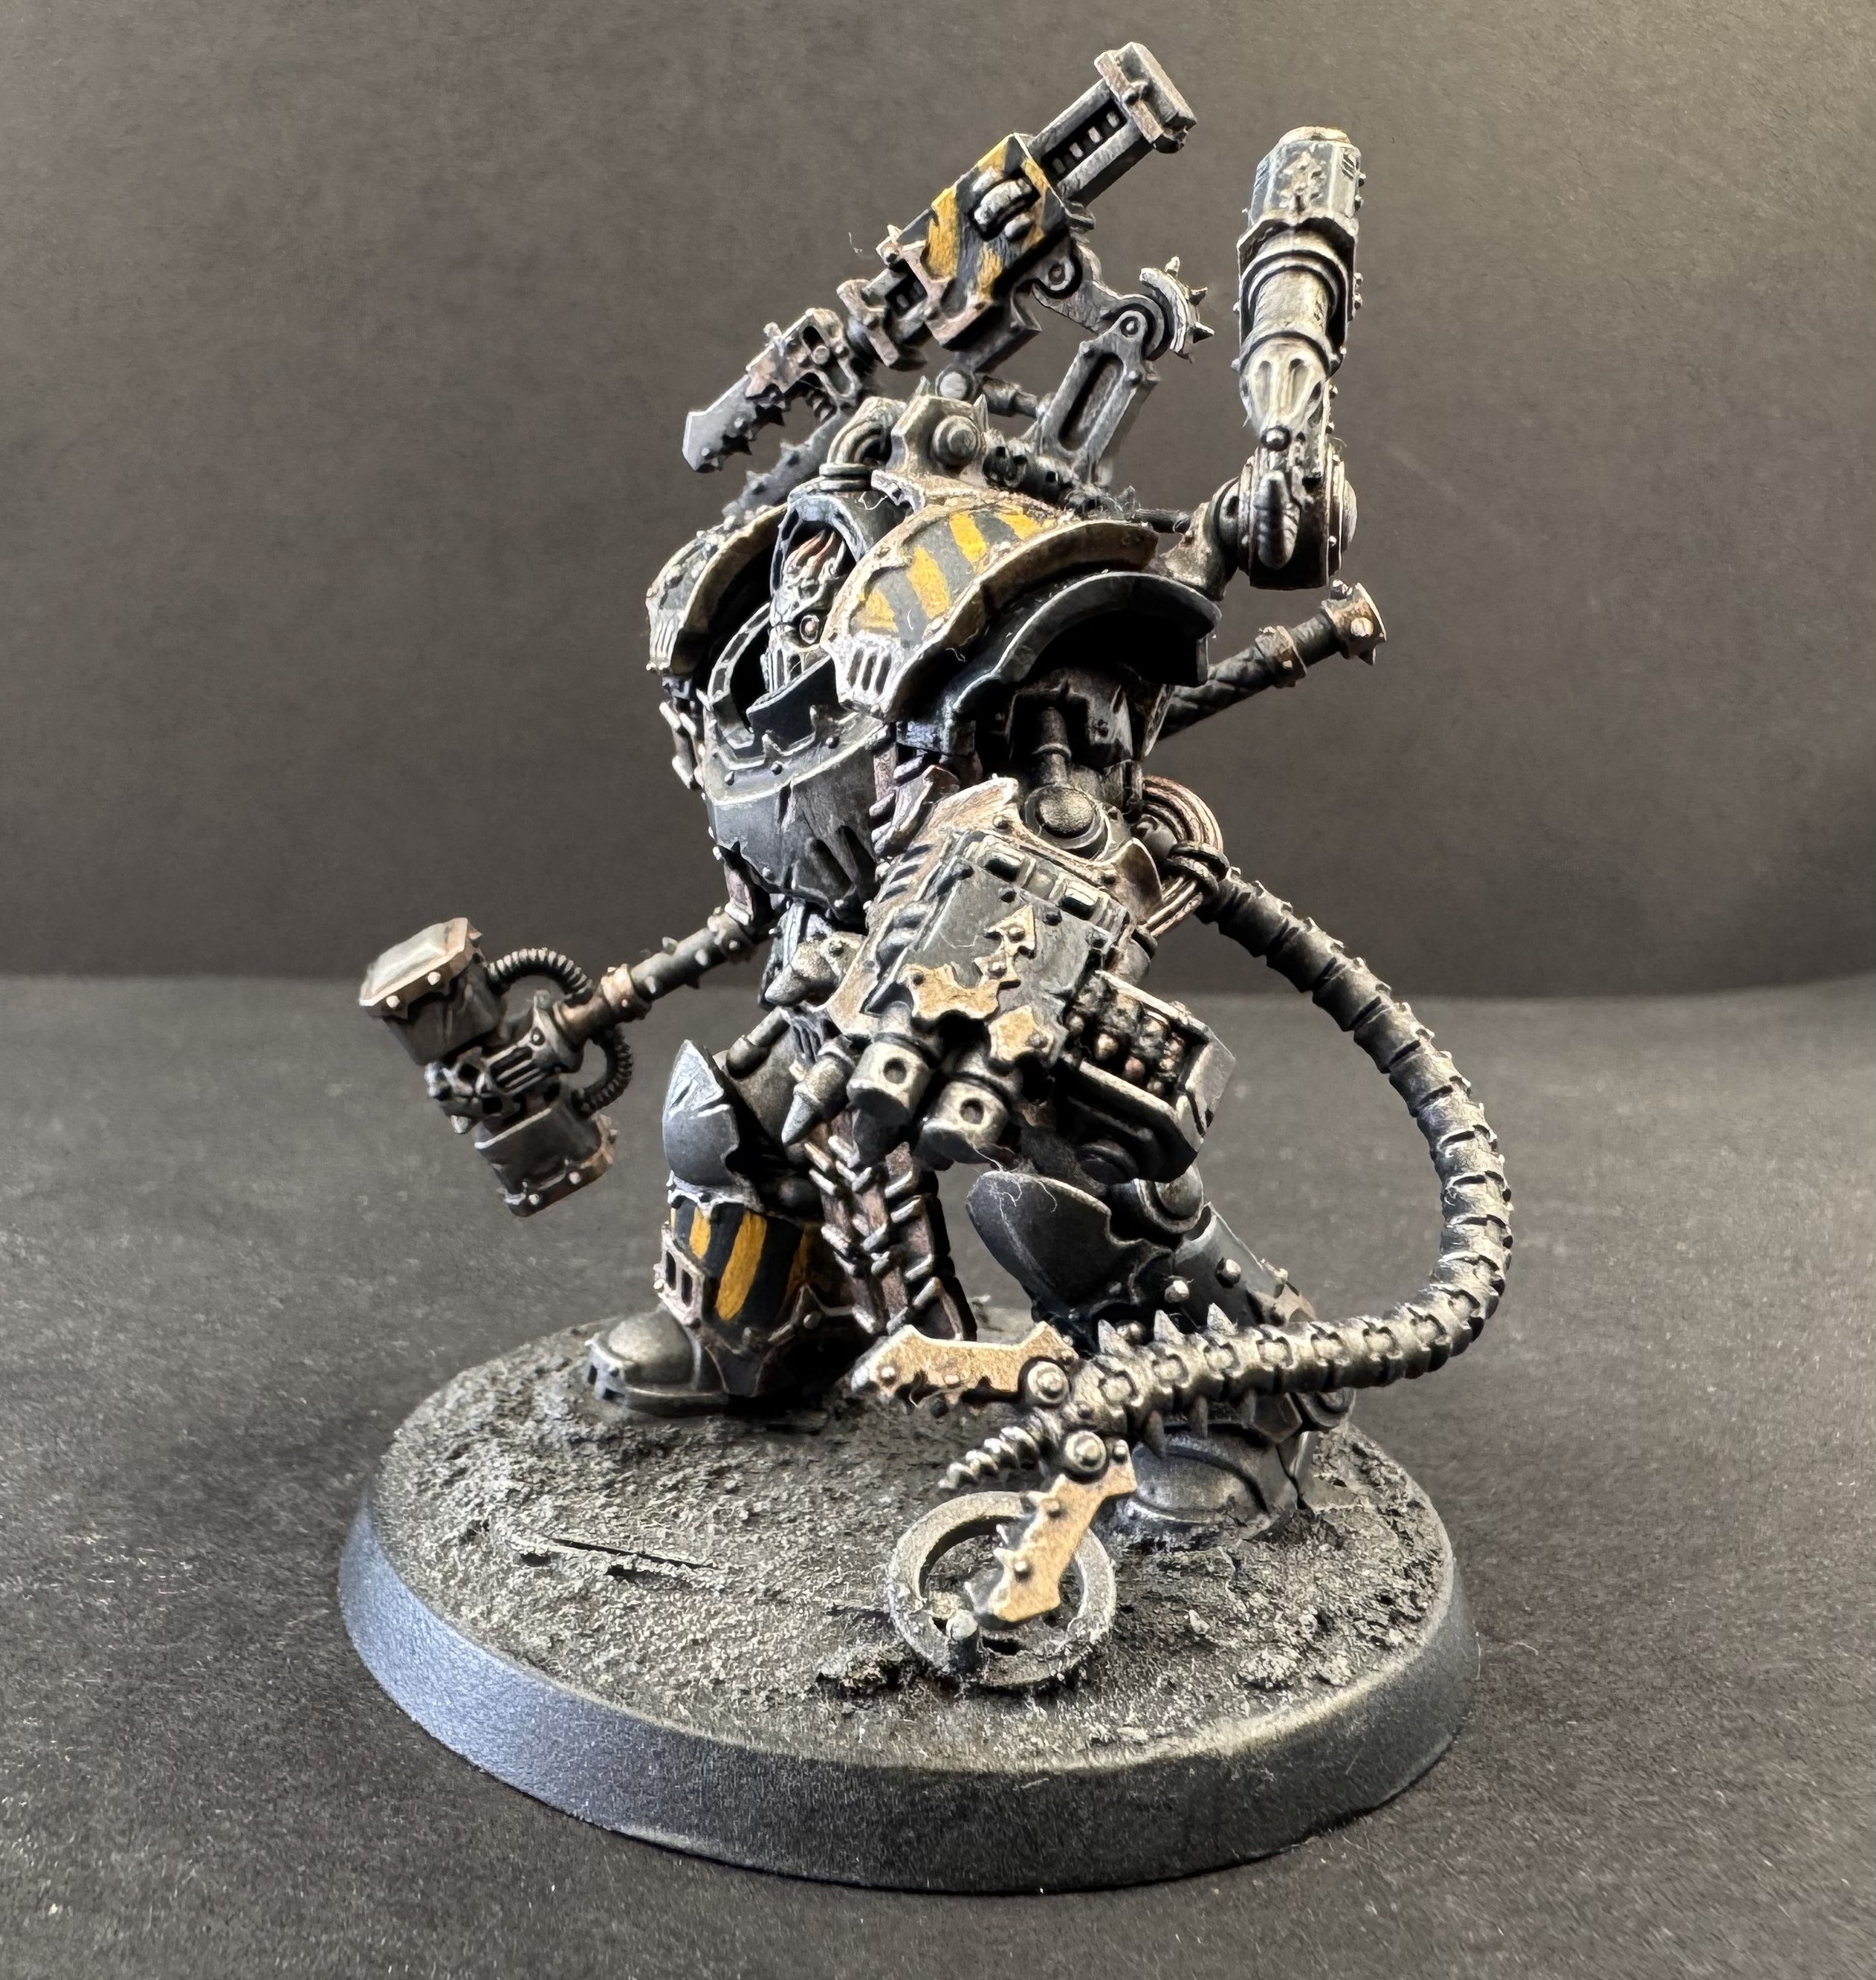
Chain and trim together
All Other Bronze Trim
Non-chain bronze trim elements (ornaments, rivets, edging) follow a simpler four-stage approach: a warm Runelord Brass base, Brass Scorpion highlights, a Seraphim Sepia wash to unify and deepen tones, then Ironbreaker for the final crisp edge.
Black Armour Panels - Cold Blue Highlight Ramp
The black armour panels are highlighted using a cold blue ramp - a technique that reads as reflective, high-quality black rather than plain dark grey. Four stages step up through increasingly bright, cool tones: starting with a green-black base through to a near-white cold highlight on the sharpest edges.
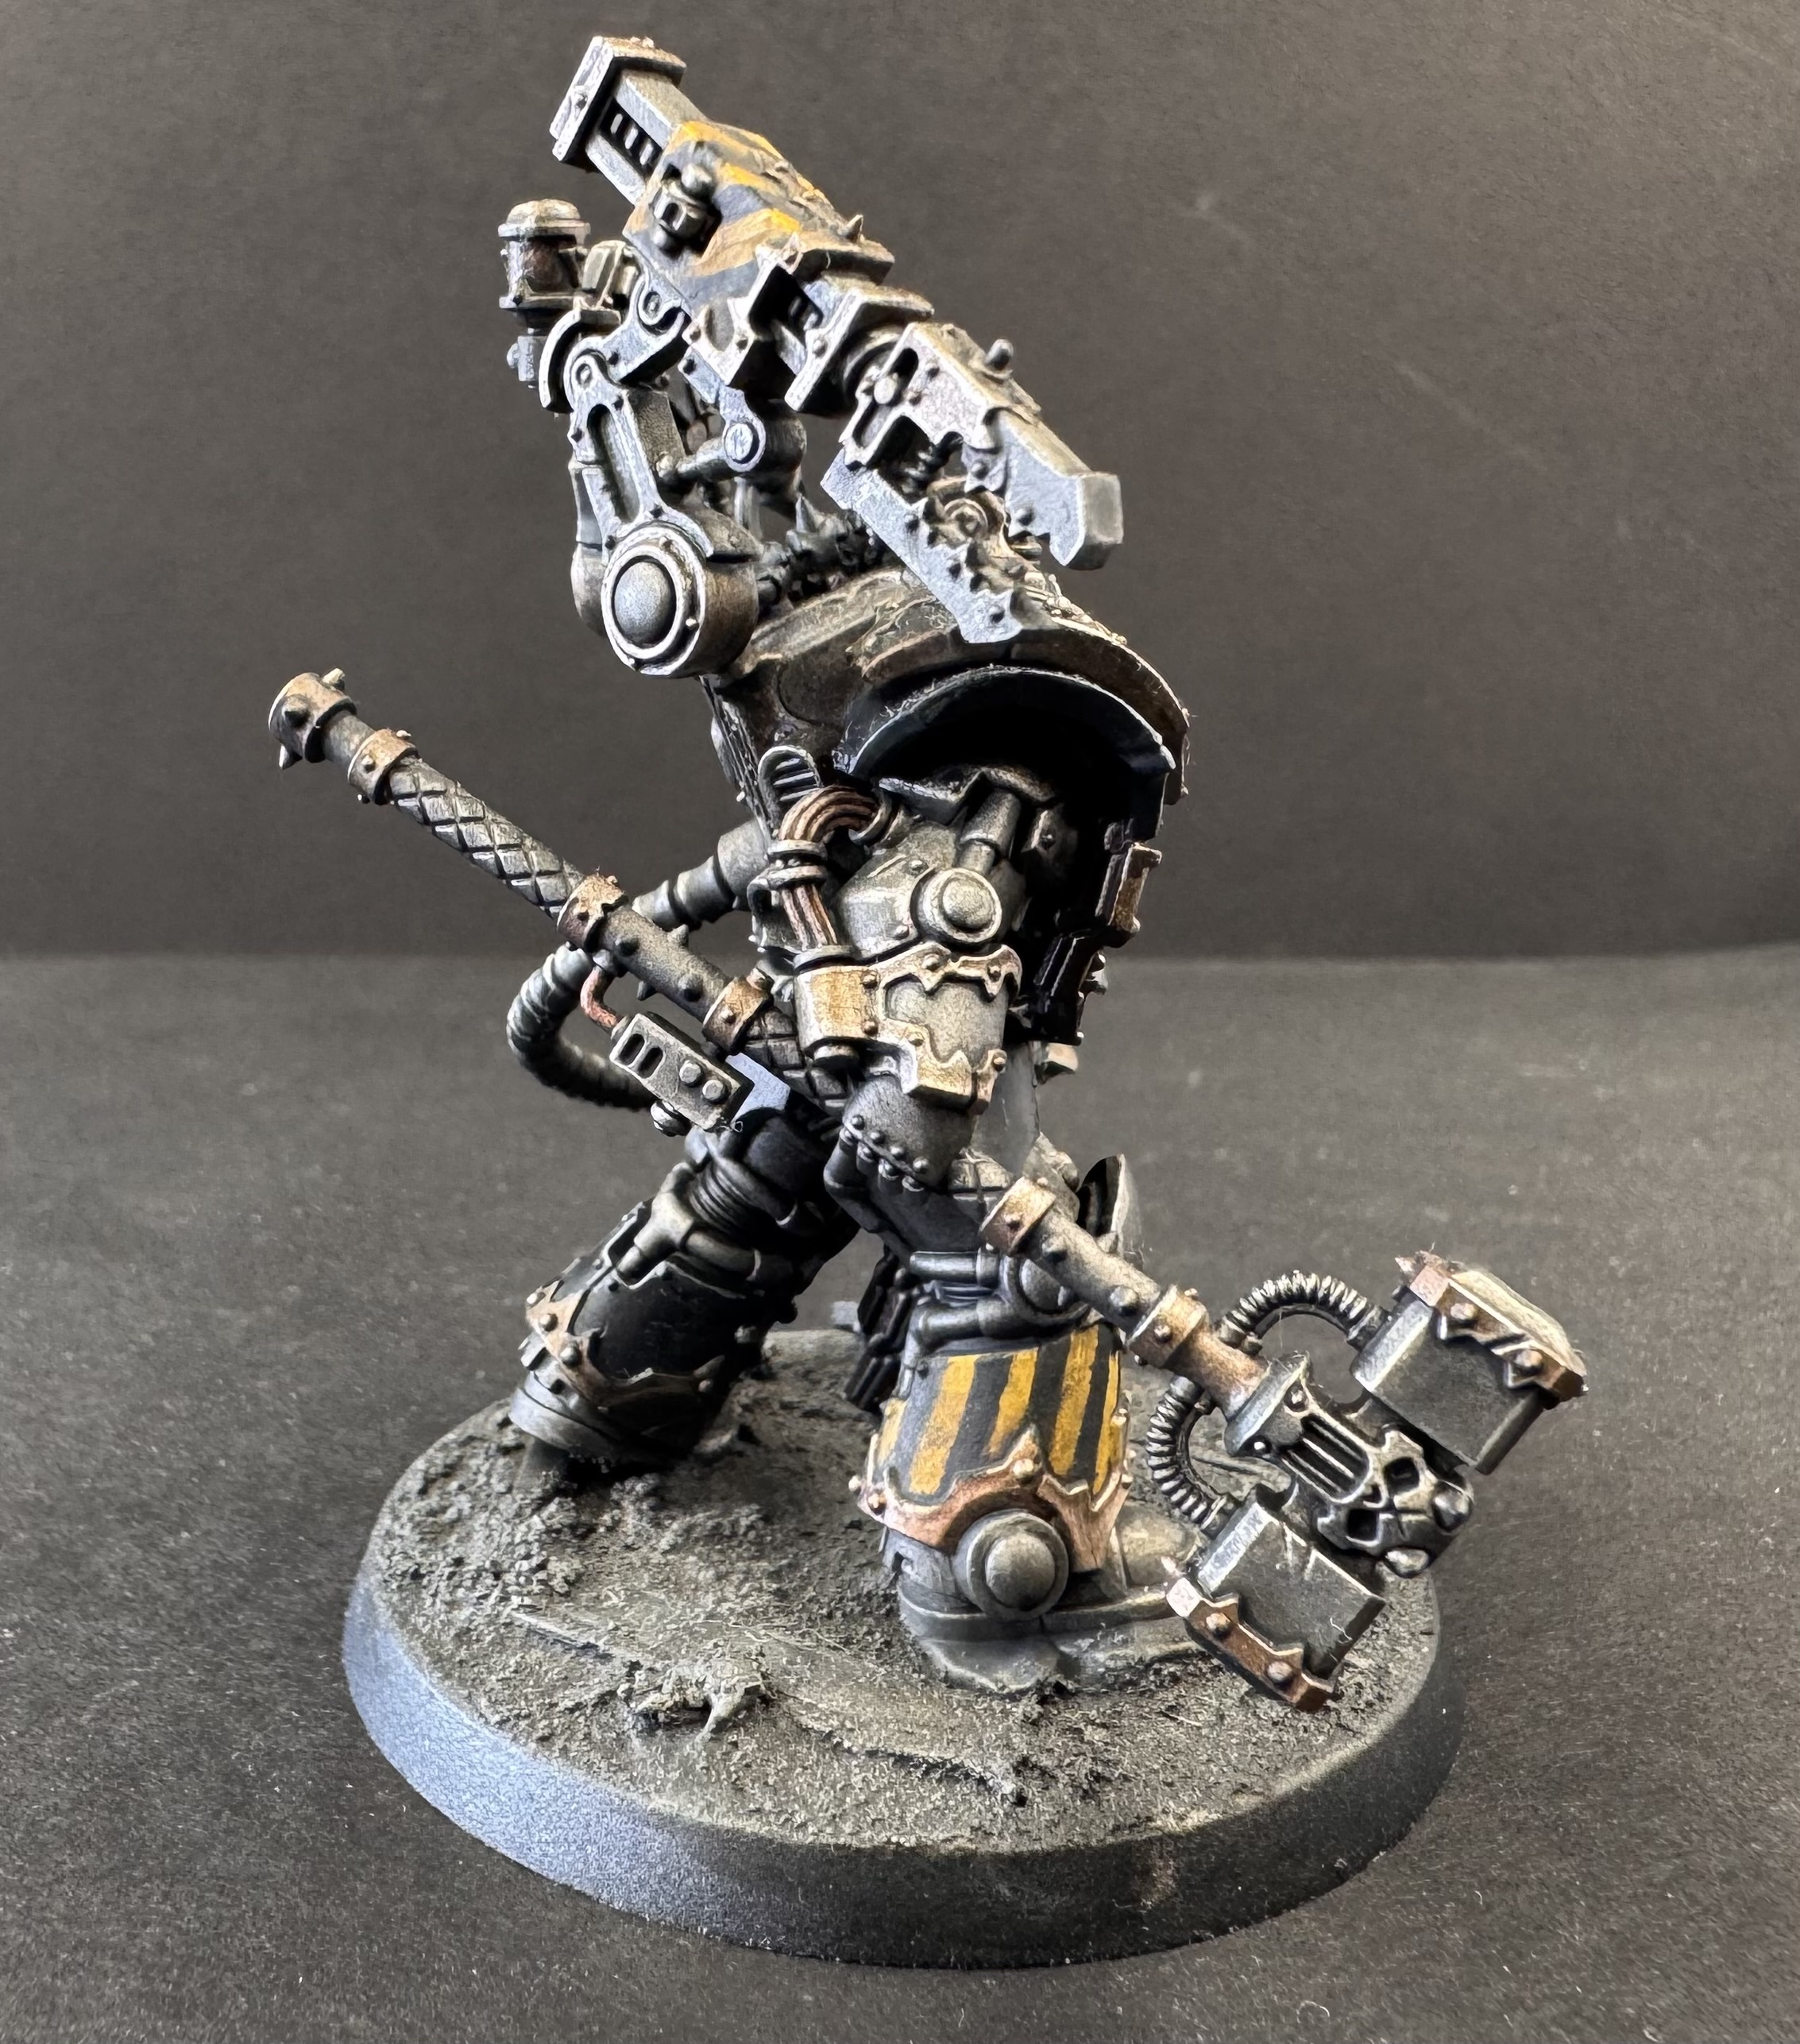
Black armour - cold blue highlight ramp visible on panel edges
Black and yellow panels together
Yellow Hazard Stripe Panels
The hazard stripes are built up in five stages. The base is laid down over the full panel area first, the black stripe pattern is drawn in freehand and then filled out to final width, then two progressive yellow highlights bring the stripes up to a hot, saturated final tone.
Draw the core of each stripe with a fine marker first, then expand to final width using Abaddon Black - hand-painted to final thickness
Weathering - Oil Wash
Mix Abteilung Starship Filth oil colour with mineral spirits (Tamiya X-20 enamel thinner works well here) to a thin, flowing wash consistency. Apply across the entire model. Allow approximately one hour for the wash to begin to tack - once it darkens slightly but before it fully cures, use a makeup sponge to wipe the raised panel surfaces clean, leaving the wash collected in recesses and corners.
Base - Industrial Mud
Apply Vallejo Industrial Thick Mud in varied thicknesses across the base to build realistic terrain texture - don't spread it flat, let it pile and ridge. Once dry, paint the whole base surface with Ratling Grime Contrast, then drybrush lightly with Skavenblight Dinge, and finish with a final highlight drybrush of Stonewall Grey on the highest points.
The Finished Model
Kravek Morne, completed.
Three quarter view
Rear
Three quarter view
Detail
All paints and supplies used in this guide are in stock at Wheels & Wings Hobbies in Toronto, available online with Canada-wide shipping. Canadian alternatives are noted where original products are no longer importable.
Shop Now →Recent Posts
-

John's Trench Crusade Sniper Priests Paint Guide - Build Feature
Wheels and Wings Hobbies - Miniature Paint Guide John's Trench Crusade Sniper Priests Trench Crusade …Jul 23, 2026 -

Kyle's World Eater Paint Guide - Chaos Legionnaire Build Feature
Wheels and Wings Hobbies - Miniature Paint Guide Kyle's World Eater - Sons of Angron Warhammer 40,00 …Jul 22, 2026 -

Decal Solutions Explained: Setter vs Softer vs Adhesive
Wheels & Wings Hobbies · Counter Notes Setter, Softener, or Adhesive? Choosing the Right Decal Solu …Jul 21, 2026