

Building the Tamiya Renault R35 with AK Interactive 3rd Gen Acrylics — Build Feature
Building the Tamiya Renault R35 with AK Interactive 3rd Gen Acrylics
Tamiya 1/35 · Armour · Full Build Feature
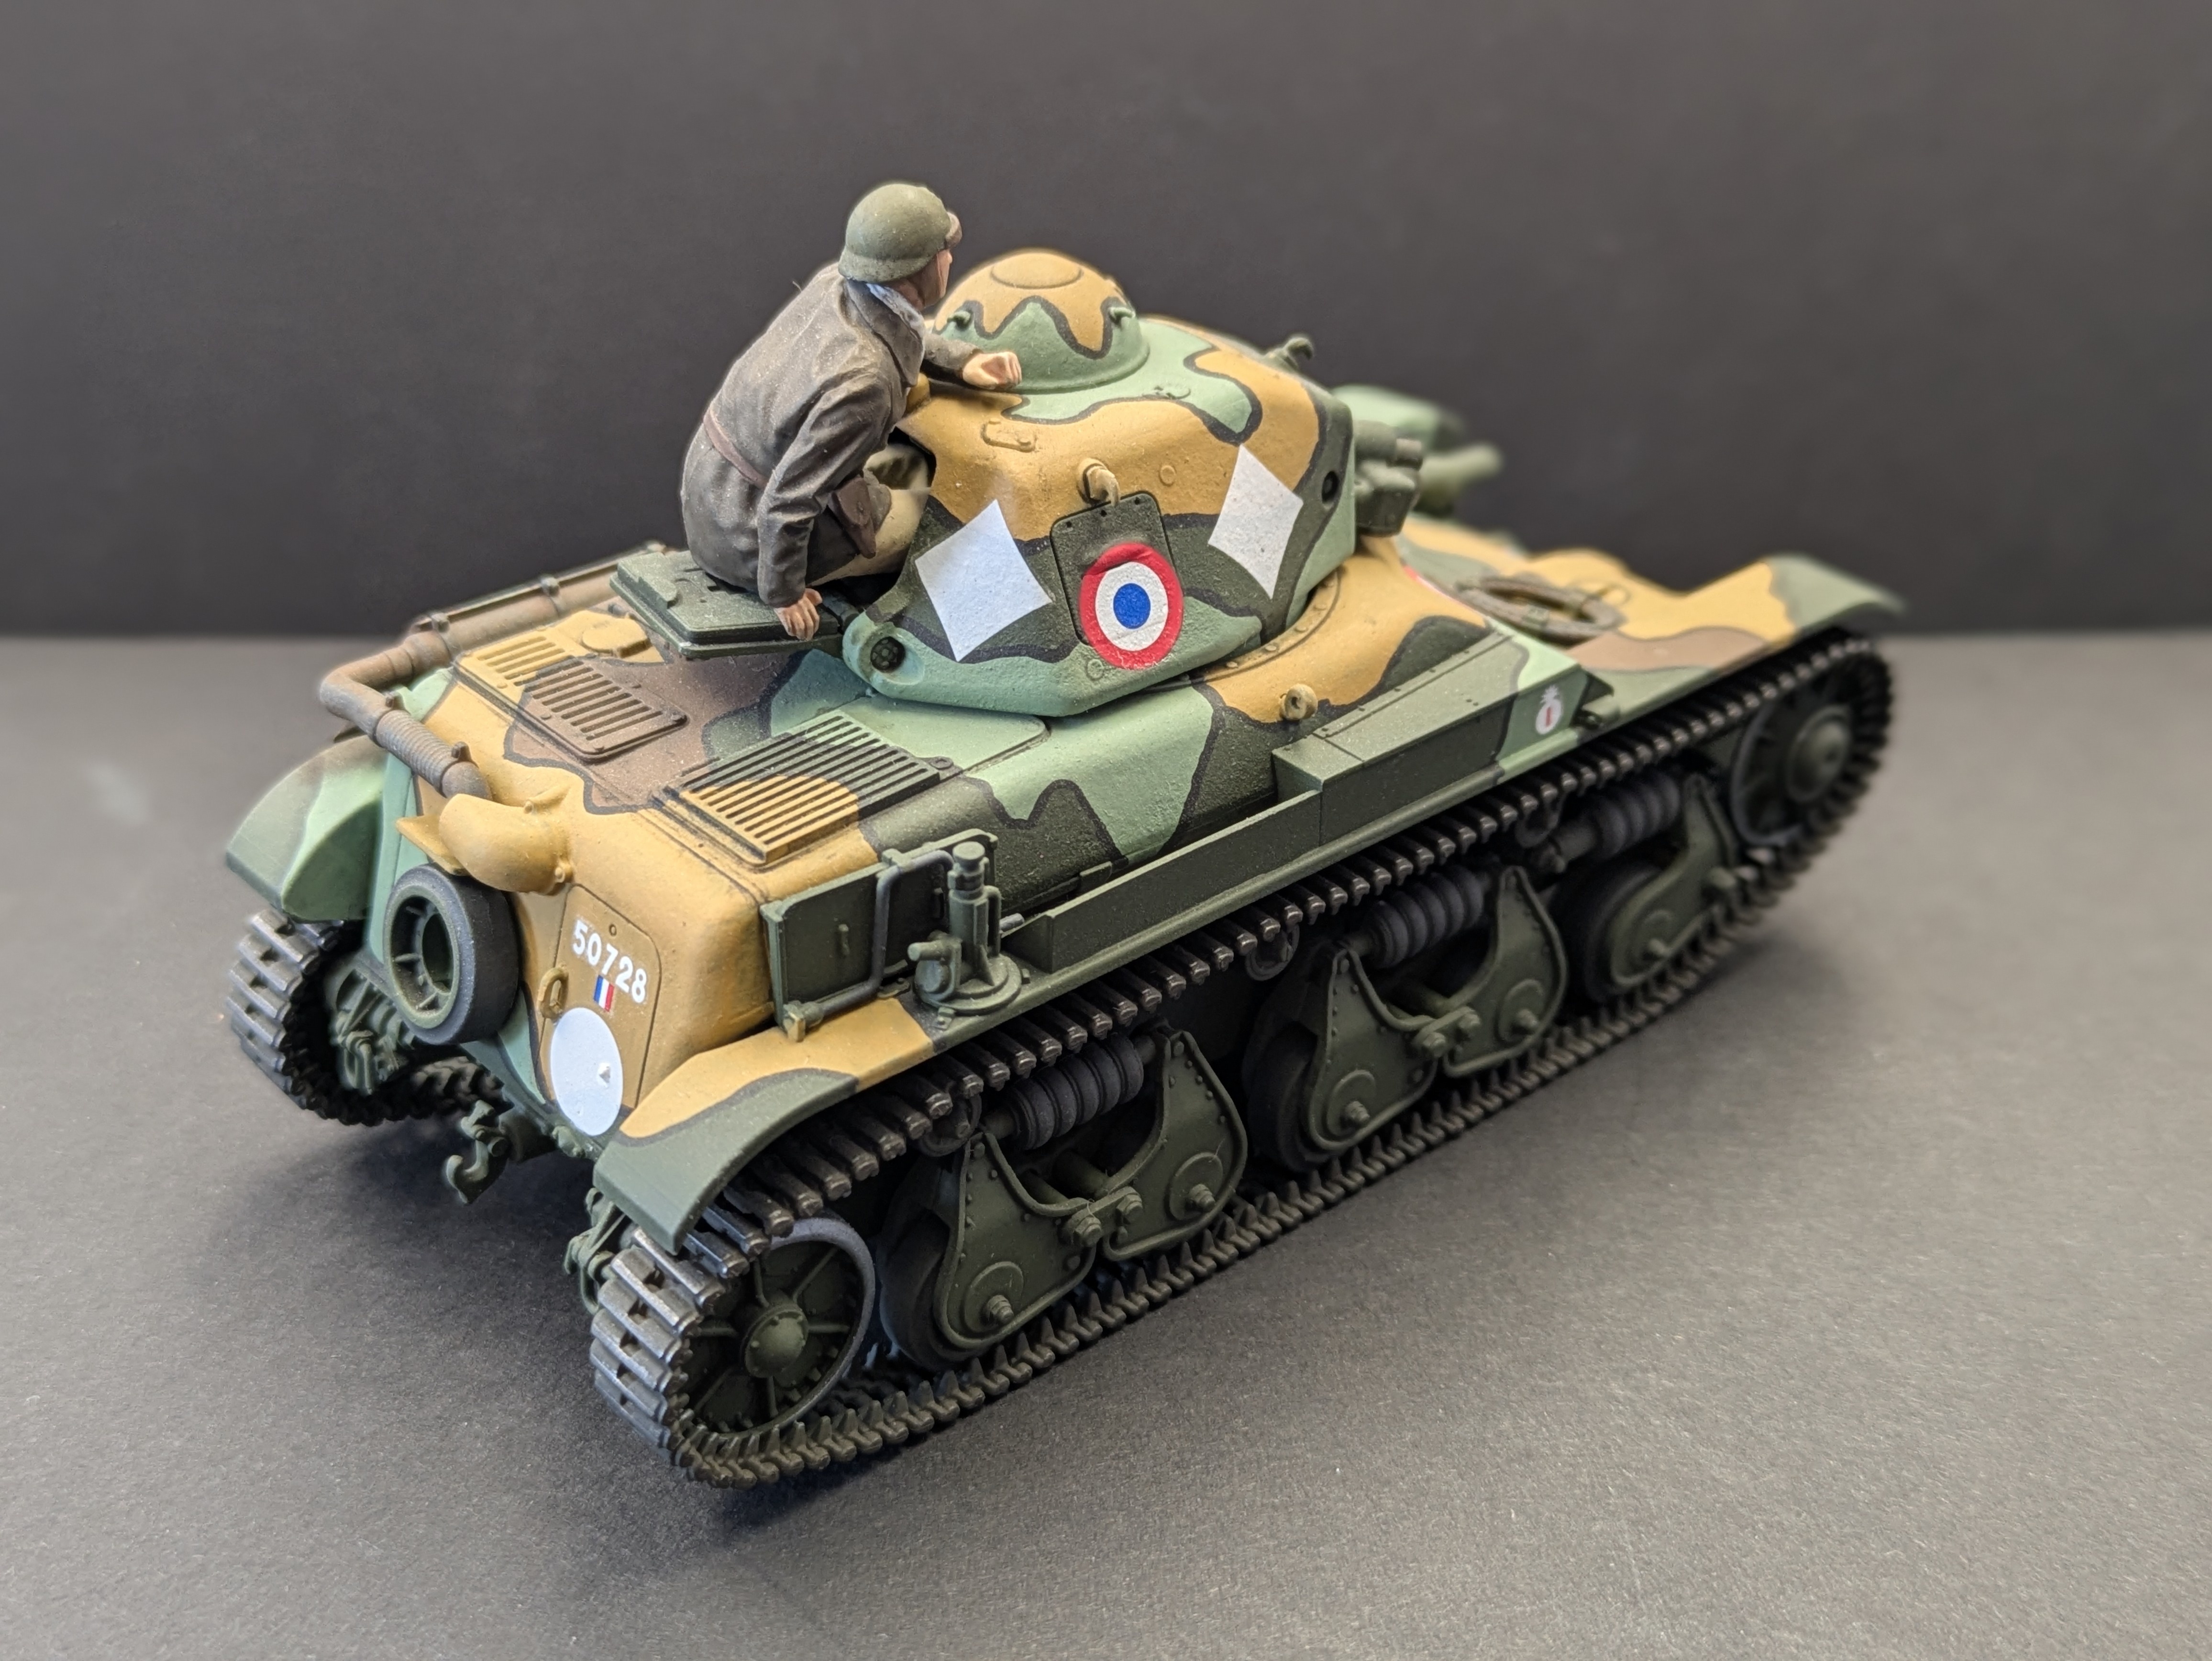
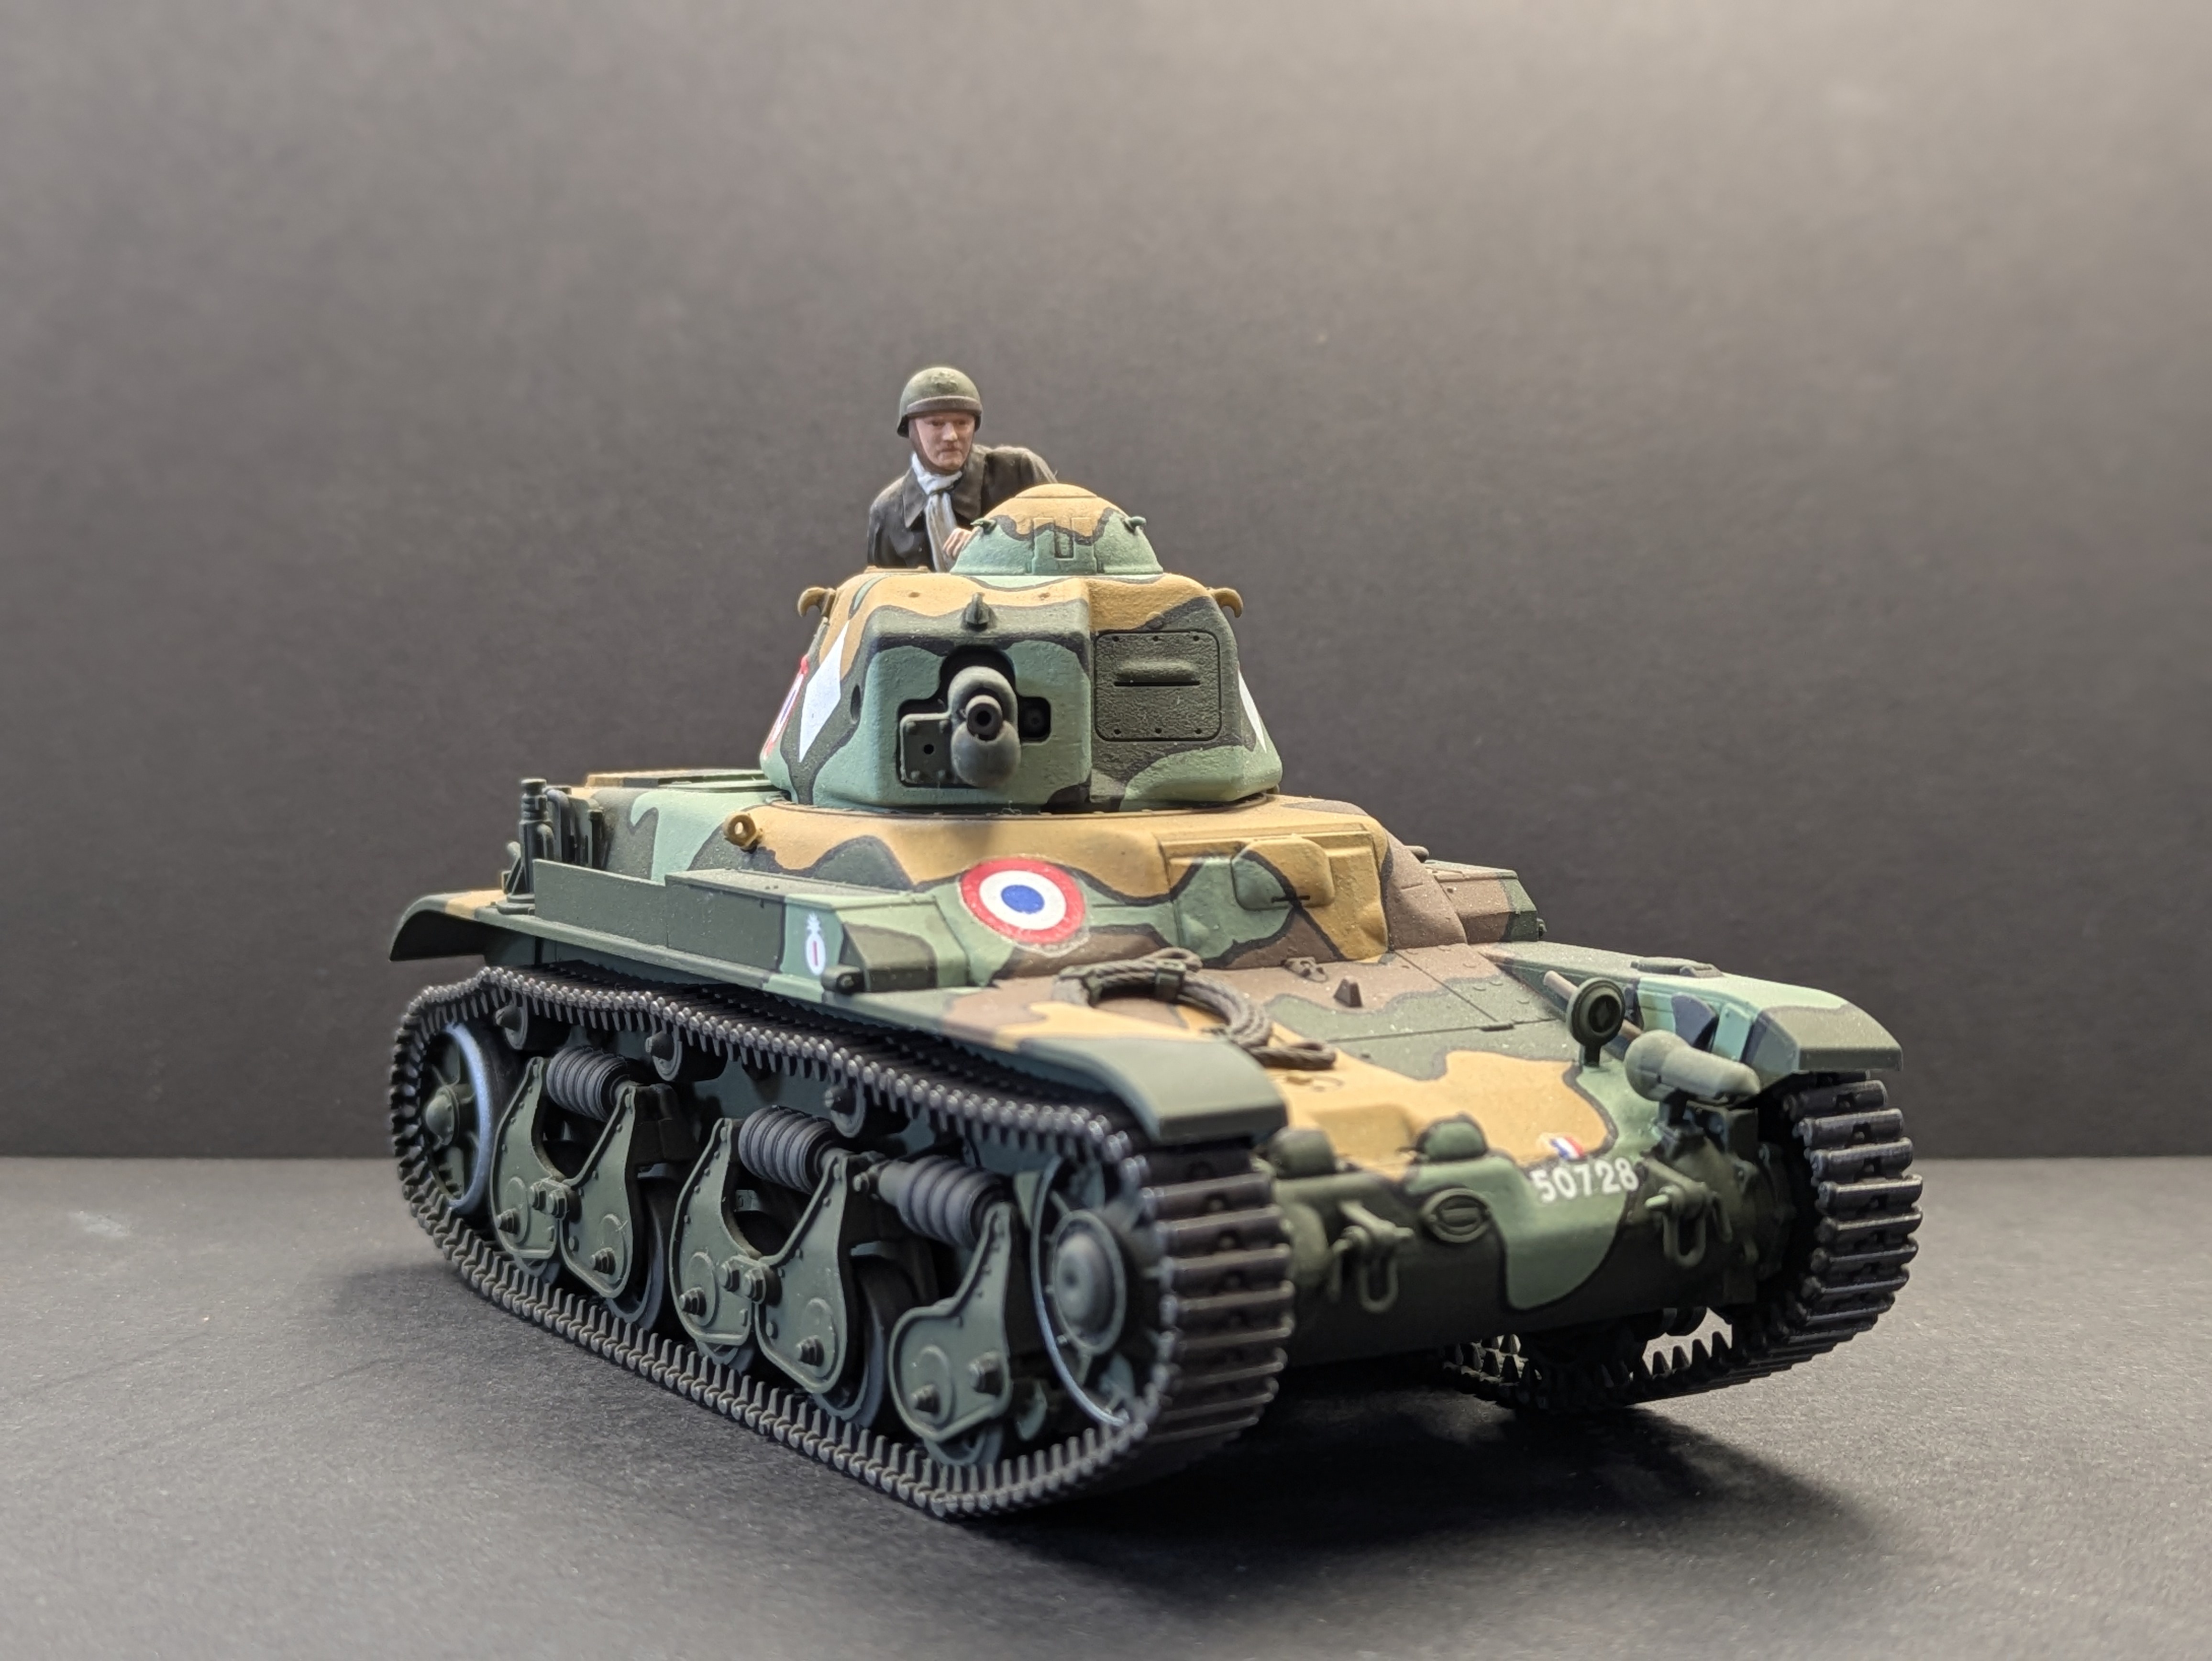
The Tamiya Renault R35 is a beautifully engineered little kit - a four-colour French camouflage scheme, clever tapered axle engineering on the running gear, and link-and-length tracks that represent the best compromise between detail and sanity. Finished here as a vehicle of the 23rd Combat Tank Battalion, June 1940.
This build is also a thorough test of AK Interactive's 3rd Generation acrylics - both airbrushed and brush painted. Short version: they pass with flying colours. Full verdict at the bottom.
Watch the full build on Wheels & Wings TV.
Five years on from when this video was made, AK Interactive is still producing some of the best water-based acrylics in the hobby. The 3rd Gen formula has stood the test of time - everything said in the verdict below holds up.
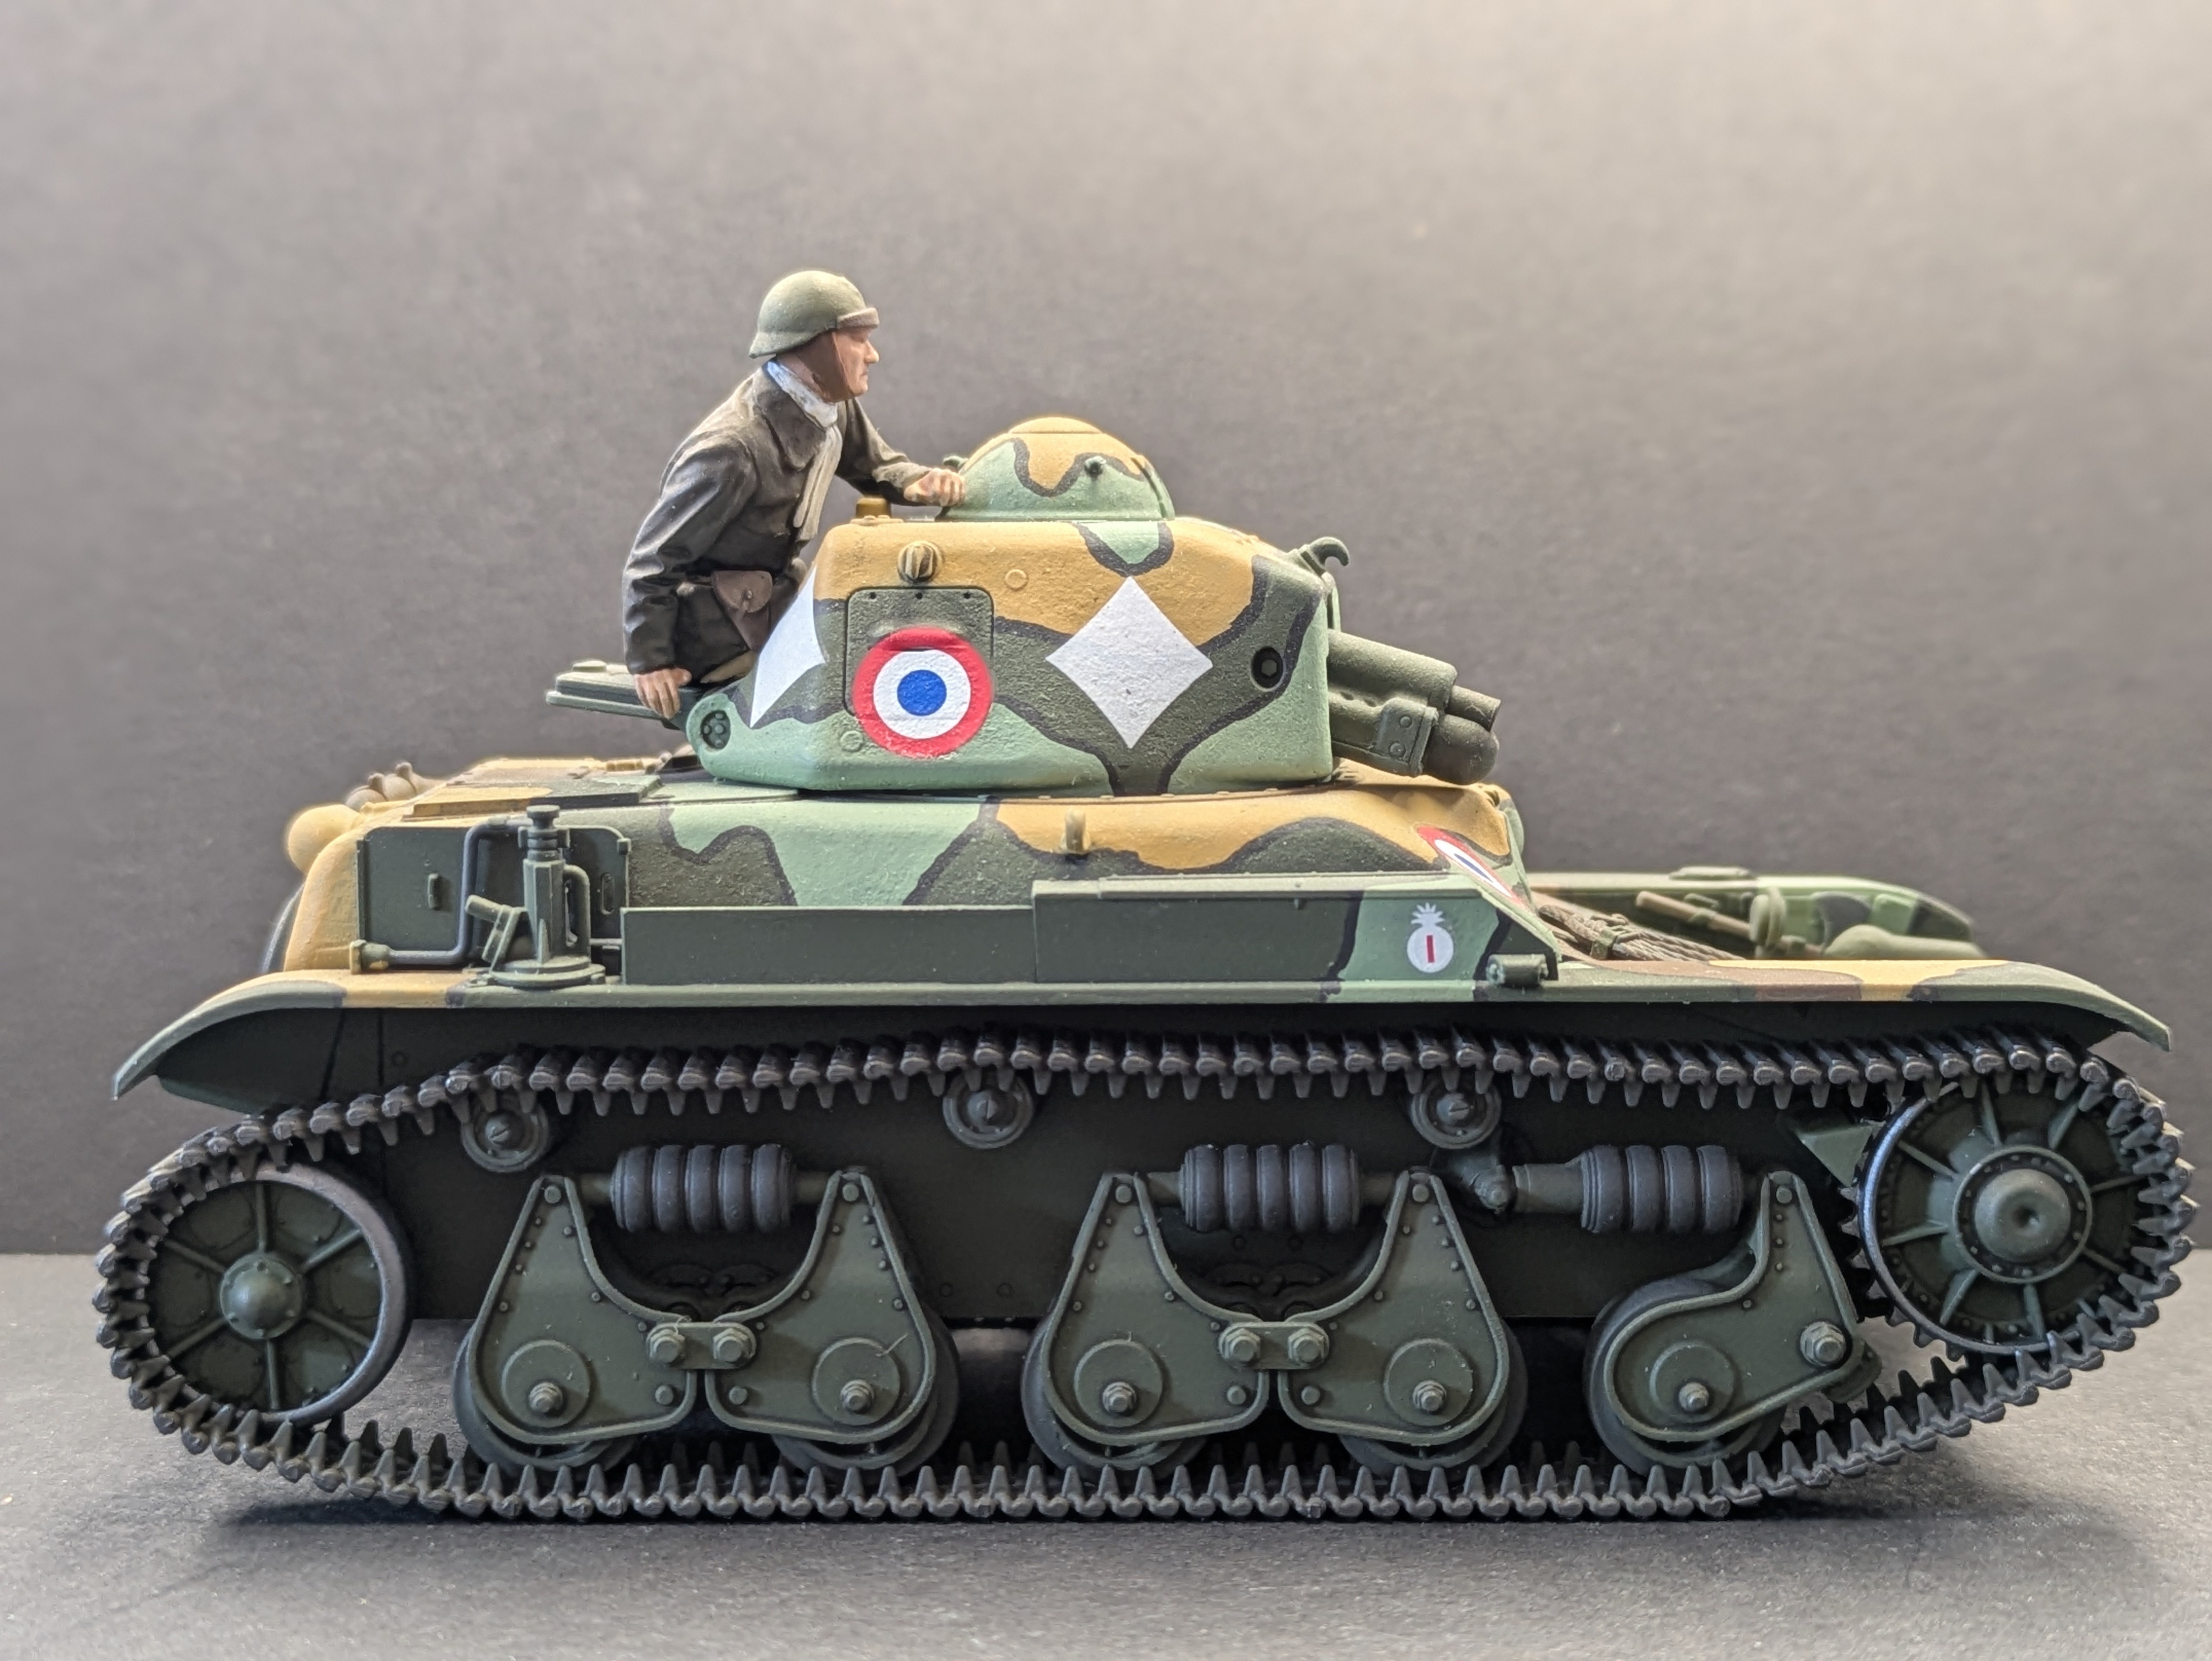
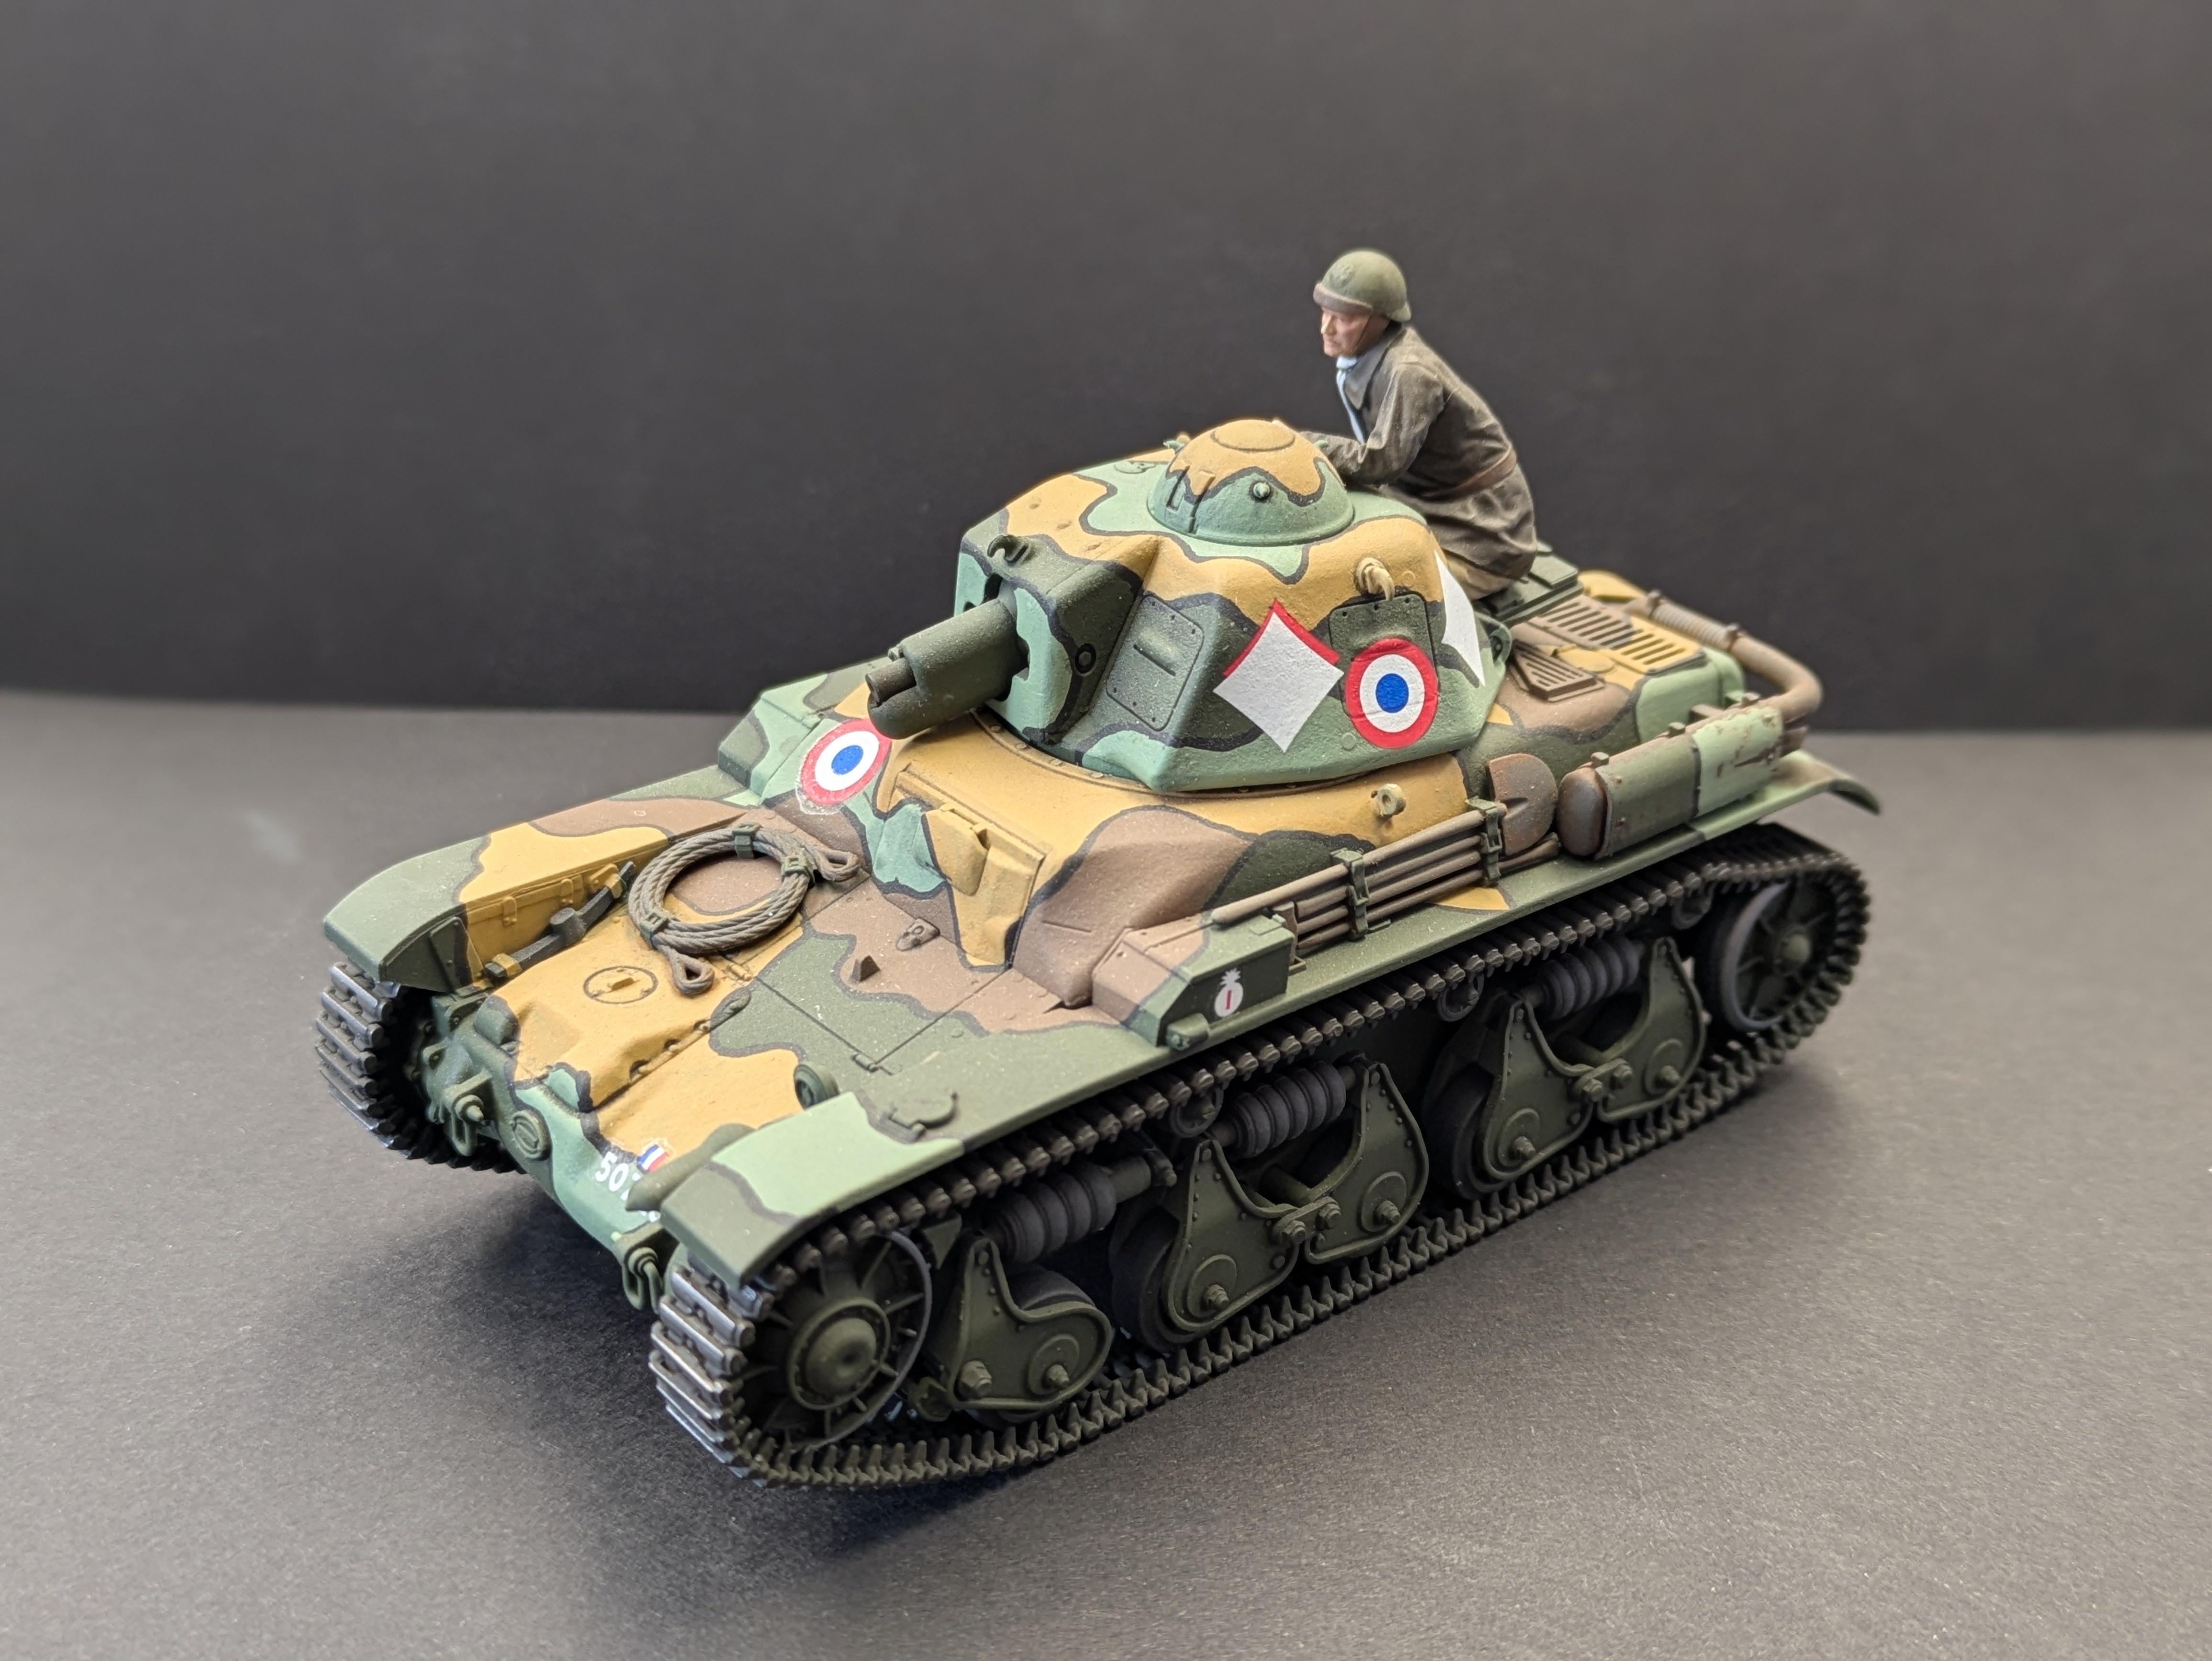
Tamiya 1/35 Renault R35 - 23rd Combat Tank Battalion, June 1940.
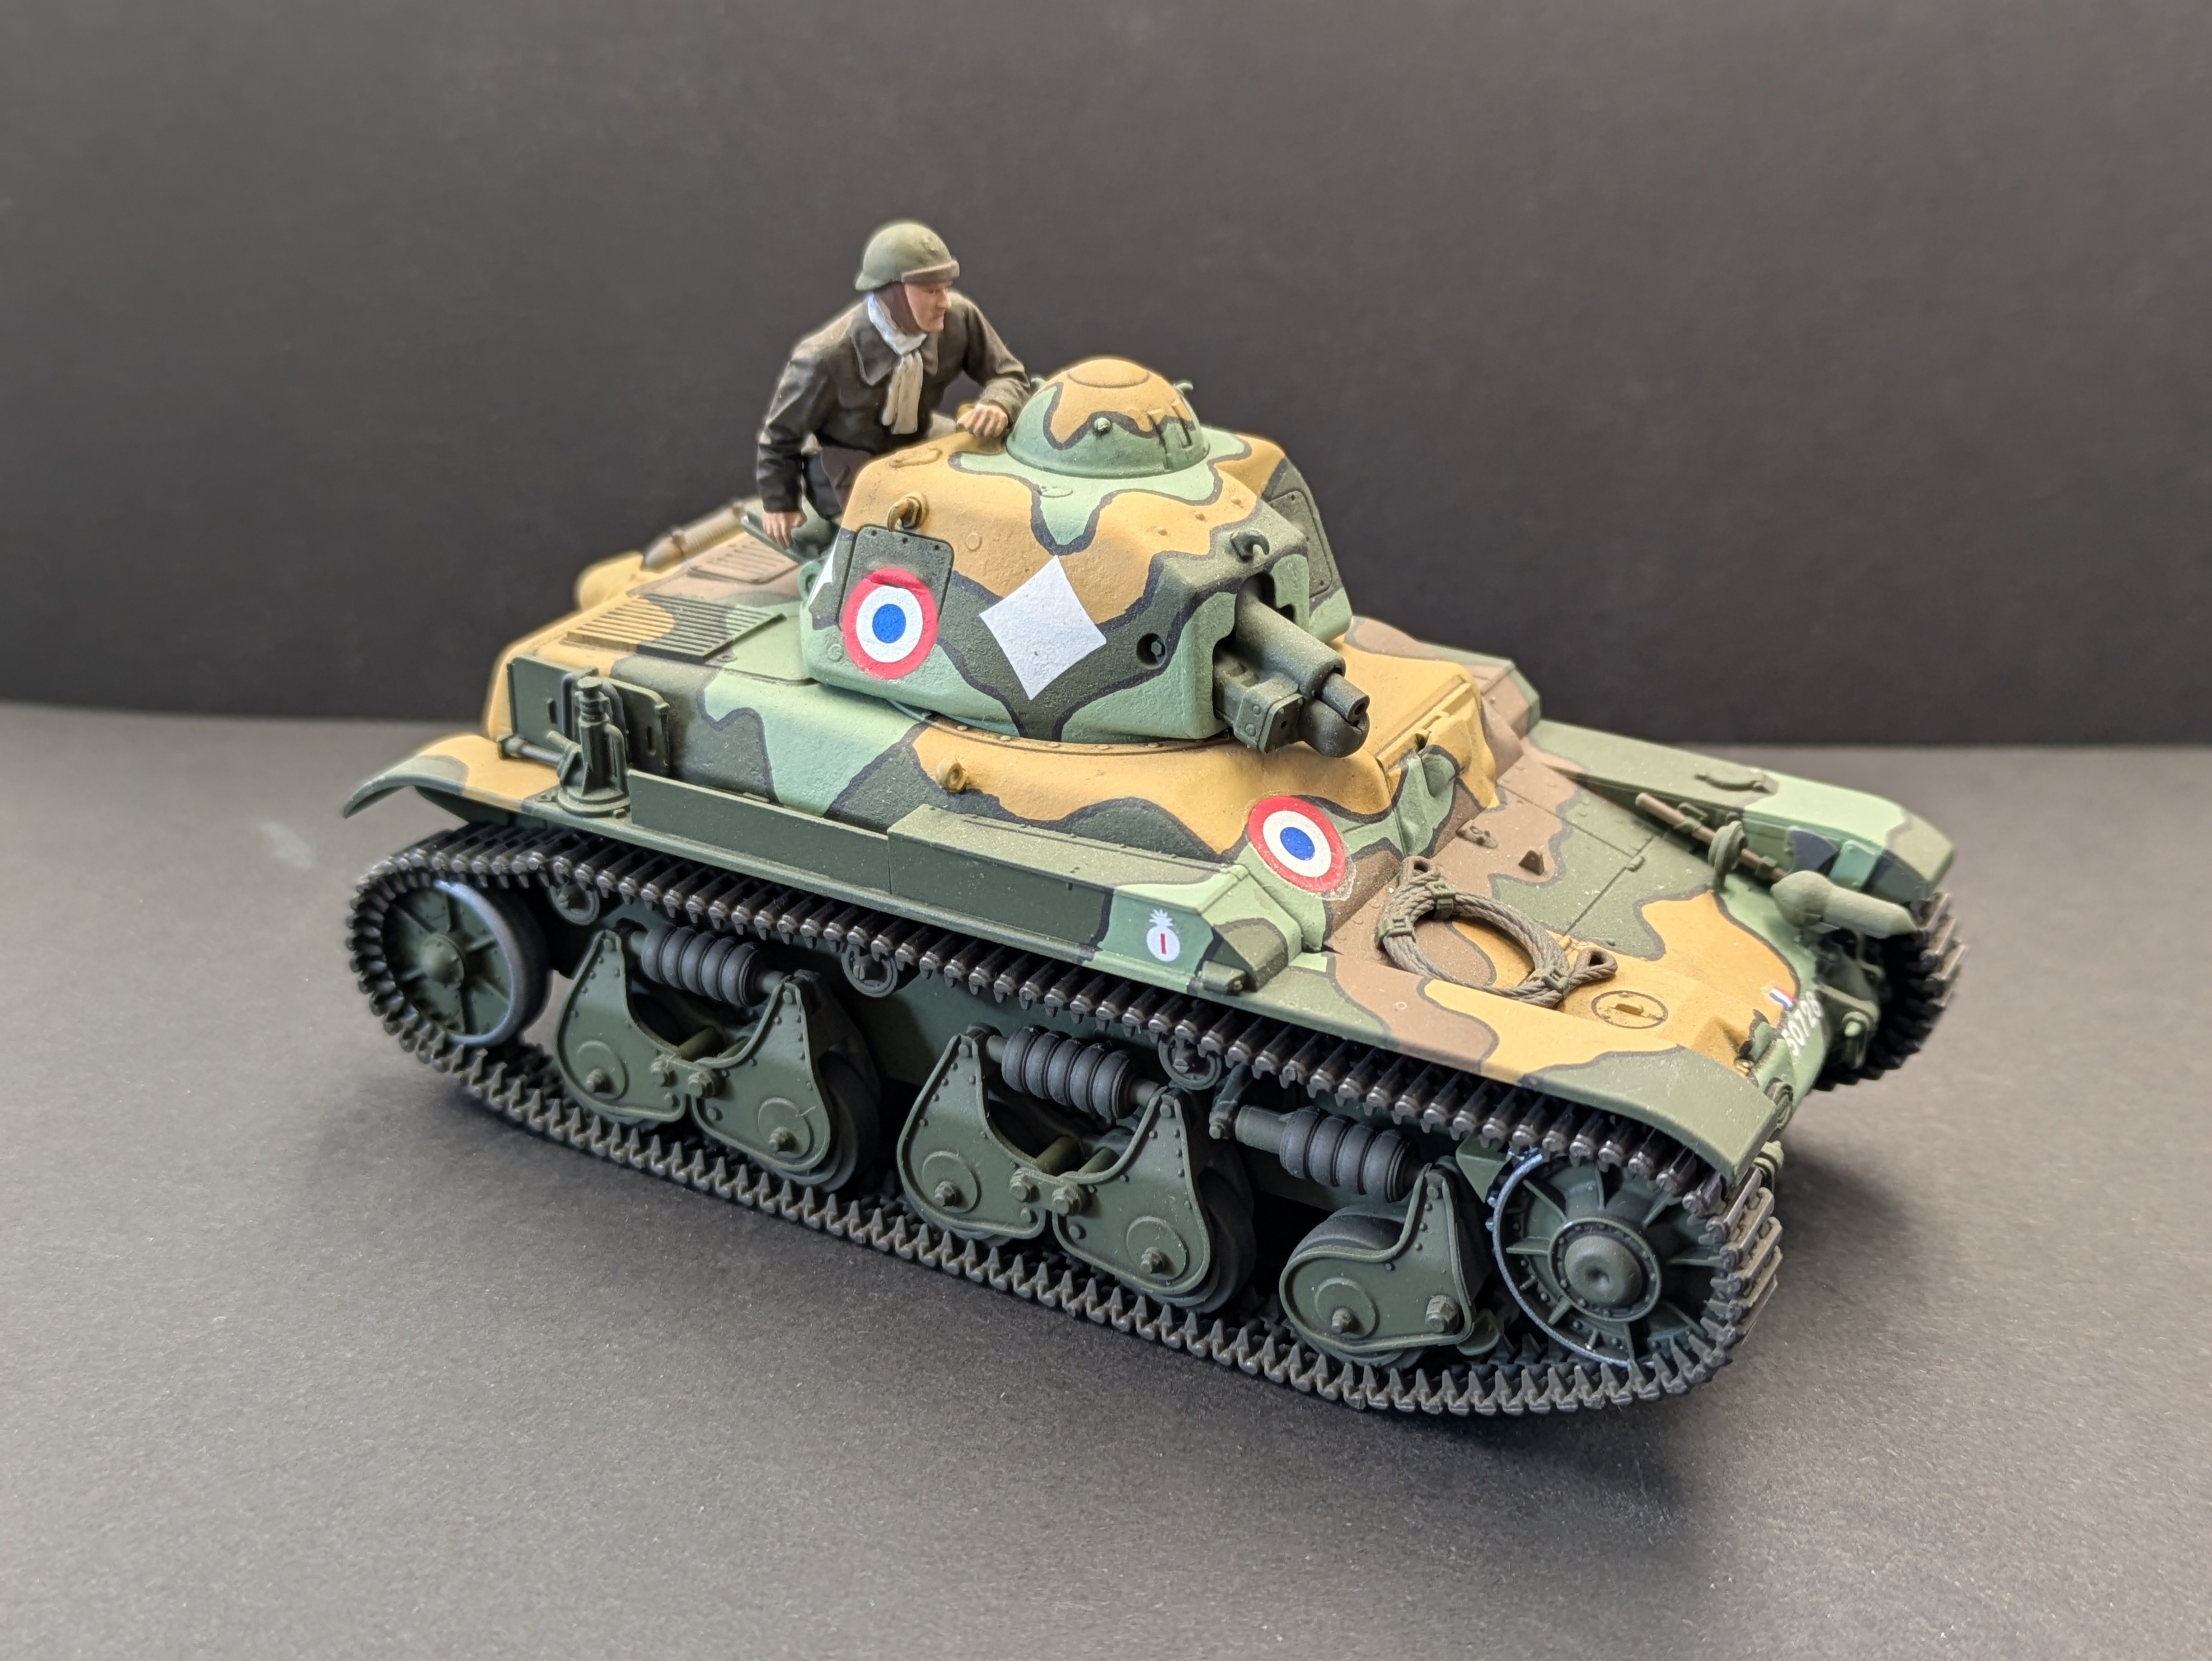
Three-quarter side left
Three-quarter side left
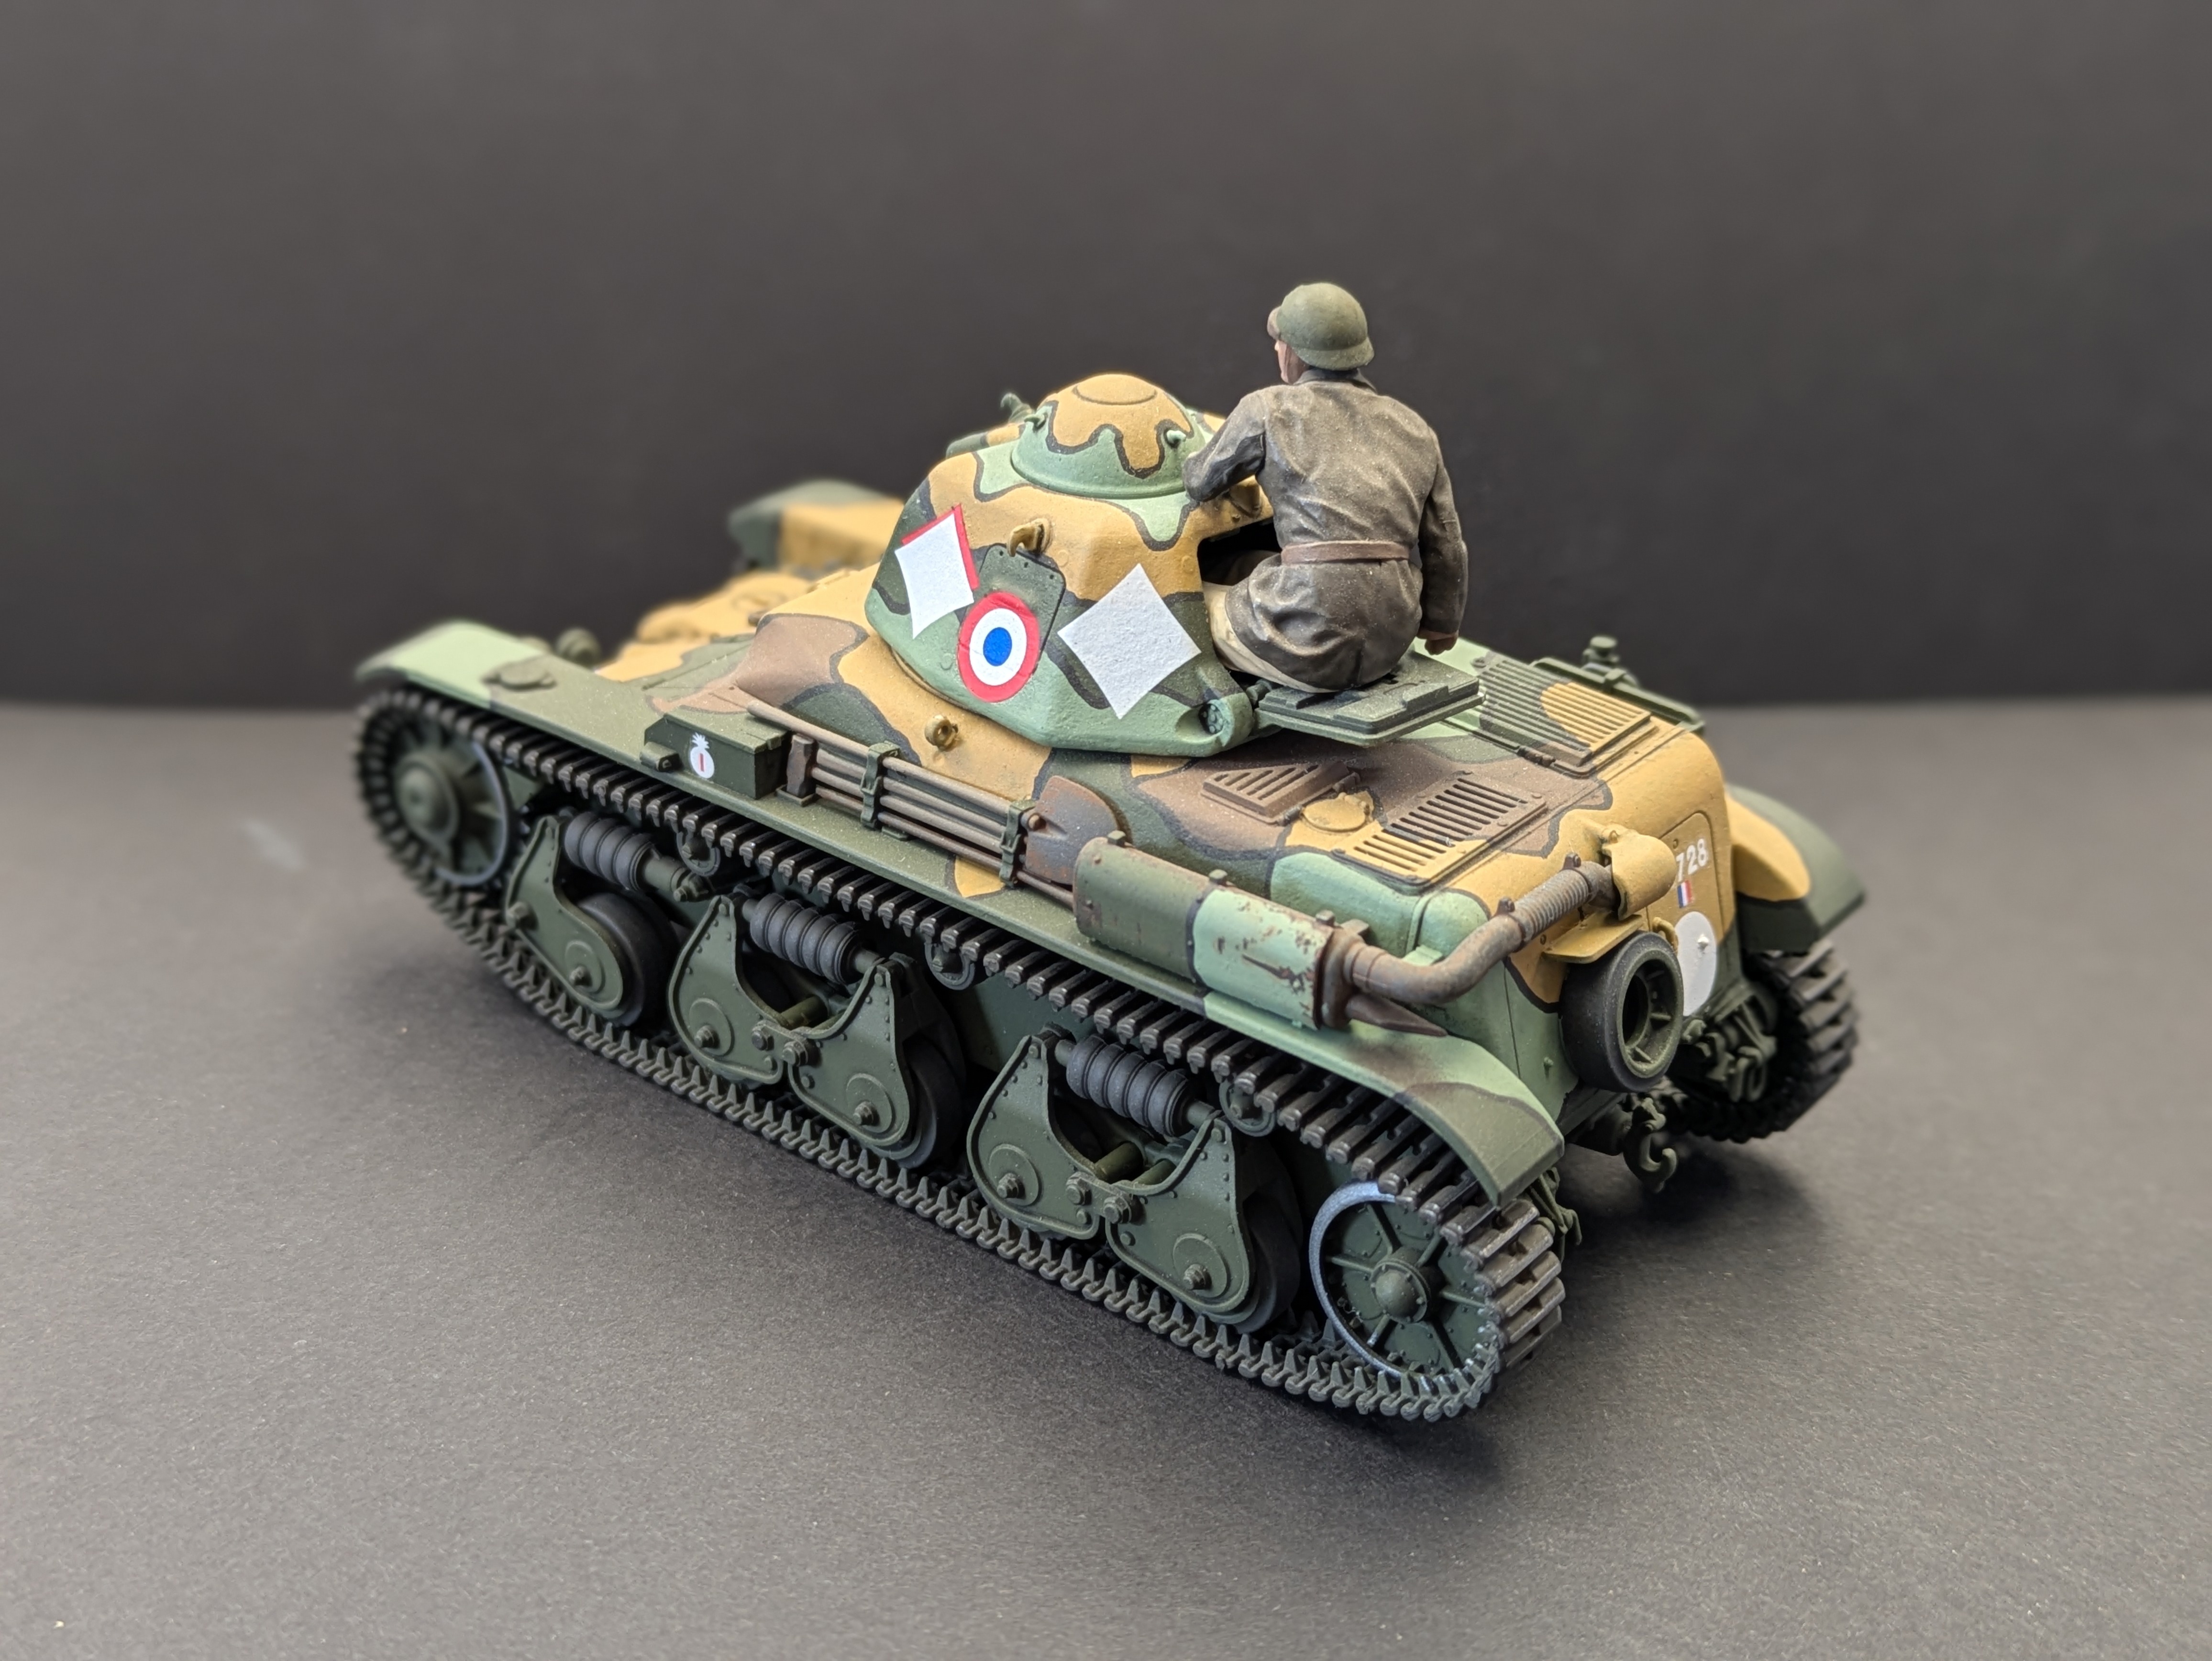
Three-quarter rear left
Three-quarter rear right
Assembly
The lower hull assembles flat-pack style - bottom, front, back, left, right, and a supporting middle section that keeps everything square. The upper hull has a very nice cast texture. Two holes either side of the turret ring need to be drilled out early to accept eyelets later - easy to miss.
The suspension bogies showcase Tamiya's engineering: tapered axles on the bogie/wheel interface mean the road wheels only go on one way. Injection moulding limits mean you can't have a perfect 90-degree draw on parts, and Tamiya have used this to their advantage. If it doesn't fit, ask yourself what you did wrong.
The exhaust is assembled and left separate to allow easier painting and weathering later. Remove the plug end of the exhaust pipe so it can be fitted in place under its armoured cover once painting is done. Tracks are link-and-length - the best compromise between detail and ease of assembly.
Seam Filling & Surface Prep
Seams on the turret and upper hull are treated with Mr. Surfacer 500, then textured to blend with the moulded-in cast texture. A complete retexture of the upper hull is an option but the kit's moulded texture is perfectly adequate - a few passes with a fine sanding sponge to smooth the rougher areas is sufficient.
Priming - AK 3rd Gen Black Primer
The AK 3rd Gen Primer can be airbrushed from the bottle with effort, but thinning to suit your airbrush and style is recommended. It lays down well, dries to touch relatively quickly, and levels itself out nicely - comparable to Badger Stynylrez or AMMO One Shot. The bottle recommends 24 hours drying time; in humid conditions or if the model will be handled heavily, waiting longer is wise. Once fully cured it is resilient to masking tape and resistant to scratching.
Four-Colour Camouflage - Airbrushed & Brush Painted
Command Green is airbrushed first as the base colour at 3:1 thinner to paint. The remaining three camouflage colours - Green Ochre, Faded Green, and Dark Brown - are brush painted. Sketch the outline of each area first before filling in with subsequent layers. Use a larger brush with a sharp point rather than a fine brush: the larger brush holds more paint and deposits it more evenly over these kinds of shapes.
The black outlines are painted with Rubber Black mixed with a small amount of retarder - this slows the drying time enough to allow smooth, continuous lines without having to stop to clean and reload the brush. Road wheels and suspension components are also taken care of at this stage.
Gloss Coat & Decals
A light coat of gloss is applied over the finished paint before decals go on, giving the decal film a smooth, non-porous surface to settle onto and eliminating silvering. Walther's Solvaset applied under and over each decal - a strong setting solution that works well with thicker Tamiya decals. The Tamiya decal sheet on this kit is notably thinner than previous generations.
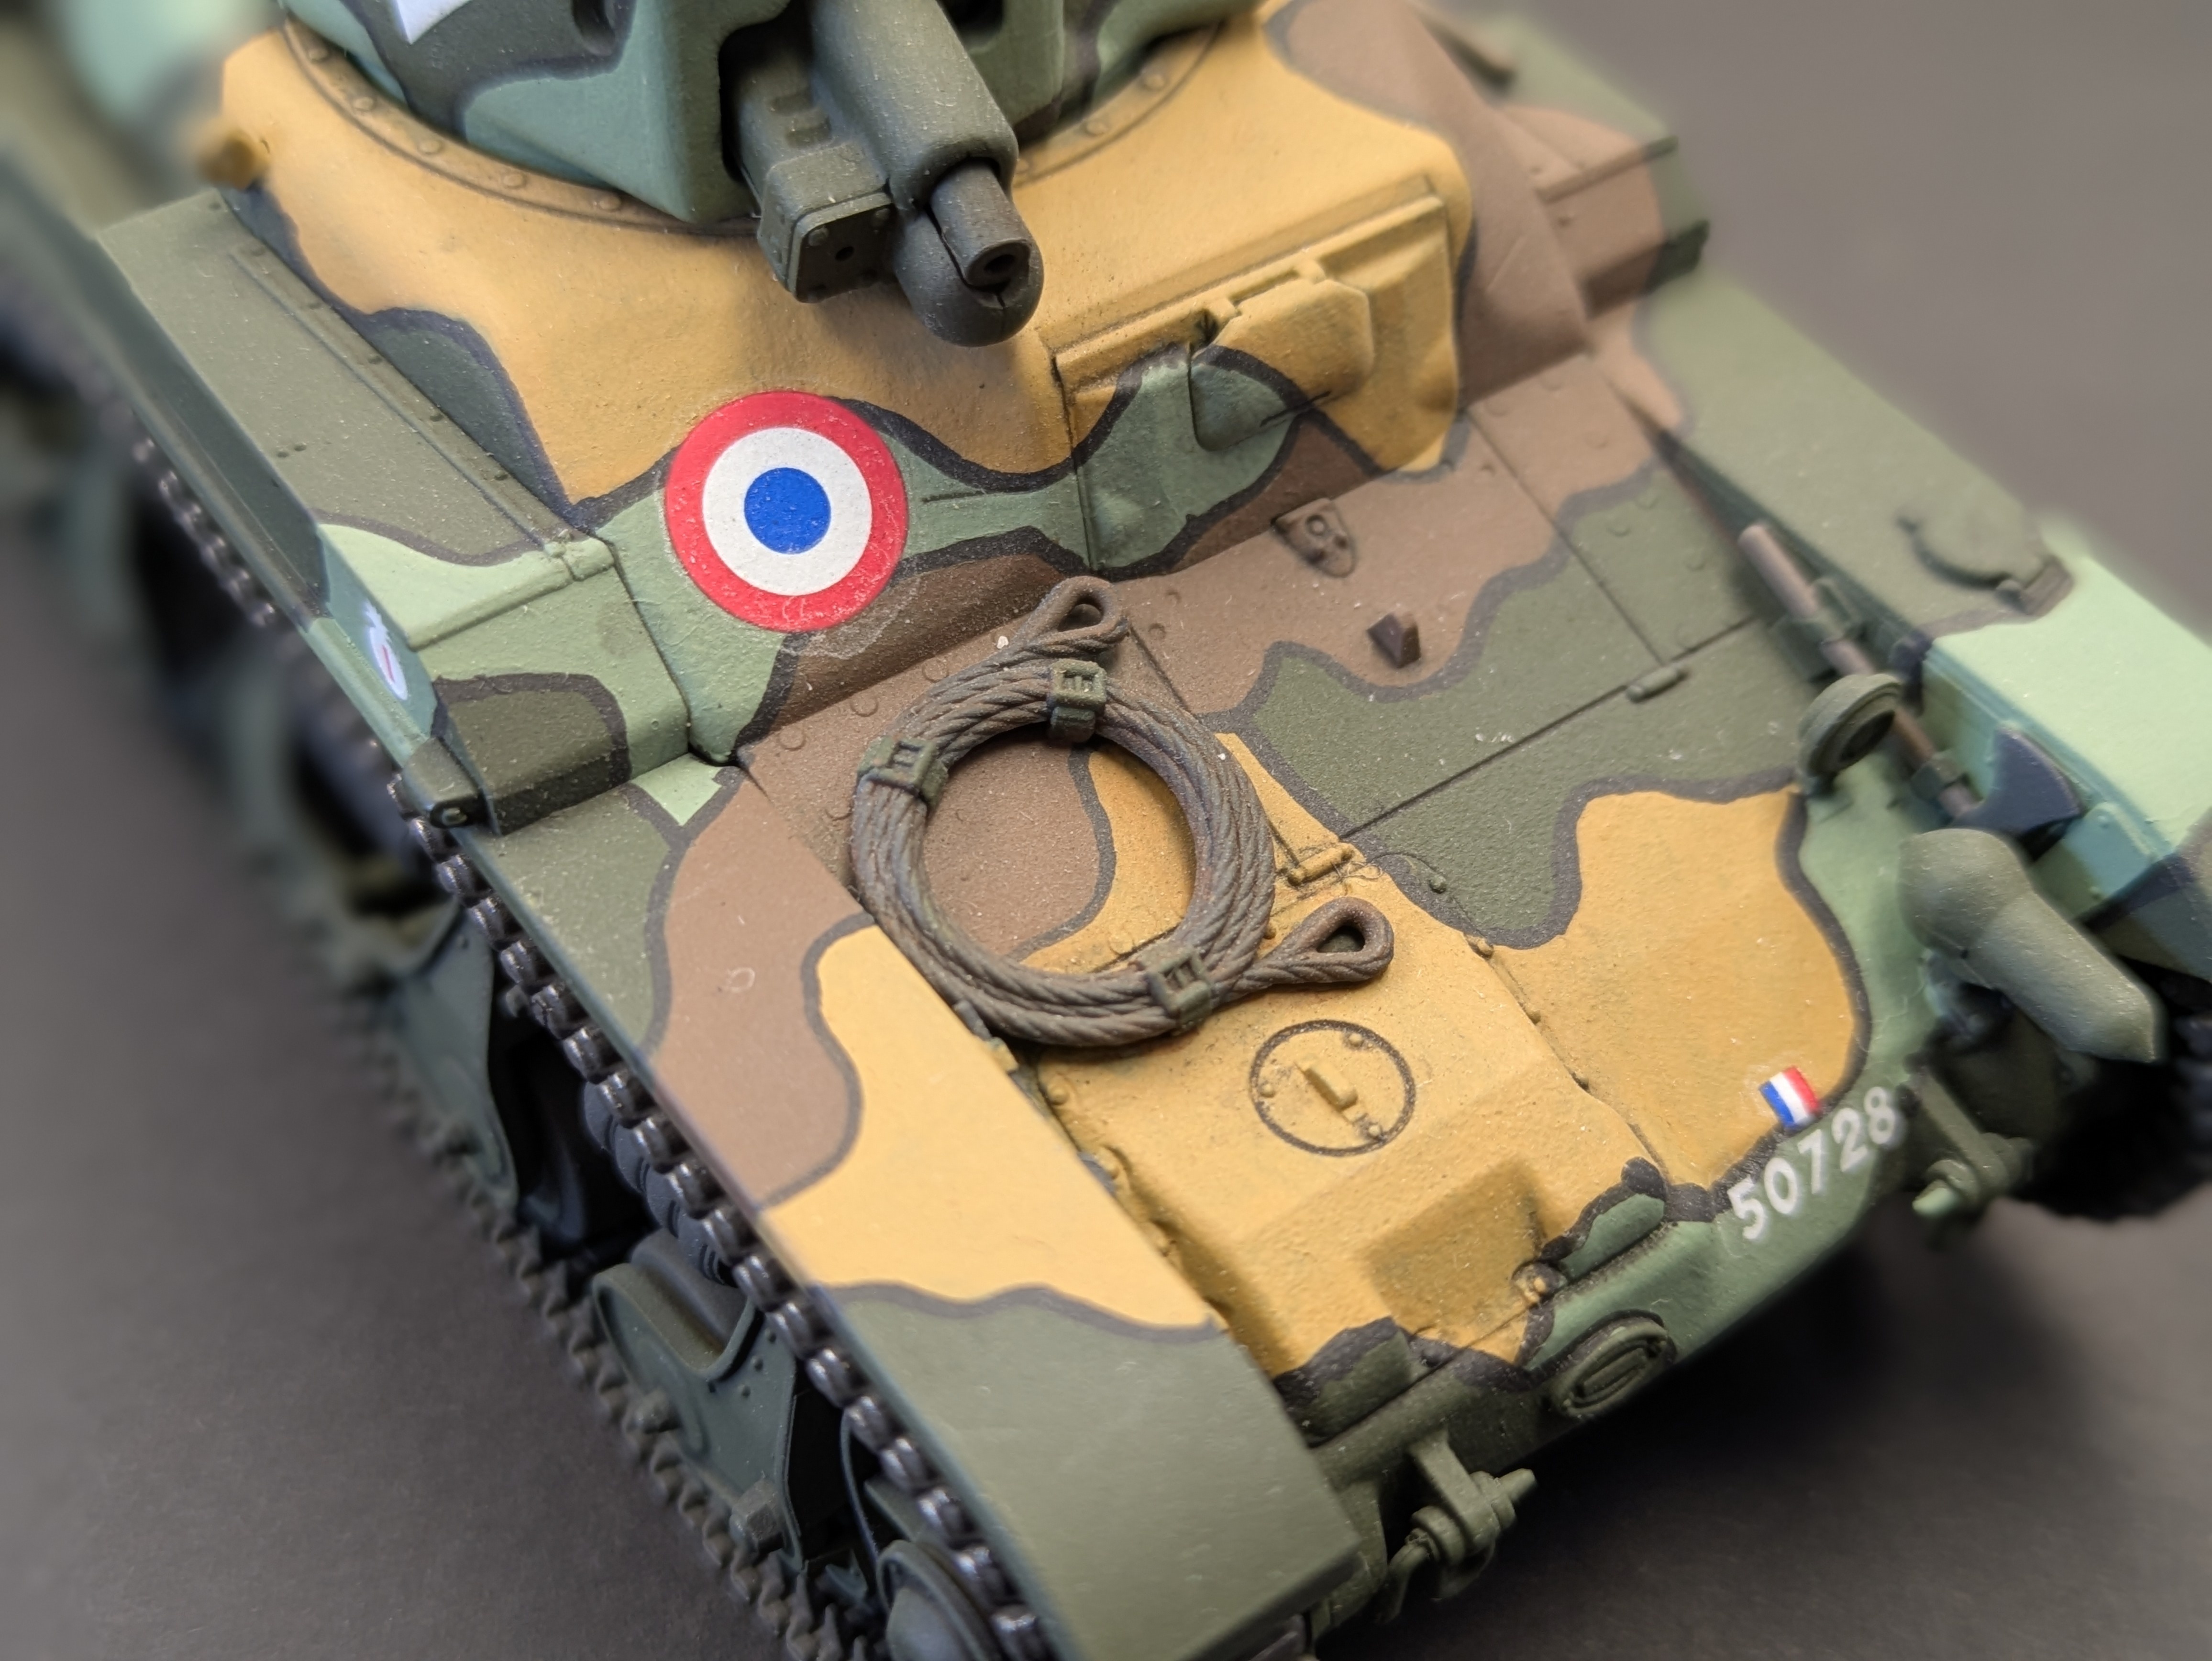
Front detail - decals and tow cable
Looking down the barrel
Exhaust - Chipping & Rust
A well-worn exhaust for relatively little extra effort. The sequence: lighter grey base coat, then a layer of AK Worn Effects chipping fluid, then a layer of darker grey over the top. A stout brush and water are used to chip away the top layer of grey, revealing the chipping fluid beneath as exposed metal. Rust Streaks applied selectively, followed by a Light Rust Wash to tie the whole pipe together.
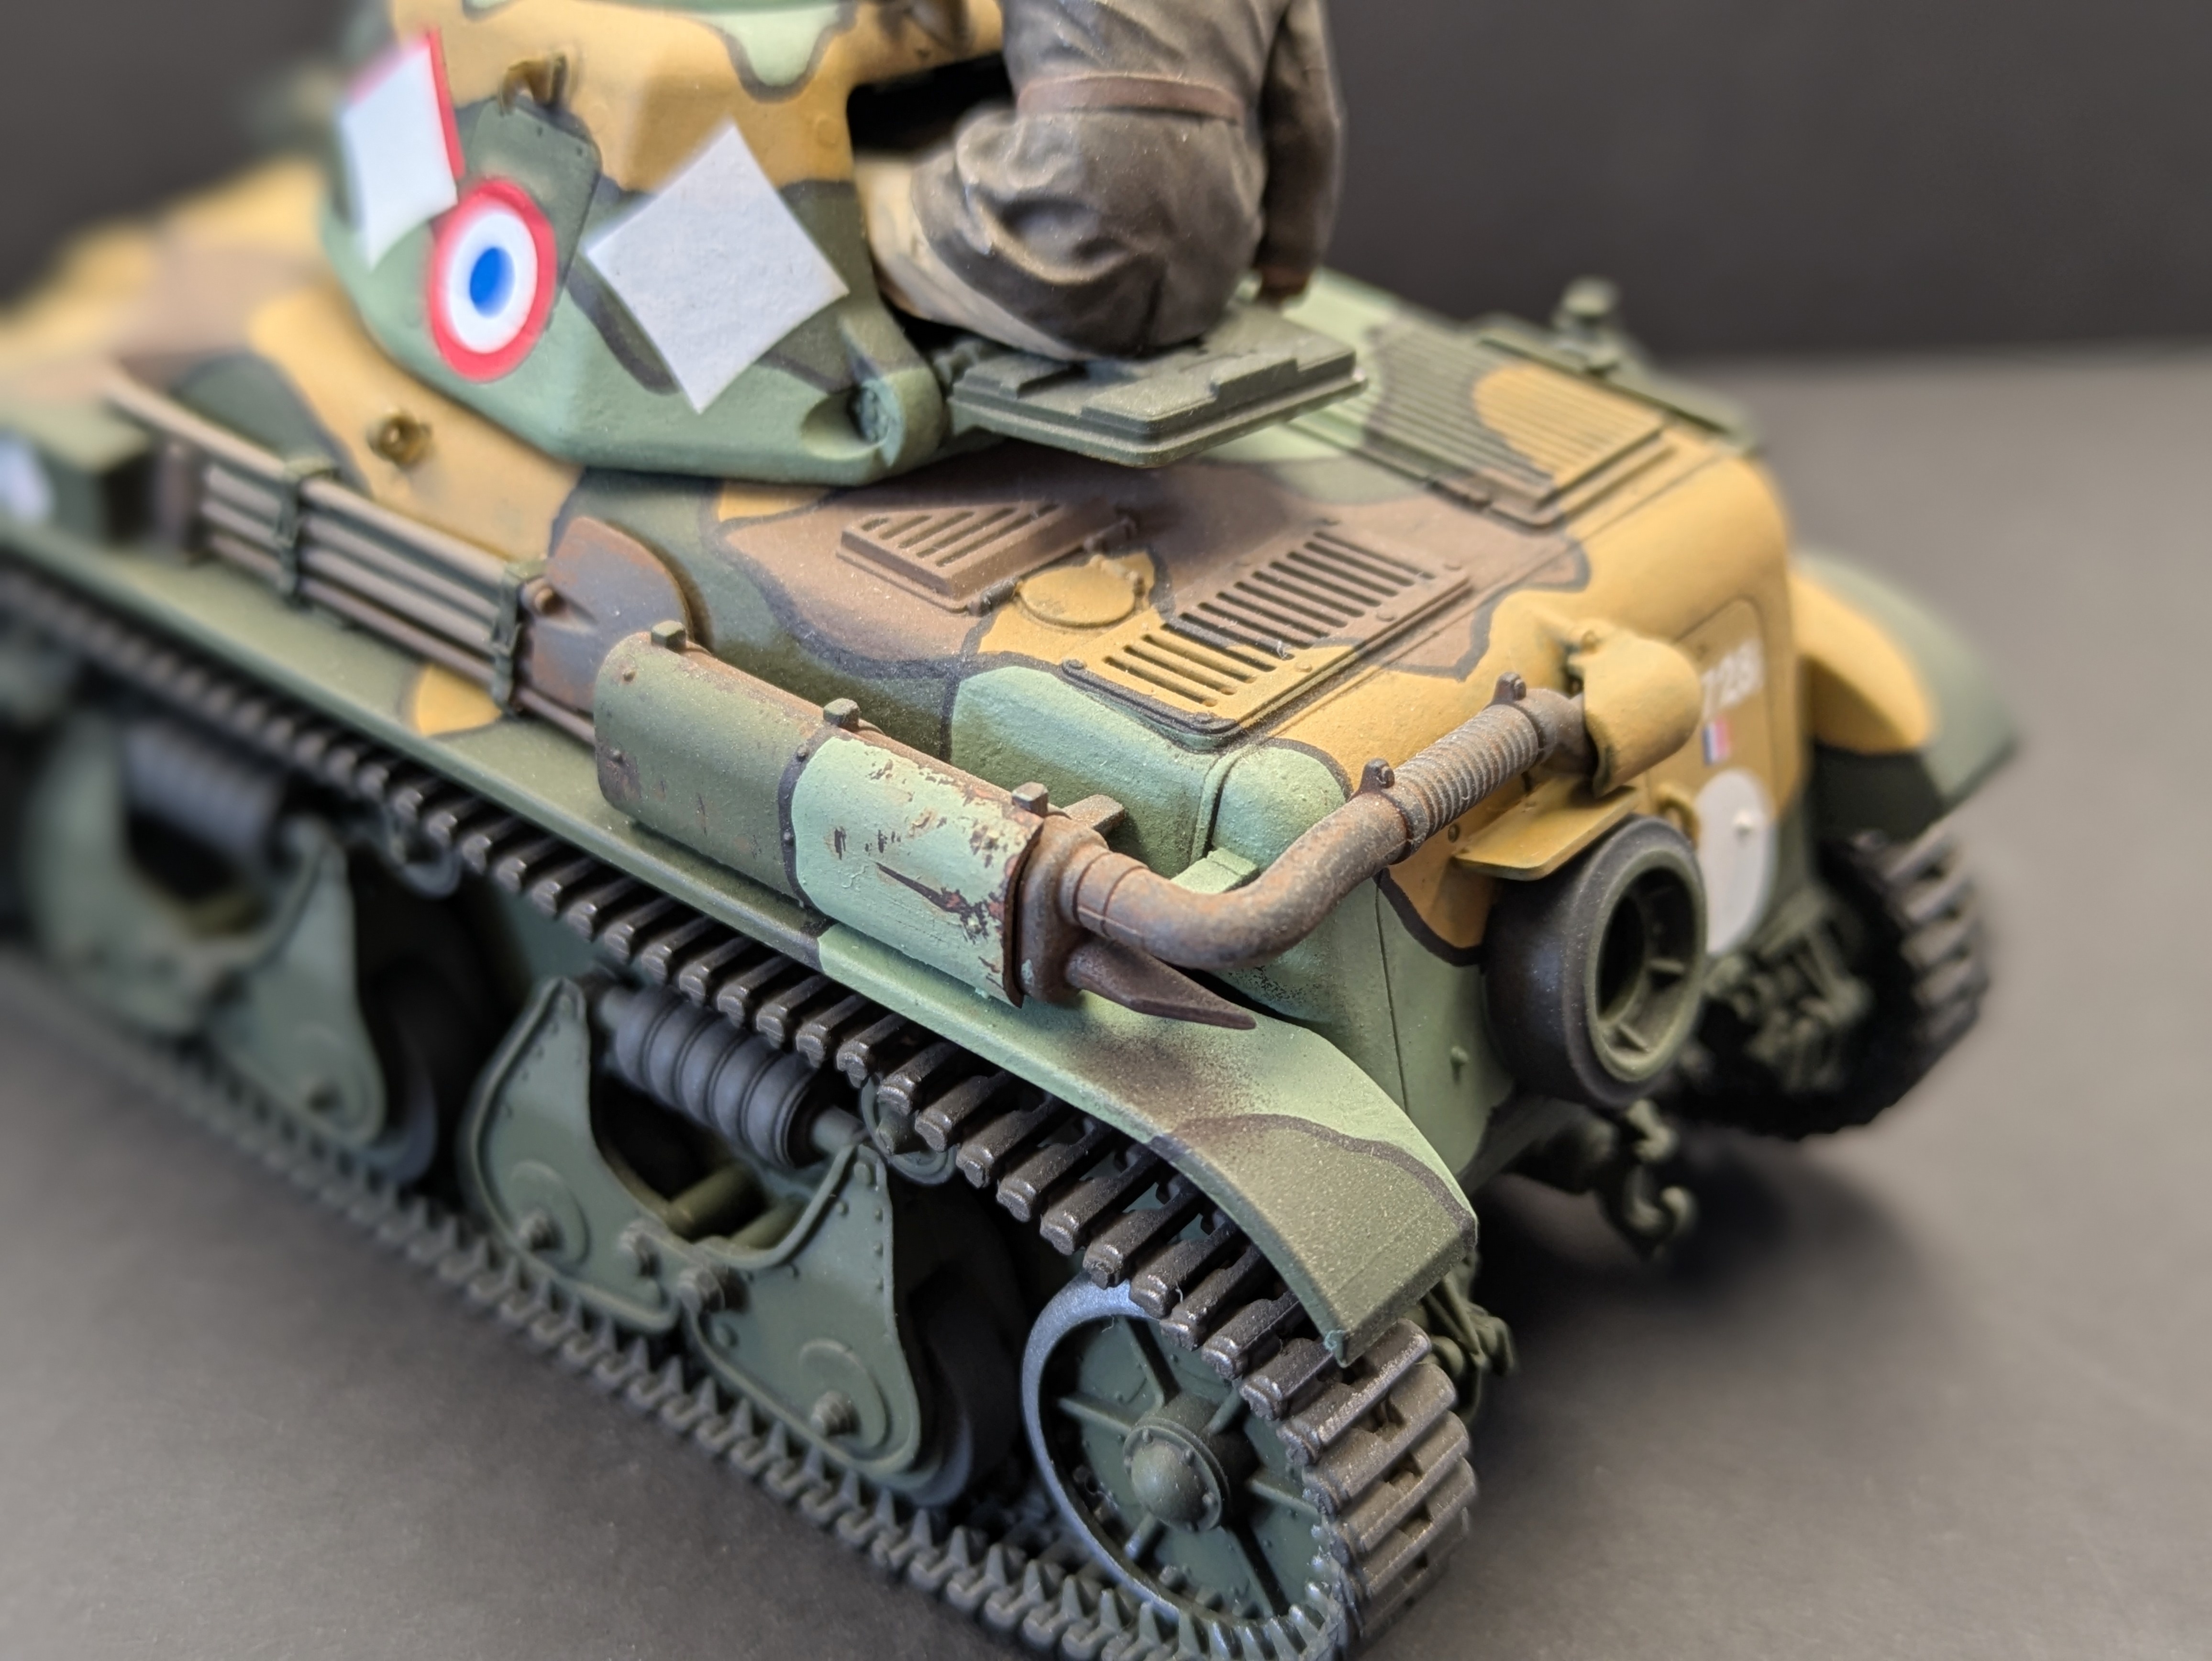
Exhaust and rear detail close-up.
Detail Wash
Selected detail areas washed with a dark enamel wash to pick out recesses and add depth.
Flat Coat
A flat coat is applied over everything to seal the weathering and unify the finish. Testors Dull Coat is no longer imported into Canada - Vallejo Matt Varnish Spray is the recommended alternative. For any lacquer thinning needs, Tamiya lacquer thinner is also no longer importable - Mr. Hobby T104 Lacquer Thinner or T108 Leveling Thinner are the direct substitutes.
Mr. Hobby T104 Lacquer Thinner / T108 Leveling Thinner
Tracks, Metallics & Final Assembly
Tracks are painted with Burnt Umber as the base coat, then highlighted with metallic pigment applied directly with a fingertip - pick up some pigment and rub it onto the track's exposed surfaces. The best tool for this job is a finger. AK Gunmetal is used for the exposed metal on the idler wheel and drive sprocket. Final assembly joins all the separately painted components into a completed vehicle.
Commander Figure
The commander figure is painted entirely with AK 3rd Gen acrylics. All the same paints, all the same formula - a good demonstration that this range handles both brush and airbrush work equally well.
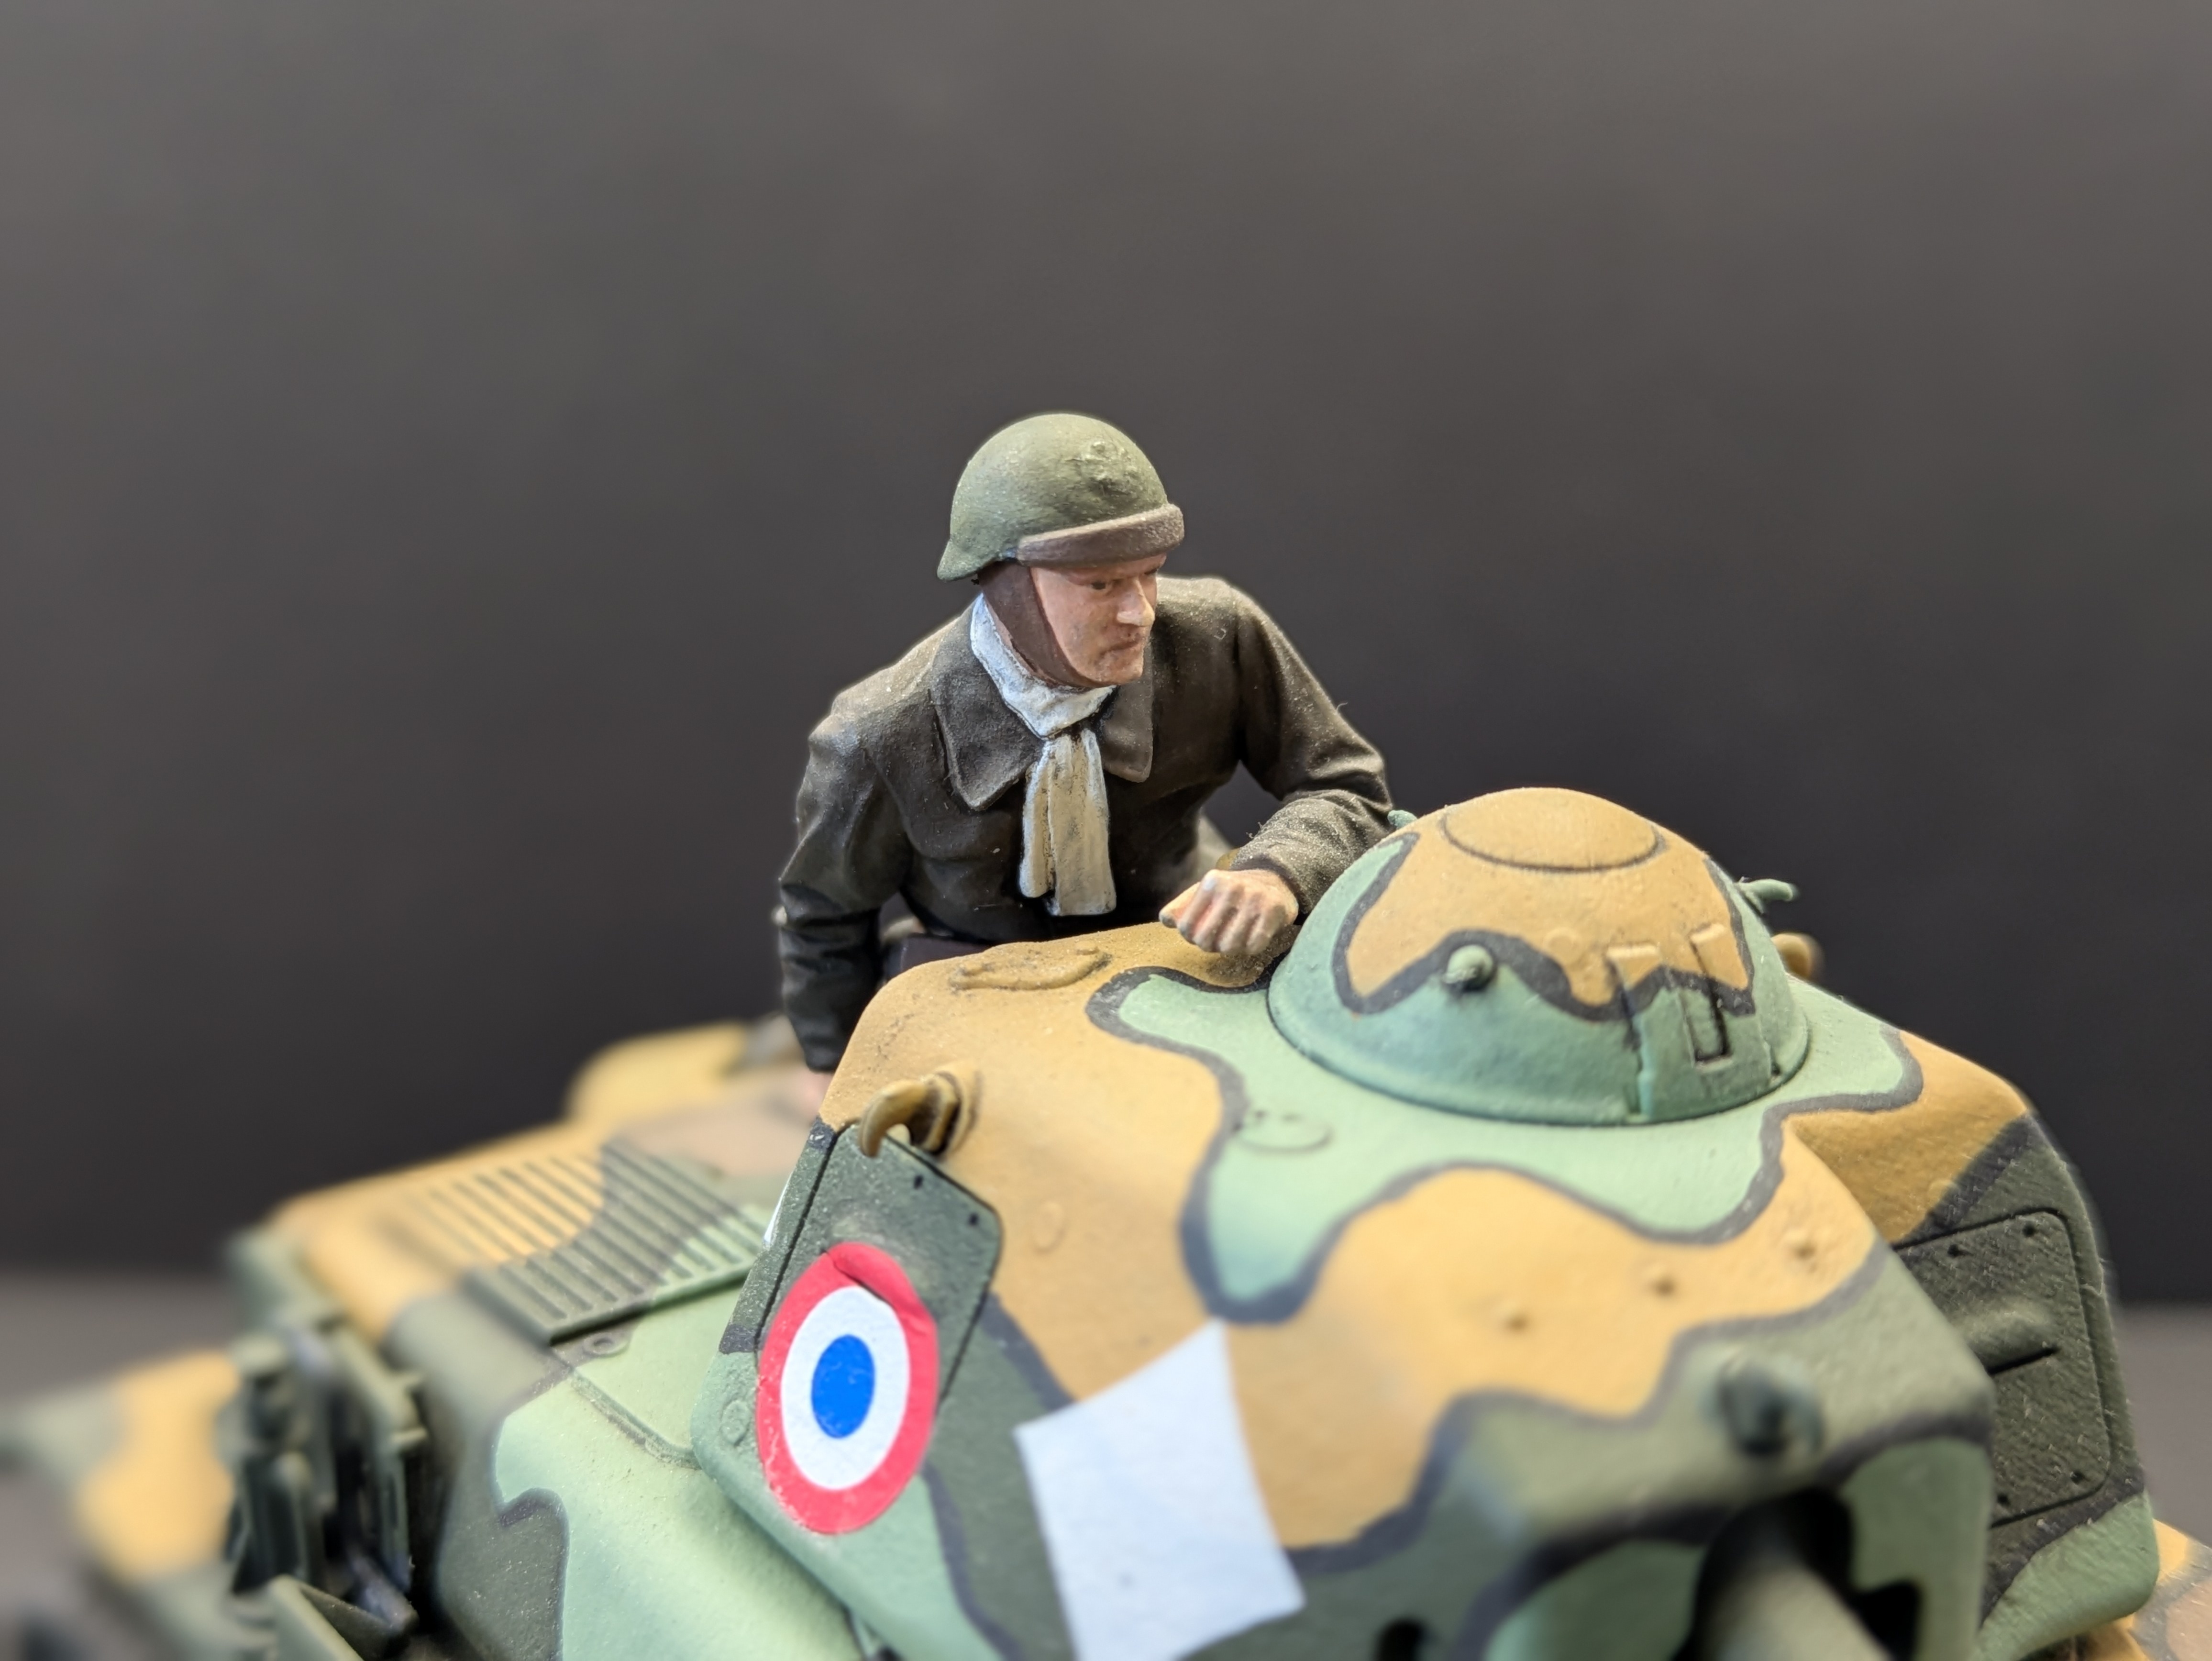
Commander face close-up - Cork base, Luminous Flesh highlight.
The Finished Build
Tamiya Renault R35. 23rd Combat Tank Battalion, June 1940. Fini.
Side profile and tracks
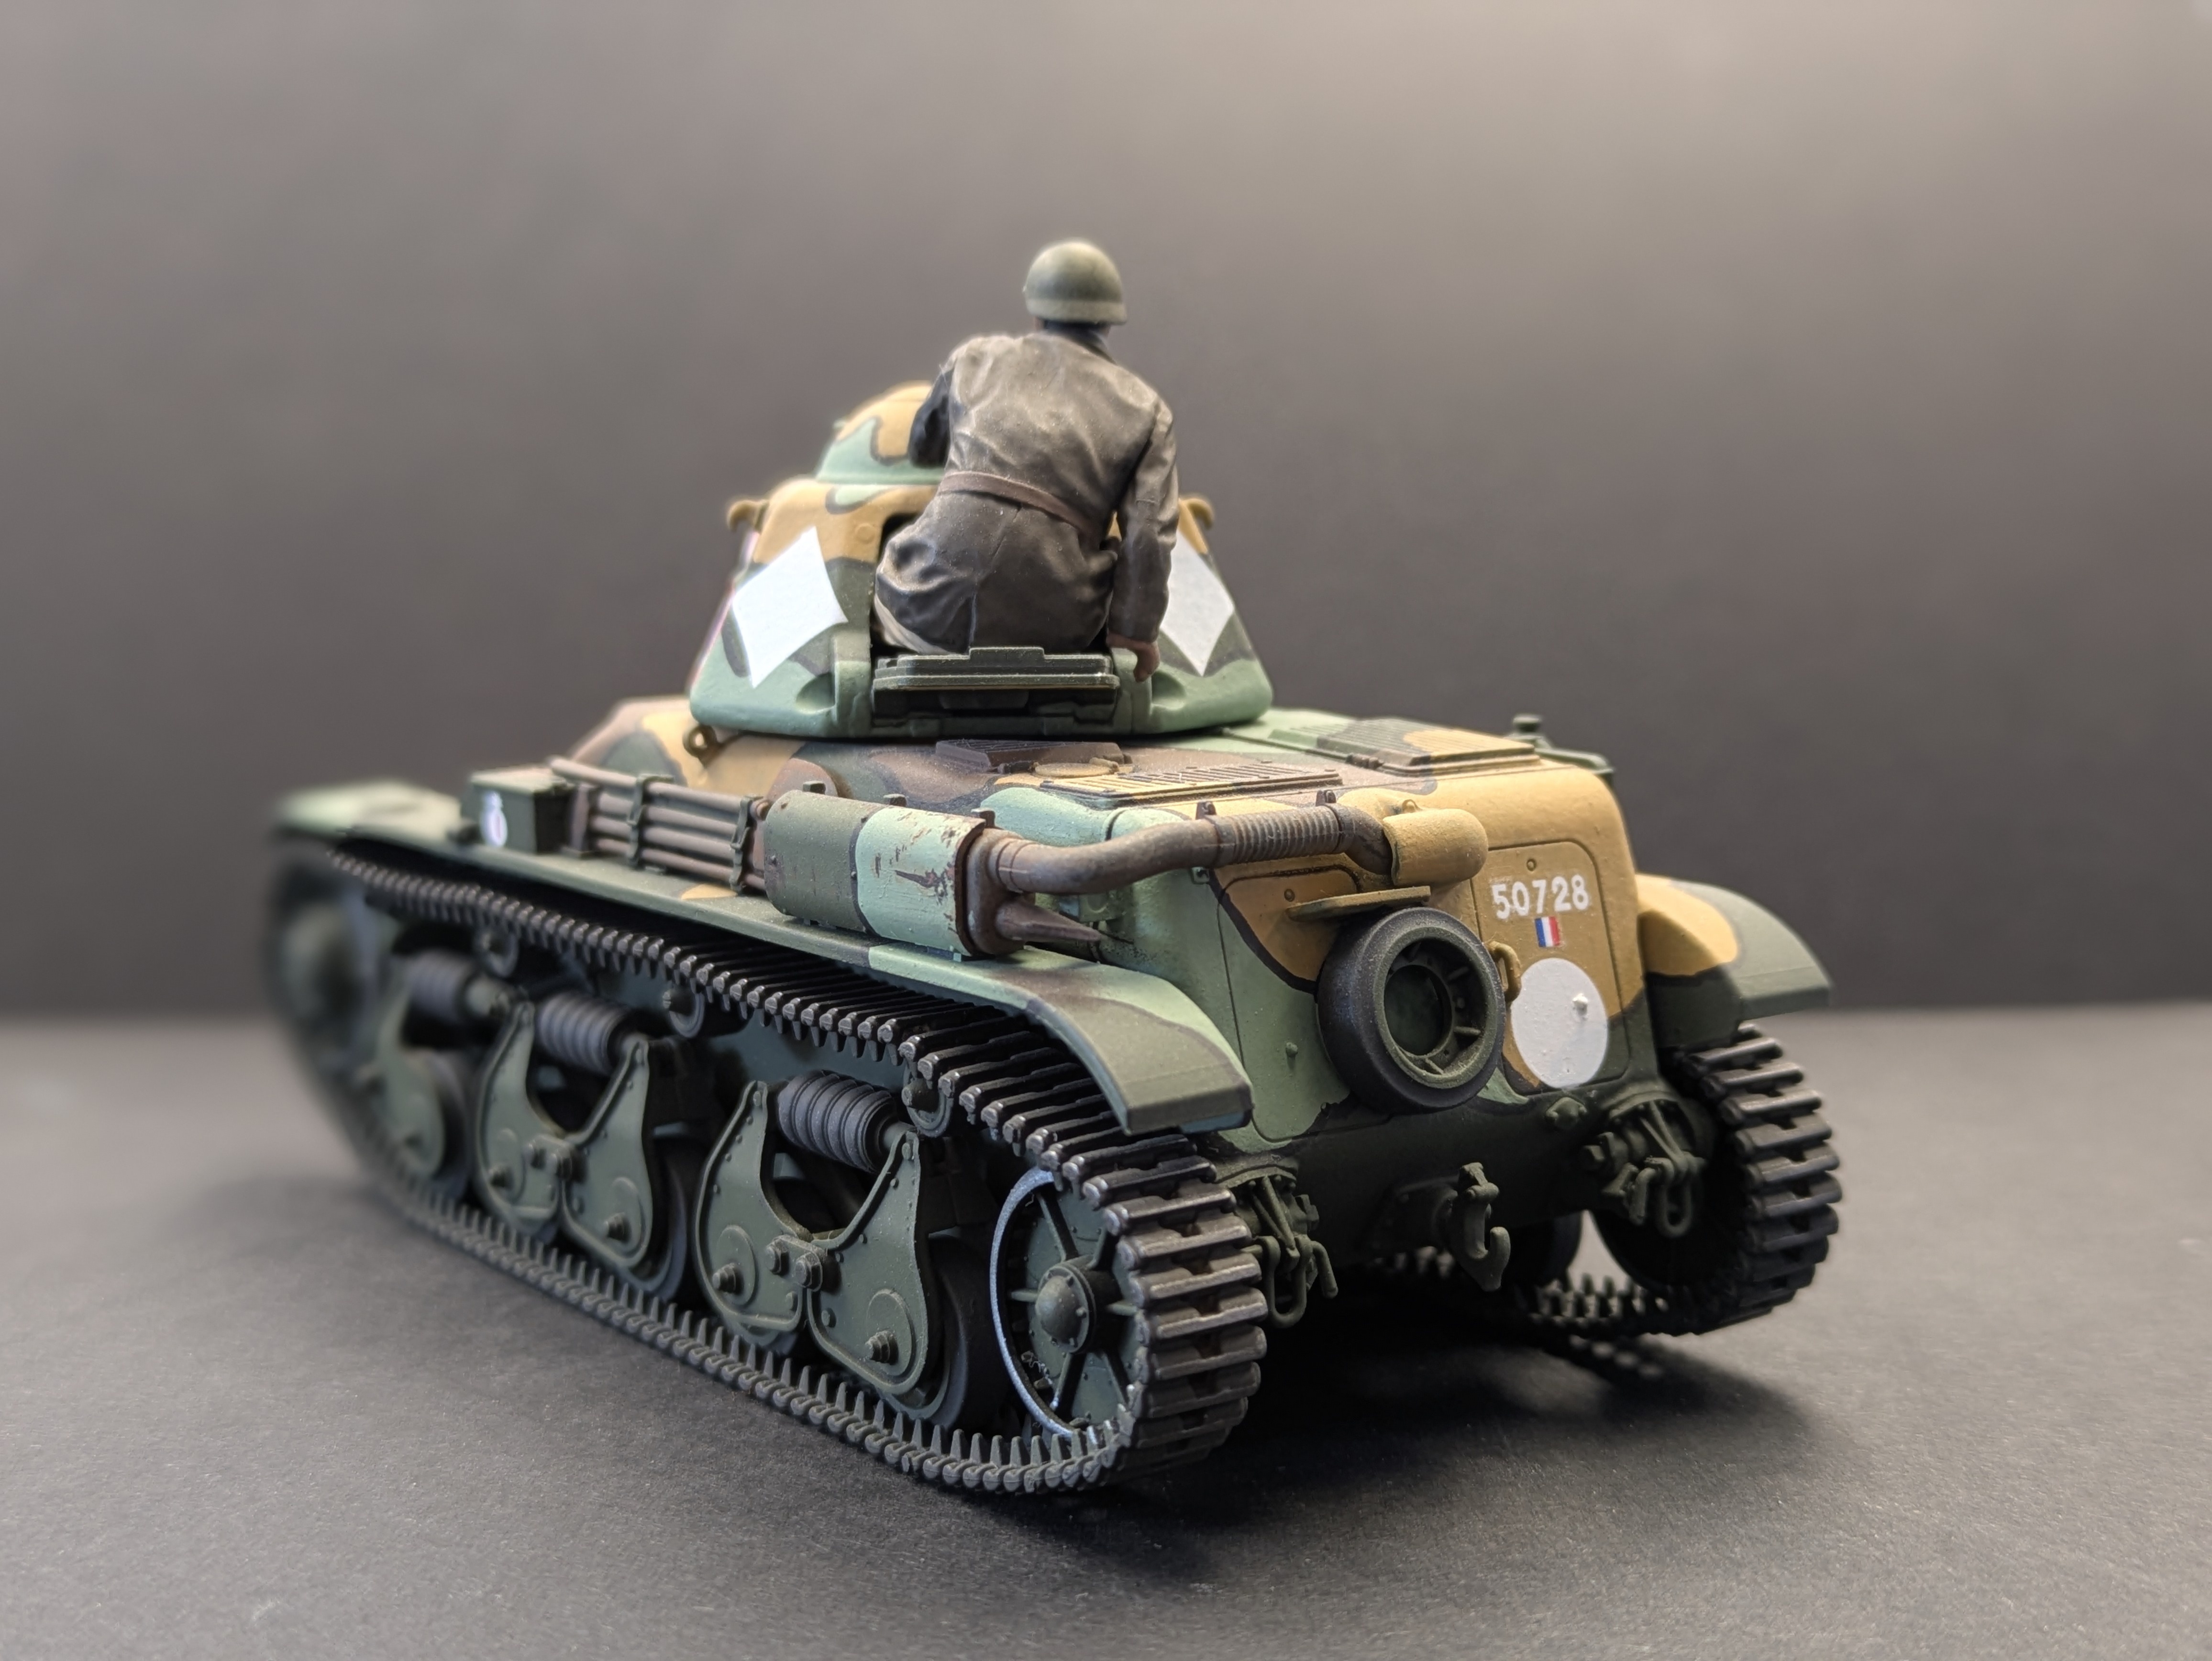
Rear three-quarter
Three-quarter side left
Looking down the barrel
The Verdict on AK Interactive 3rd Gen Acrylics
They've hit it out of the park. The 3rd Gen acrylics airbrush very well and brush paint very well - a rare combination. Very few paints work well with both methods of application. They dry to a beautiful matte finish and even without weathering or clear coats, you would be hard-pressed to tell the difference between an airbrushed area and a brush painted area.
Tip dry - the bane of water-based acrylics in the airbrush - is almost non-existent with this paint. Load it on Sunday, spray all week.
The Tamiya Renault R35 is a great kit. No surprises there - it says Tamiya on the box.
AK Interactive 3rd Gen Acrylics and all paints and supplies from this build are in stock at Wheels & Wings Hobbies in Toronto, available online with Canada-wide shipping.
Shop AK Interactive →Recent Posts
-

John's Trench Crusade Sniper Priests Paint Guide - Build Feature
Wheels and Wings Hobbies - Miniature Paint Guide John's Trench Crusade Sniper Priests Trench Crusade …Jul 23, 2026 -

Kyle's World Eater Paint Guide - Chaos Legionnaire Build Feature
Wheels and Wings Hobbies - Miniature Paint Guide Kyle's World Eater - Sons of Angron Warhammer 40,00 …Jul 22, 2026 -

Decal Solutions Explained: Setter vs Softer vs Adhesive
Wheels & Wings Hobbies · Counter Notes Setter, Softener, or Adhesive? Choosing the Right Decal Solu …Jul 21, 2026